
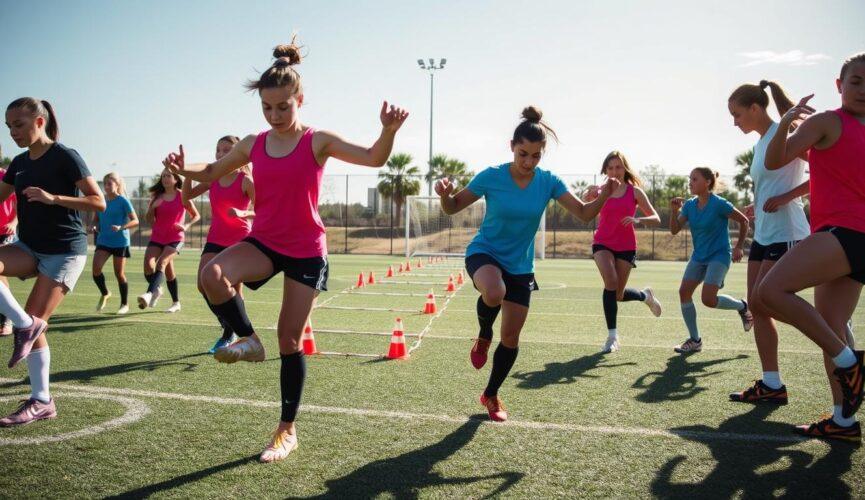
If you play, coach, or love someone on the pitch, you’ve probably heard the scary number. Female athletes face a risk of serious knee ligament issues that is two to ten times higher than their male counterparts.
But here’s the key: this isn’t just bad luck. It’s a complex puzzle. Our unique movement patterns, hormonal cycles, and muscle firing all matter. The modern game’s intensity adds another layer.
We also can’t ignore the mental game. The fear of a “pop” or the long road back from rehab is real and taxing.
The good news? This isn’t a fate you have to accept. Research shows that with consistent, smart training, you can slash that risk by more than half. This means less chance of future problems like osteoarthritis and more seasons doing what you love.
Think of this as your starting line. We’re here to break down the “why” and build your personalized, year-round ACL prevention strategy together. Let’s build a stronger, more confident you.
Biomechanics 101: knee valgus, trunk control, foot strike; how poor decel and plant angles create risk
Imagine landing from a jump; if your knee buckles inward, you’ve just witnessed the primary mechanical flaw we must fix. To build a safer, more powerful athlete, we need to understand three key players: knee valgus, trunk control, and foot strike. Think of this as your body’s movement blueprint—it shows us exactly what to correct.
Let’s start with knee valgus. This is the technical term for your knee “caving in” toward your other leg during a cut, pivot, or landing. Your ACL acts as a key stabilizer. When the knee collapses inward, it puts a lot of stress on that ligament. Injuries often happen when the knee is nearly straight during deceleration, making it a vulnerable hinge.
Next is trunk control, or what experts call “trunk dominance.” This occurs when your shoulders and upper body lean sharply toward your plant foot. Instead of your powerful hips and glutes absorbing the force, your upper body weight adds extra load to that single knee. The vital cue here is to “sink into the hips” and avoid being “too tall” or upright.
Your foot strike and the angle of your leg when you plant are the final pieces. If your foot lands far from your body’s center of mass, or if your shin is at a steep angle, it forces your knee into a dangerous position. Good landing mechanics require a soft, balanced foot contact that allows for proper knee alignment.
So how do these flaws combine to create risk? A stiff, upright landing with a wobbly trunk and a collapsed knee turns your joint into a shock absorber it was never meant to be. The poor deceleration angles overload the ACL from multiple directions at once.
Mastering valgus control is about retraining these patterns. It’s not just about strong muscles; it’s about teaching them to fire in the right sequence during dynamic movements. This foundational understanding is your first and most critical step toward injury-proofing your game.
Now that you can spot the problem, the exciting part begins: learning the fixes. In the next section, we’ll dive into simple screens and coaching cues to improve your landing mechanics and build that essential control.
Screening and teachable fixes: drop jump, single‑leg squat, T‑test—coaching cues and video feedback tips
Imagine using a phone to spot and fix risky movements. You don’t need a lab to find signs of an ACL tear. All you need are simple tests and the right words to correct them.
This is where ACL prevention starts. It’s not just about doing exercises. It’s about understanding why athletes move a certain way and teaching them to change.

Let’s look at three key screenings. They’re like a movement interview. They ask the body questions, and the answers show if an athlete controls their valgus well.
The Drop Jump: Have an athlete step off a low box, land, and jump straight up. Watch how they land. If their knee caves inward, that’s knee valgus. Tell them, “Check your shin angle.” Encourage them to keep their shin vertical over their foot when landing. This helps stabilize the knee.
The Single-Leg Squat: This test shows control under load. Ask an athlete to stand on one leg and squat down slowly. Watch from the front. If their standing knee caves inward or their trunk leans, give them a cue. Tell them, “Sit back into your hip,” to engage their glutes. Or, “Stack your shoulders over your ankle,” to improve trunk control. These moments teach strong movement patterns.
The Modified T-Test: This screening checks control during changes in direction. Set up four cones in a T shape. The athlete sprints forward, shuffles side-to-side, and backpedals. Watch their plant foot during the shuffles. If the ankle rolls or the knee is unstable, it’s like a risky cut in a game. It’s a key part of assessments like the Cutting Movement Assessment Score (CMAS).
Video feedback is magic. Film these screenings on your phone. Show the athlete the clip side-by-side with a corrected version, or point out the moment their knee caves. Seeing the problem makes the feeling of the correction click instantly. It turns a complex concept into a simple visual lesson.
Your role as a coach is critical in ACL prevention. You’re not just a drill sergeant. You’re a movement teacher. Correction is key. By using these screenings and clear cues, you turn observation into action. You give your athletes the power of valgus control and the confidence to move safely.
Proven exercises: Nordics, Copenhagens, RDLs, hip abductor/extensor work, calf/soleus strength, decel and cut
Welcome to your exercise playbook! Here, we turn biomechanical knowledge into real strength. These movements are your tools for a strong knee.
We start with basic exercises and move to advanced ones. We connect gym strength to field safety. Let’s build your knee’s strength safely.
Your hamstrings are key for stopping. A Nordic hamstring curl trains the strength to stop your shin from sliding forward. This is important for ACL safety.
To start, kneel on a pad with a partner holding your ankles. Slowly lower your chest toward the floor, resisting gravity. Even a few inches is a win! Try to lower farther each week.
Groin and Hip Guardian: Copenhagen Planks
This Copenhagen adduction exercise strengthens your inner thigh and hip. It prevents your knee from caving inward during side-to-side movements. This is a common cutting error.
To start, lie on your side with your bottom knee bent and your top leg straight. Lift your hips into a side plank, pushing your top leg down into the bench. Hold for time. It’s tougher than it looks!
Posterior Chain Power: RDLs and Deadlifts
Your glutes and hamstrings work together. Romanian Deadlifts (RDLs) teach this hinge pattern. Focus on feeling a stretch in your hamstrings as you push your hips back.
Progress to single-leg RDLs for more stability. For advanced strength, aim for a conventional deadlift with a target of 1.25 times your body weight. This builds raw power that protects your knees during landing and jumping.
Building Hip Armor: Abductor and Extensor Work
Your hip abductors (outer glutes) protect your knee. Weakness here leads to valgus collapse. Start simple:
- Clam Shells: Lie on your side, knees bent. Keep your feet together and lift your top knee like a clamshell opening.
- Banded Side Steps: Place a resistance band around your thighs and take slow, controlled steps sideways.
- Hip Extensions: On all fours, lift one leg straight back, squeezing your glute at the top.
Progress these to banded hops and weighted exercises to mimic soccer forces.
Don’t Forget the Foundation: Calf and Soleus
Your calf muscles control ankle stiffness. Strong calves help absorb impact better. Include calf raises with both a straight knee (gastrocnemius) and a bent knee (soleus) in your routine.
From the Gym to the Gridiron: Deceleration and Cutting Drills
Strength is useless if you can’t use it on the field. This is where application is key. Integrate drills that force you to use your new strength:
- Deceleration Landings: Jump from a low box and focus on landing softly, absorbing the force through your hips and hamstrings.
- Angle of Attack Cuts: Practice changing direction while consciously “checking your shin angle”—keeping your knee aligned over your toes.
Start these drills at slow speeds, focusing on perfect form. Speed comes later, after the movement pattern is automatic.
Here’s a quick reference for your strength targets and starter moves:
| Muscle Group | Key Exercise | Starter Variation | Advanced Target |
|---|---|---|---|
| Hamstrings | Nordic Hamstring Curl | Partner-Assisted Lowering | Full Range Curl |
| Adductors/Hips | Copenhagen Plank | Short Hold (15-30 sec) | Long Hold (45+ sec) |
| Posterior Chain | Deadlift | Bodyweight RDL | 1.25 x Body Weight |
| Hip Abductors | Banded Exercise | Clam Shells | Banded Lateral Hops |
| Quads/Glutes | Squat | Bodyweight Squat | 0.75 x Body Weight |
Remember, consistency beats intensity every time. Master the movement before you add load or speed. Your knees will thank you for every rep!
Practice integrations: 12‑minute ACL block, pre-session micro plyos, “check your shin angle” cueing language
The best ACL prevention isn’t just a clinic. It’s a habit in every warm-up. Let’s make your team’s routine a strong shield against injury. We’ll make safety a part of practice.
Forget the “dinky 10-minute warm-ups” that research warns against. A true prevention program needs dedicated, coached time. It’s about quality movement, not just checking a box.
Your secret weapon is a consistent 12-minute “ACL Prevention Block.” This isn’t extra work. It’s a smarter way to use the time you already have.
Blueprint of the 12-Minute Block
Think of this block in three parts. Each part has a clear job to prepare the body and mind for safe play.
- Minutes 1-4: Dynamic Activation. Light jogging, leg swings, and movement prep. The goal is to wake up the muscles and joints.
- Minutes 5-9: Core Strength & Plyometrics. Here’s where we build power safely. We integrate decel training principles and progressive plyometrics. Start with low-intensity jumps and build up.
- Minutes 10-12: Sport-Specific Drills. Practice cutting and landing with the new techniques you just learned. Use smart cues here!
Before this block even starts, try pre-session micro plyos. These are 2-3 minutes of very low-level jumps. They prime the nervous system for safe landings without causing fatigue. Think of it as turning on the body’s “safety software” before practice loads.

Your words as a coach are powerful tools. Specific, positive language can change a player’s movement in an instant.
Instead of “Don’t let your knee cave in,” try a proactive cue like “Check your shin angle.” This simple phrase directs attention to the lower leg. It encourages the player to align their shin over their foot during a cut or landing.
Other great cues include:
“Land like a feather, not a brick.”
“Push the ground away with your whole foot.”
“Brace your core before you cut.”
Use video feedback during these blocks. A quick phone video can show a player what “good” feels like. This makes the learning stick!
Structuring Your Plyometric Progressions
Not all jumps are created equal. A safe progression is key to effective plyometrics and decel training. Start low, master the form, then gradually increase the demand.
| Tier | Example Exercises | Coaching Focus | Sample Volume |
|---|---|---|---|
| Low Intensity | Two-foot hops in place, mini squat jumps, lateral skips | Soft landing, knee over toe, quiet feet | 2 sets x 10 reps |
| Medium Intensity | Single-leg hops (forward/back), broad jumps, 180° turns | Stable hip control, balanced stance, controlled deceleration | 2 sets x 6 reps per leg |
| High Intensity | Depth jumps (from low box), single-leg bounds, resisted cuts | Maximal force absorption, rapid directional change, perfect shin angle | 3 sets x 4 reps with full rest |
Move up a tier only when the current tier looks easy and controlled. Rushing leads to bad habits and higher risk.
This integrated approach turns theory into muscle memory. When your players hear “check your shin angle” during a scrimmage, they’ll auto-correct. That’s the moment prevention becomes a true habit.
Consistency is your greatest ally. A dedicated 12-minute block, three times a week, builds more resilience than a one-off workshop. You’re not just warming up; you’re building a team of confident, durable athletes.
In‑season vs off‑season plan: progression calendar, deload weeks, travel tournament adaptations
Think of your ACL prevention plan like a road map for the entire year. You need different routes for the off-season highway and the in-season backroads. Throwing random exercises into your schedule when you have time isn’t a plan—it’s a recipe for inconsistency and, sadly, injury.
A year-round sport demands a year-round strategy. The goal is to build an athlete who is resilient under pressure, not just fit for a week. This is where periodization comes in. It’s a fancy word for a simple idea: systematically changing your training focus to match your body’s needs and the demands of the calendar.
Let’s break down the two main phases and what your focus should be in each.
The Off-Season: Your Building Phase
This is your foundation time. With games off the schedule, your priority is to build raw strength, muscle capacity, and work on any technique flaws. Think of it as construction season.
- Focus on Max Strength: Heavy(ish) lifts like squats, Romanian deadlifts (RDLs), and hip thrusts.
- Correct Imbalances: Dedicate time to single-leg stability, hip abductor strength, and calf/soleus work.
- Learn New Skills: Introduce complex deceleration and cutting drills at slower speeds to engrain proper mechanics.
The In-Season: Your Maintenance & Sharpness Phase
When games start, your goal shifts. You’re no longer trying to break down muscle fibers to build them back bigger. Now, you’re maintaining the strength you’ve built and keeping your nervous system razor-sharp for game speed.
- Maintain Strength: Reduce lifting volume but keep the intensity high. One or two solid strength sessions per week is plenty.
- Priority on Plyos and Reactivity: Use short, potent blocks (like the 12-minute ACL block) for fast, nervous system-driven drills.
- Emphasize Recovery: This phase is about staying fresh. More focus on sleep, nutrition, and soft tissue work.
Here’s a quick look at how the focus shifts:
| Training Element | Off-Season Focus | In-Season Focus |
|---|---|---|
| Strength Work | Build maximum capacity (higher volume) | Maintain strength (lower volume, higher intensity) |
| Plyometrics & Agility | Learn technique, moderate volume | High intensity, low volume, game-speed reactivity |
| Primary Goal | Construct a robust athletic foundation | Peak performance and injury resilience for games |
The Non-Negotiable: Deload Weeks
This is where many plans fail. Your body gets stronger during rest, not during the workout. A deload week is a planned, lighter week of training every 4-6 weeks.
It allows your tissues, tendons, and nervous system to fully adapt to the stress you’ve applied. Skipping these is a direct ticket to overuse injuries and performance plateaus. Think of it as a mandatory pit stop on your yearly road map.
Adapting for Travel and Tournaments
Tournament weekends are chaotic. Your plan must be flexible. The key is consistency, not perfection.
- Pack Your “Micro-Gym”: Bring resistance bands. A 10-minute band session for glutes and hips in your hotel room is a game-changer.
- Pre-Game Activation: Replace your usual warm-up with a condensed, 5-minute version focusing on hip circles, leg swings, and mini-band walks.
- Post-Game Recovery: Prioritize hydration and a simple protein-rich snack immediately after the last game. Even 5 minutes of gentle stretching can aid recovery.
- Manage Load Spikes: If you’ve had a light week and then jump into 3 games in a day, that’s a massive spike. Be extra diligent with your cool-down and consider a very light “movement” day the following day instead of complete rest.
Remember, the best ACL prevention plan is the one you can stick to through all the seasons. By periodizing your year, respecting deloads, and having smart travel strategies, you build the consistent, resilient athlete that can handle anything the game throws your way.
Footwear/field notes: studs vs turf, surface moisture, friction risks
Strength and technique are key, but so are your shoes and the field. Every move you make on the field is influenced by these. So, your footwear and the field’s condition are critical for safety.
Let’s look at the choices you make every time you step onto the field.
Choosing Your Shoes: Studs vs. Turf Shoes
Choosing the right shoe is more than a fashion choice. It’s about getting the right grip for the surface. Too much grip can hurt your knee, while too little can cause slips.
Firm Ground (FG) Cleats (Studs): These are for natural grass fields. They give you the traction you need for quick moves. But, they’re not good on artificial turf or very dry ground.
Turf Shoes: These have short, rubber nubs for synthetic turf. They offer good grip without digging into the turf. Using cleats on turf can increase your risk of injury.
| Surface Type | Recommended Footwear | Key Risk if Mismatched |
|---|---|---|
| Natural Grass (Moist) | Firm Ground (FG) Cleats | Low risk with proper studs |
| Natural Grass (Hard & Dry) | Turf Shoes or AG Cleats | Excessive foot fixation with FG cleats |
| Artificial Turf (Newer) | Turf Shoes or Artificial Grass (AG) Cleats | High rotational friction with FG cleats |
| Artificial Turf (Worn/Wet) | Turf Shoes | Unexpected slips and loss of control |
Surface Moisture: The Friction Game-Changer
Weather changes everything. A wet field can make you slip, even if it seems safer. A dry field can make your foot stick, leading to knee injuries.
Always test the field’s grip during warm-up. This helps you avoid surprises during the game.
External Support: Brace vs. Tape
Many players consider using a knee brace or kinesiology tape for support. What does the science say?
Functional braces are mainly for athletes coming back from injuries. They offer support and confidence. But, they don’t strongly prevent first-time ACL injuries.
Kinesiology tape works differently. It helps your brain know where your joints are. This can improve muscle control and movement.
In the brace vs tape debate, tape might have a slight edge. But, neither is a magic solution. They’re tools to help, not replace, good technique and strong muscles.
Your best strategy is to control what you can. Choose the right shoes, understand the field, and build your body’s resilience. This approach keeps you safe and lets you play your best, season after season.
Post‑injury confidence: return metrics and psychological readiness; success stories from women players as motivation
Objective metrics show you’re ready, but your mind must catch up. You’ve passed strength tests and your doctor says you’re good to go. Yet, stepping back onto the field can feel daunting. This section aims to help you bridge that gap.
Following your healthcare professional’s advice is essential. They base clearance on solid data. Key return metrics include:
- Strength Symmetry: Your injured leg should have at least 90% of the strength of your healthy leg.
- Hop Tests: These measure power, stability, and trust in single-leg landing mechanics. Can you hop for distance and stick the landing without wobbling?
- Movement Quality: Coaches and therapists watch your deceleration and cutting form in sport-specific drills.
These numbers are your foundation. But the final hurdle is often psychological readiness. That moment of hesitation before a sharp cut, or the fear of planting your leg hard—that’s what we need to address.
Confidence isn’t just healed; it’s rebuilt through action. Many women athletes who’ve successfully returned talk about this. Their stories highlight a powerful truth: the same prevention principles that protect your knees are the keys to reclaiming your game. Mastering controlled landing mechanics and trusting the strength you’ve built becomes your new superpower.
Think of confidence as a muscle. You strengthen it with repetition. The Nordic hamstring curls, Copenhagen planks, and deceleration drills you learned for prevention? They’re now your tools for empowerment. Every clean rep where you control your descent builds neural trust. It tells your brain, “We can handle this force safely.”
Celebrate the small wins. The first time you complete a plyometric circuit without overthinking your landing mechanics. The practice where you stop guarding that knee. This is how you move from being cleared to play to being ready to compete. You’re not just getting your knee back. You’re reclaiming your identity as an athlete, armed with more knowledge and resilience than ever before.
Team rollout toolkit: captains as ambassadors, station cards, accountability charts
To keep ACL prevention going for your whole team, you need more than just knowledge. You need a system that makes it fun and holds everyone accountable. A simple list of exercises isn’t enough. You must create a culture where caring for your body is key to soccer success.
Your team rollout toolkit is the answer. It gives you the structure, teaching tools, and motivation to turn drills into a team effort. Let’s look at the three main tools to help you coach this program well.
Your team leaders are your secret weapon for getting everyone on board. Instead of the coaches telling everyone what to do, let your captains lead. Choose players who are respected, consistent, and love training.
They become your prevention ambassadors. They show off exercises, give tips on form, and motivate the team during ACL prevention sessions. This peer leadership makes the program feel like a team effort, not just something the coaches are pushing.
2. Simple, Visual Station Cards
Clear instructions mean less confusion. For your strength and plyometric circuits, make simple station cards. These visual guides are placed at each exercise spot in your training area.
A good station card has three things: the exercise name, a simple graphic or photo, and a key coaching cue. For example, a “Drop Jump” station card might say “Knees over toes, soft landing.”
This lets players move through circuits on their own. You, the coach, can focus on observing and giving feedback instead of repeating instructions.
3. Fun, Visual Accountability Charts
What gets measured gets done. But tracking should be fun, not a chore. Create a big, colorful chart in the team room. Use it to mark off when everyone completes a prevention session.
Get creative! Use stickers, markers, or magnets. Celebrate when the team reaches milestones, like “10 Sessions in a Row!” This visual scoreboard turns hard work into a shared victory. It shows progress and builds pride in the team’s commitment.
| Tool | Primary Purpose | Key Features |
|---|---|---|
| Captain Ambassadors | Build peer-led buy-in and leadership | Peer demonstrations, form reminders, team motivation |
| Station Cards | Provide clear, independent exercise instructions | Exercise name, visual cue, key coaching point |
| Accountability Chart | Track progress & celebrate team consistency | Visual, fun, celebrates streaks, posted publicly |
When you use these three tools together, you’re not just doing drills. You’re building a prevention-positive culture. Mastering plyometrics form becomes a team standard. Showing up for strength work becomes a shared value.
This culture does more than protect knees. It builds unshakeable team confidence and unity. Learn more about building unshakable team confidence in our guide to building unshakable team confidence. Start with your toolkit this season, and watch your team’s commitment to health and performance grow.
Common mistakes, FAQs, and printable 8‑week template
Let’s get you started on the right path. Many jump into advanced plyometrics without mastering basic landing skills. Another mistake is ignoring decel training, which is key for safe cutting and pivoting.
People often ask about support gear, like brace vs tape. For most, neither replaces strong muscles. Tape gives feedback, while braces help after injuries. Always talk to a sports medicine expert.
We’ve made a helpful resource for you. Download our 8-week template. It mixes strength exercises, like Nordics and RDLs, with plyometrics and deceleration drills. The plan is easy to follow, tracks your progress, and lets you take notes.
This template is your guide. It helps you build a strong base around your knees. Stick to the basics, follow the plan, and play with confidence for years.