Let’s be honest. That inspirational poster on the gym wall is lying to you.
Making the team isn’t about heart. It’s a tough, numbers-driven check of your physical skills. Think of it more like a harsh business deal. Your speed, stamina, and strength are being carefully evaluated.
The data doesn’t lie. Your coach’s preseason packet is not just a suggestion. It’s a detailed plan. You’ll do lots of “Gassers” until your lungs are exhausted. You need a 2-mile run time that’s fast for a casual jogger. You must also pass the 300 test sprints.
These tasks are not optional. They’re the minimum you need to get on the first team. This soccer fitness training program is all about getting you ready for the high school season.
Your offseason wasn’t a break. It was a secret, hard work period to earn your spot on the team. This article will help you understand what you need for tryout preparation. We want to make sure you’re not left out.
Sport-Specific Training Programs
Soccer is a 90-minute game of quick moves and strategy. Your first touch is as important as your endurance. Generic conditioning programs don’t work because they miss the key skills needed for the game.
The top programs, like the Champlin Park 9-week summer plan, focus on the game’s demands. They prepare athletes for the fast-paced action of a real match.
There are six essential parts to these programs. They are: Proper Warm-up, Agility, Speed and Explosion, Multi-Joint Ground Based Movements, Core Strength, and Mobility & Recovery. These aren’t just about getting fit. They’re about mastering the skills needed to stop, cut, and speed up quickly.
The plan’s structure is key. It’s divided into phases to build, intensify, and peak at the right times. This approach avoids burnout and makes sure you’re ready for the game, not just the gym.
Phase (Weeks)
Primary Focus
Key Training Components
Foundation (1-3)
Building the Base
Mastering movement patterns, establishing weight training rhythm, introductory agility work.
Intensification (4-6)
Adding Speed & Power
Increased load on multi-joint lifts, introduction of advanced agility drills, focused anaerobic conditioning blocks.
Peak (7-9)
Sharpening the Blade
High-intensity, sport-specific drills, maximal explosion work, tapering for optimal performance.
Constant Thread
Technical Ball Mastery
Technical Ball Work integrated twice weekly, minimum. The brain and feet must develop alongside the body.
Look at the table and you’ll see Technical Ball Work is a constant. It’s done twice a week, at least. This is because having a good first touch is essential. It’s where athleticism meets skill.
This approach is key to player development. For young athletes, learning these skills early is vital. Check out these skill-building secrets for young female soccer players to start right.
Elite soccer skills development and smart conditioning programs go hand in hand. Without both, you’re not complete. This 9-week plan is your guide to turning raw talent into game-winning skills.
Mental Preparation & Confidence Building
Drilling set pieces until sunrise is not enough without confidence. The tryout is like a stage, and your mind is the star. Forget the workout packet’s secrets—this is the real game.
Coaches look at more than just your first touch. They read your body language like a film. A slumped shoulder after a missed pass sends a strong message.
Your reaction shows how resilient you are. This is where soccer fitness training meets the mind. That final exhausting Gasser? It tests your mental and physical endurance.
Soccer skills development means nothing without confidence. Can you try that tricky turn when tired and watched? That’s the question.
Avoid the “comparing game.” It’s a mental trap. Focusing on others can hurt your own performance. Your journey is unique, but your hustle is universal.
Hustling shows you work hard when no one watches. It shows a deep desire to impact the game. Coaches are drawn to players who motivate others.
Leadership is about setting the mood, not just showing up. Be the one to lift your team’s spirits. This attitude is your secret weapon.
How do you turn this into action? Let’s break down the mental game.
Mental Mistake
Confident Response
Coach’s Perception
Dropping your head after a lost ball.
Immediate recovery sprint to defend.
Resilient, coachable, team-first mentality.
Over-apologizing to teammates for an error.
A quick “My bad” followed by focused play.
Accountable but not emotionally fragile.
Watching a “star” player instead of your role.
Executing your own responsibilities with intensity.
Self-aware, focused, and reliable.
Going silent during a challenging drill.
Offering a simple “Let’s go!” or “Good pass.”
Natural leader, positive influence.
Staying positive is a choice, not a trait. It’s about controlling your thoughts. The best players focus on the next action after a mistake.
This mindset makes you stand out. For more on building confidence, check out strategies for aspiring female soccer players.
In the high-stakes game of tryouts, a sharp mind and attitude are key. You can’t bluff fitness or skill. But you can show unshakeable belief in your preparation and value. That’s often what wins the part.
Nutrition for Peak Performance
If your tryout preparation is a blockbuster movie, nutrition is like the sound engineer. Nobody notices them until the audio cuts out.
Let’s be real. A great script and director mean nothing without good audio. Your body works the same way.
Your conditioning programs are like a finely tuned engine. But what fuel do you put in it? If it’s just whatever’s in the vending machine, you’re not going to win.
This isn’t about fad diets or eating like a monk. It’s about managing your body’s energy and repair needs. Mess up, and your body stops working.
Your body needs fuel, water, and repair materials to perform. Carbs and fats are your fuel. Water keeps you cool and hydrated. Protein fixes muscle damage from training.
Ignoring these needs is like tearing down your tryout preparation. The post-workout window is key for muscle repair. Missing it is like missing a chance to grow your business.
Mastering nutrition is what makes you a contender, not just a participant. It turns hard work into results, not just effort.
Fuel Type
What It Is
The On-Field Result
Performance Fuel
Complex carbs (oats, sweet potato), lean protein (chicken, fish), healthy fats (avocado, nuts), consistent water intake.
Energy spikes and crashes, brain fog, increased inflammation, sluggish performance, heightened injury risk.
Strategic Timing
Pre-workout: Easily digestible carbs + protein. Post-workout (within 45 min): Carbs + protein to replenish glycogen and repair muscle.
Optimal energy availability during session. Maximizes recovery and adaptation, making every training session more effective.
Hydration Protocol
Drink water consistently throughout the day, not just during training. Electrolytes added for intense/long sessions.
Maintained blood volume, efficient nutrient transport, regulated body temperature, and peak neuromuscular function.
While others chase magic supplements, you’ll have a secret advantage. Proper nutrition gives you a quiet, efficient edge. The table above is a blueprint for turning fuel into power.
Forget the glamour. Focus on the hard work of making a good grocery list. It’s the most powerful part of your puzzle.
Recovery & Injury Prevention
The Champlin Park program doesn’t just suggest lifting weights; it demands it. It sees strength as a must-have, not just a nice-to-have. The program is clear: lift weights or risk injury. It’s not a choice; it’s a rule.
Strength exercises like squats, planks, and pushups are not just for looks. They protect your knees, ankles, and hips from the rigors of soccer. It’s like wearing armor to defend against the game’s challenges.
But, having armor is only part of the battle. The idea that “no pain, no gain” is outdated. Real progress happens during recovery, not during the workout. Champlin Park knows this, dedicating a whole day to “Mobility & Recovery.”
They even suggest a weekly leisurely run to “flush out lactic acid.” This isn’t just about getting your heart rate up. It’s a way to reset your body, like restarting a machine.
Great soccer skills come from having fresh, responsive muscles. You can’t play well if you’re tired and sore. Rest is key to performing at your best.
Ignoring recovery is like stopping a software update mid-install. You’ll crash. The program links soccer fitness training and soccer skills development to smart recovery. Build your strength, then let your body heal. That’s how champions are made.
Timeline for Tryout Preparation
You have the blueprint, the mindset, the fuel, and the repair plan. Now, it’s time to put it all together. This final phase isn’t about cramming. It’s about timing your peak performance perfectly.
Think of your summer as a three-act play. Act I (Weeks 1-3) lays the groundwork. Act II (Weeks 4-6) adds complexity and speed. Act III (Weeks 7-9) is the final sharpening and resting phase. Your conditioning programs need this rhythm.
The intense 6-week window before tryouts is your sprint. But it’s built on a 9-week foundation. This timeline is your project plan. Mark the dates. The final week should be calm and confident, not chaotic.
The countdown isn’t a threat. It’s a rhythm for your preparation. When you step onto the field, you’re not hoping to be ready. You’re executing a plan you started months ago. That’s confidence, not anxiety.
We cheer for the goal scorers. We debate the manager’s tactics. But have you ever thought about the massive machine that makes the game possible?
It’s not just 22 players and a ball. The global sport business is a huge, multi-billion dollar world. For every moment of magic on the field, there’s an army of professionals working behind the scenes.
Think of data savants analyzing performance. Marketing wizards building global brands. Legal eagles negotiating contracts worth more than some small countries’ GDP. This is the real front office.
Forget the tired idea of a single career path ending at 35. The off-field game offers a maze of opportunities. It’s where the true power brokers and storytellers are.
Let’s pull back the curtain. The beautiful game’s commercial side is often its most fascinating—and overlooked—drama.
On-Field Career Opportunities
Women’s soccer is changing fast. The term ‘on-field’ now covers many career paths, not just one job. Gone are the days of a simple path from college to retirement.
The old way was like a narrow ladder. You climbed until you hit a ceiling. Now, it’s like a vast network of roads. If you miss a turn, more paths appear soon.
The league structure has changed too. The NWSL is no longer the only game in town. The USL Super League and Canada’s Northern Super League are starting up. Even lower tiers are becoming professional, with plans for more leagues.
USL Super League President Amanda Vandervort said, “Rising demand calls for more options, not fewer.” This growth is not just about more leagues. It’s about making soccer a real career, not just a hobby.
This change means more competition, which is good. NWSL Commissioner Jessica Berman calls this time of growth and competition. Players now have more choices and opportunities.
The financial side is key. But the real excitement is what’s being built on top of it. Athletes are becoming entrepreneurs, seeing their playing careers as just one part of their income.
Take England’s Ella Toone as an example. She’s not just playing for Manchester United and the Lionesses. She’s also building her own football academy. Her career is not just about playing; it’s about building a brand.
This changes what we mean by sports industry jobs. Players are now brands, businesses, and content creators. Their careers are not just about playing; they’re about building an empire.
For more on this, check out our analysis of new jobs in women’s soccer.
So, a modern soccer career is like a tactical formation. It needs skill, financial smarts, brand strategy, and vision. Your career is not just about playing; it’s about building a whole ecosystem around it.
Off-Field Soccer Industry Roles
If you think soccer games just happen, I have a surprise for you. The game you see on TV is the result of a huge, hidden industry. This is where the real action happens.
The SheBelieves Summit, presented by Deloitte, is more than just a pep rally. It’s a place where big ideas are born. Companies invest here to help grow the sport, not just to sponsor teams. Deloitte’s support shows how it’s about more than just the game.
This investment has created new jobs that didn’t exist before. Now, we have data experts, community leaders, and league managers. Women’s soccer is growing, and so is the number of jobs in the front office.
For athlete career transitions, this is great news. Retired players have valuable knowledge. They can manage teams or create fan experiences. They move from playing to planning the game.
The data shows that growing the sport creates more jobs. We need people in operations, finance, and event management. It’s a perfect match of supply and demand.
Let’s look at where the action is off the pitch.
Role
Primary Function
Key Skills
Transition Relevance for Athletes
Front-Office Strategist
Shapes long-term club vision, manages salary caps, and oversees roster construction.
Analytical thinking, negotiation, deep knowledge of the sport.
Direct application of tactical understanding and team dynamics.
Data Analyst
Translates on-field performance metrics into actionable insights for coaching and recruitment.
Experience with the grueling schedule and operational needs of a professional season.
Brains are now as important as brawn. This isn’t a consolation prize for retiring. It’s a promotion.
The world of soccer is complex and demanding. It needs the same discipline and teamwork as the game itself. Look at former women soccer players creating impact beyond the game. They show us how to make a difference.
So, next time you watch a game, don’t just watch the players. Look at the people behind the scenes. They’re building the future of soccer, one smart move at a time.
Media & Broadcasting in Women’s Soccer
The most valuable player in women’s soccer might not be on the field. She’s in the production truck, creating stories that turn viewers into fans. This isn’t just a statement; it’s the new way to grab attention.
When you watch a game today, you’ll notice more than just cameras and graphics. The texture of the commentary has changed. Analysts now share the story behind a player’s actions. For example, Beth Mead uses her platform to talk about resilience and identity. Fans connect with the person behind the game, and that connection is valuable.
This emotional connection is a goldmine. It’s funding careers and creating a new path for professionals. We need people who can tell authentic stories with journalistic rigor and cultural understanding. It’s the opposite of old clichés.
So, what are the soccer business opportunities here? Let’s analyze them like a game tape.
Content Creators & Digital Strategists: Clubs and leagues need voices that resonate with fans. This means writing that touches the fan’s heart, not just the league table.
Broadcast Producers & Directors: The vision for how a story unfolds on screen is key. It’s about capturing the emotions, like the sigh after a missed penalty.
Podcasters & Audio Storytellers: Intimacy is the new scale. Deep conversations about the biggest challenge isn’t on the field can build a community faster than a traditional pre-game show.
Even platforms like LinkedIn are stages for intellectual commentary. Former players and executives are analyzing the game’s business with precision. Your voice—your ability to analyze, contextualize, and humanize—is an asset. Proper soccer media training is now as specialized as coaching badges.
The goal is no longer just to inform. It’s to make viewers feel part of something. When you do that, you don’t just cover the game. You help build it. And that, right there, is the most exciting soccer business opportunity of this media renaissance.
Sports Marketing & Sponsorship Careers
The modern sponsorship playbook is more like a best-selling novel than a corporate memo. It’s not just about a logo on a jersey. Today, it’s about telling a story that connects with fans and brands.
Take Deloitte’s partnership with the SheBelieves Summit. It seems like a big company supporting a sports event. But it’s more than that. They’re investing in the sport’s future and creating new soccer careers.
These careers blend analytics and creativity. The Partnership Activator creates fan experiences all year. The Brand Strategist makes a company’s values part of the team’s story. The Digital Campaign Wizard tracks engagement to show the value of sponsorships.
This isn’t just marketing for sports. It’s marketing as sport. Every campaign is a game, and every metric is a score. The goal is to build loyalty, not just sell products.
Fans, like those in women’s soccer, want real partnerships. They can tell when a partnership is fake. Success comes from campaigns that make a difference in the community.
For professionals, having the right skills is key. Can you analyze data and tell compelling stories? If so, there are many opportunities. These soccer careers offer a front-row seat to exciting business changes.
So, when you see a brand with your favorite team, look closer. See the strategists, storytellers, and analysts. They’re the ones making every sponsorship a story worth telling.
Fitness & Training Professional Paths
If you think sports industry jobs are all about yelling ‘drop and give me twenty,’ you’re about two decades behind the curve. Today, athletes are seen as complex puzzles. They need experts in biomechanics, data science, and therapy, not just drill sergeants.
We’ve moved from ice baths to cryotherapy chambers and from stopwatches to predictive analytics. This change shows how much the field has evolved.
The fitness world today is a complex, multi-disciplinary field. A sports scientist analyzes lactate thresholds, then passes it to a nutritionist. The nutritionist tweaks glycogen levels, and the physiotherapist fixes muscle imbalances. There’s also a performance psychologist and a data-driven conditioning coach.
This team works together like a human performance engineering firm within a club. They’re not just a support team; they’re essential to the athlete’s success.
The sport’s growth has led to more focus on player development. New leagues aim to bridge the gap between amateur and professional players. This growth creates jobs for specialists who refine raw talent.
Every new academy and fledgling league needs this team. They don’t just need players; they need the people who build them.
The game is getting faster and more demanding. Clubs see investing in human performance as a key advantage. They don’t want to risk a player’s performance without optimizing it first.
So, what do these careers look like? Let’s break it down. The table below shows the key roles in turning athletic talent into polished performance. It’s your guide to the heart of modern soccer.
These jobs are not fleeting. They are stable, impactful careers built on expertise. As the sport grows, so does your value. You’ll see players recover from injuries stronger and teams perform better in the 90th minute.
It’s a career for those who love the science of recovery and the humor in preseason challenges. The future of soccer is in the lab, clinic, and gym, not just on the field.
Entrepreneurship in Soccer Industry
Think of entrepreneurship as the final boss-level in the soccer career game. It’s where athlete career transitions stop being a plan for later and start building a legacy now.
Players are no longer just athletes. They are CEOs in cleats. Ella Toone MBE building her own academy is a masterclass in this shift. She’s creating something beyond her playing career while she’s at the top of her game.
This is the new playbook. The modern player’s identity is a diversified portfolio. We see launches for media companies, fashion lines, and tech startups. The pitch is just the launchpad.
Why this explosion in soccer business opportunities? The platform they’ve built has immense influence. Smart players are turning personal brand into sustainable business. It’s a cultural shift as much as a financial one.
For the rest of us, this opens wild new doors. Venture capital, business development, and startup incubation now have a vibrant sports-specific lane. The playbook is being written in real-time. Are you watching?
You think the path to being seen is a secret handshake for the soccer elite? Think again.
It’s a system. And like any good system, it can be gamed. This isn’t about waiting for a scout’s epiphany under the Friday night lights. It’s a calculated, multi-year campaign of self-development and strategic exposure.
The data doesn’t lie. Seventy-four percent of Division I men’s college coaches start their evaluations in the 10th grade. Club experience and tournament performances are your currency. Sure, NCAA rules formally restrict direct contact until later. But the real evaluation machine is always humming, much earlier.
This aligns perfectly with the stated mission of U.S. Soccer’s own Talent ID department: to identify and monitor players. They aim to impact the entire ecosystem. Your job is to understand that machinery.
True player development is what intersects with the gaze of soccer talent scouts. It requires looking beyond traditional grass metrics. Exploring talent identification in alternative formats can reveal key skills. It also means insisting on a holistic environment, supported by robust safe sport initiatives that protect athletes.
Forget destiny. Let’s talk strategy.
Fitness & Skill Development for Recognition
Scouts don’t just watch your 40-yard dash. They check your whole skill set. Everyone can run fast. But, it’s your control over the ball that really stands out. This is key for player development.
Your skills are like a smart investment. A great first touch is like a reliable stock. Vision and passing range are like stocks with big growth chances. Skills like touch, passing, shooting, and dribbling take time to learn but pay off big later.
Are you just fast, or are you versatile? College coaches see you as a future investment. They want speed, but they need technical skills and club experience too. Your skills are the most valuable part of your package.
Tactical awareness is also important. It’s about knowing where to be before the play starts. This is more than just running; it’s about thinking ahead. Can you read the game like a chess player, or do you just react?
Try this self-assessment: compare yourself to college players. Watch their games. Ask yourself:
Is my first touch as clean?
Is my passing range as diverse?
Do I see the same passing lanes they do?
This isn’t about copying them; it’s about finding your own level.
Real player development means growing your skills. It turns you into a complete player. That’s what gets you noticed and recruited.
Tournament & Showcase Participation
Welcome to the world of youth soccer, where talent is everything. Showcase tournaments are where it all happens. It’s not just games; it’s a chance to show off your skills on a big stage.
You’re not just playing; you’re presenting yourself to coaches. They’re watching you closely, ready to make decisions. It’s like a live audition for college teams.
For Division I college coaches, these events are key. They see hundreds of players in one place, saving time. Top events like ECNL and Girls Academy are where the action is.
To stand out, you need to know the game inside out. Make smart moves that coaches notice, even if they’re not on the stat sheet. Show your defensive skills when your team loses the ball. Coaches value soccer smarts and hard work.
This setting creates a lot of pressure. You’re on display, like a product. But instead of getting nervous, stay calm. This shows you’re ready for college.
This is your chance to prove your worth. It’s where your training meets real pressure. Learning to stay focused under stress is key. Resources on building confidence in aspiring female soccer players can help a lot.
So, think like a strategist, not just a player. Know which colleges are coming. Be intentional during warm-ups. Every move you make is part of your pitch.
The showcase circuit values quick thinking and action. You have to show your worth in 90 minutes. It’s a chance to make a lasting impression.
These showcases are a unique chance to meet coaches. But it’s not just about playing well. It’s about showing you understand the game and the opportunity.
Creating a Soccer Portfolio & Highlights
Your soccer portfolio is like a campaign ad. It’s your first chance to impress coaches. It’s not just about showing your skills. It’s about launching your soccer career.
Every second counts. Coaches have little time to watch your video. It should be 3 to 6 minutes long, with 20 to 25 key plays. This is how you grab their attention.
Each clip should answer important questions. Can you handle pressure? Do you have good defensive skills? Your video is your chance to show off.
A long, slow video won’t impress. What coaches want is a fast, action-packed video. Forget the music and slow-motion shots. They want to see your skills in action.
Aspect
The “Home Movie” (Loses Votes)
The “Political Ad” (Wins the Campaign)
Core Purpose
To memorialize a fun season.
To solve a specific problem in the soccer recruiting process.
Editing Philosophy
Include everything; it was a good play!
Ruthless curation. Only the most convincing evidence stays.
Clip Content
Isolated skills, celebratory reactions.
Game footage showing decision-making under pressure.
Narrative
Chronological, “this happened then that.”
Thematic, grouped by skill (defending, playmaking, finishing).
Viewer Takeaway
“This player had a season.”
“This player fits our system.”
Goalkeepers need to mix it up. Show your saves and your skills. It’s all about convincing them you’re the right fit.
Your portfolio is your story. It’s what you tell coaches before you meet them. For more tips, check out this in-depth guide on making a great video.
Networking with Coaches & Scouts
Networking with coaches is more than just collecting business cards. It’s about starting a strategic conversation early. Think of the soccer recruiting process as a specific, rule-bound dating game. You can’t just wait by the phone.
The NCAA rulebook guides your actions. For Division I, the calendar is key. Coaches can start direct communication on June 15 after your sophomore year. That’s when the real race begins.
Before June 15, soccer talent scouts work in secret. They can show interest through your club coach. They can watch you at tournaments. But they can’t contact you directly yet. This is your chance to stand out.
To get noticed, start with research. Find schools that match your style and needs. Then, write a personalized email. It’s not about flattery. It’s about showing you’ve done your homework.
Building a relationship takes time. Use your club coach to get noticed early. A respected coach’s endorsement is powerful. When a college coach calls them, you want to be remembered.
Period
What Coaches Can Do
Smart Player’s Move
Before June 15 (Sophomore Year)
Send questionnaires, talk to club coaches, observe at events.
Send introductory emails, build a highlight reel, get on their radar.
On/After June 15 (Sophomore Year)
Initiate direct calls, texts, emails, send recruiting materials.
Begin arranging official visits (paid for by the school).
Prepare for campus tours, know what to ask, treat it like a two-way interview.
Official visits start August 1 before your junior year. It’s not a vacation. It’s a chance to show you’re the right fit. Ask about playing time, academic support, and team culture.
The goal of the soccer recruiting process is simple. Make the coach’s job easier. Show you’ve done your homework. Be the standout choice, not just another name on the list.
It’s about smart, targeted outreach. It’s not about spamming everyone. It’s about showing you understand their needs and your own dreams. In this game, being proactive often wins.
Transitioning from Recreational to Competitive
This final leap is a big change. You’re no longer just playing for fun. You’re now the boss of your own sports career.
This change is a big test of your player development plan. You need to check all your old habits. Replace them with a pro’s focus on training, recovery, and watching game footage.
The path ahead is clear. Just playing high school soccer is not enough. At least two years in an elite club is needed. Four years is common. Your coach can help figure out your level and how you’ll grow.
Your goal is to find a competitive club where you play real games. This is where you get noticed. It makes every local tournament more important.
These events are not just weekend fun. They are key business meetings. This is where you show off the skills you’ve worked on for years.
Here, you put it all together. Your improved skills, tournament experience, polished portfolio, and growing network. You’re not just switching leagues. You’re upgrading your whole soccer system.
Let’s be brutally honest. The beautiful game has a glaring problem, and it’s not on the pitch.
While female talent explodes in stadiums worldwide, the real power centers—the boardrooms, technical areas, and federation halls—have often felt like an exclusive old boys’ club. The glass ceiling wasn’t just cracked; it was reinforced with concrete.
But the winds are shifting. This isn’t a feel-good diversity seminar. Consider this a diagnostic.
Why are women in sports leadership roles a strategic imperative for innovation and cold, hard growth? Look at the evidence.
Emma Hayes’s tactical genius transformed Chelsea. Michelle Kang’s multi-club ownership play is rewriting the business playbook. These aren’t tokens; they’re titans.
It’s Moneyball for the front office, with a full-blown cultural revolution on the side. The most potent transfer market move isn’t always a player. Sometimes, it’s a perspective.
Coaching Certification Pathways
Becky Hammon didn’t just break into the NBA. She navigated a complex system of coaching licenses to join Gregg Popovich. Her journey, like those of Katie Sowers in the NFL and Jennifer Campbell in the NHL, shows the importance of strategy. A successful soccer coaching career is built on a series of calculated steps, not just luck.
The path to the NWSL or top collegiate teams is not easy. It involves a structured, often political, journey. The U.S. Soccer Federation (USSF) and the Union of European Football Associations (UEFA) guide this path. They offer a range of licenses, from basic to advanced.
The USSF pathway is key for American coaches. It starts with online modules for beginners. The real challenge begins with the ‘F’ license. You then move up through ‘E’, ‘D’, ‘C’, ‘B’, and ‘A’ licenses.
The ‘A’ license is a tough, in-person test. It focuses on tactics and high-performance environments. The Pro License is the highest level, held by top MLS and collegiate coaches. It’s like a black belt in coaching.
The UEFA system is similar, with ‘B’, ‘A’, and Pro licenses. The choice between USSF and UEFA depends on your goals and location.
Pathway
Key Levels
Typical Duration
Approx. Cost Range
USSF
Grassroots, F, E, D, C, B, A, Pro
5-10+ years
$200 – $15,000+
UEFA
B License, A License, Pro License
3-7+ years
$5,000 – $25,000+
National ‘C’ License
Often a national federation entry-point
1-2 years
$1,500 – $4,000
The real story is not just the curriculum. It’s also about money, time, and connections. Can you afford the travel and time for courses? The system favors those with money and flexibility.
Finding a mentor is a big challenge. Hammon used her WNBA experience to get into the NBA. Sowers and Campbell found opportunities through fellowships and gigs. Their strategy was clear: find a niche, get a mentor, and earn the right badges.
But we must question if this system is fair. Does it value knowledge or wealth and connections? The badges show you know the game, but your network can open doors.
See your soccer coaching careers as a two-part journey. It’s a deep dive into the game and a soft-power campaign. Every course, connection, and volunteer role is a step up. The next great coach will know the game and how to climb the ladder.
Referee Training & Advancement
Sarah Thomas didn’t just break the NFL’s officiating glass ceiling. She rewired the entire perception of what a referee’s nerves are made of. Her journey from the Friday night lights of Mississippi to the Super Bowl spotlight is a masterclass in composure.
If coaching is a strategic game of chess, elite officiating is a high-wire act performed under a microscope. Every decision is a live broadcast of your judgment to a stadium of partisan critics. This career is for the unsung strategists, the real-time data processors who manage 22 moving parts and several thousand screaming opinions.
The pathway from a local assignor’s list to a coveted FIFA badge is less a clear ladder and more an obstacle course for your sanity. It’s opaque by design, filtering for those with an unshakeable mix of law, psychology, and athleticism. Let’s map this clandestine climb.
The physical referee training regimen rivals that of many athletes. It’s not just about keeping up with play. It’s about being in the perfect position, every single time, to see the infraction no one else can. This demands peak cardio and spatial awareness drills.
The mental training, though, is the true differentiator. How do you develop skin thicker than a goalie’s gloves? It involves studying endless film, not for tactics, but for pattern recognition of fouls and player behavior. It’s rehearsing calm communication under fire and making the call even when you know it will ignite fury.
Gaining experience, building a reputation with assignors, handling abusive sidelines.
Every official starts here, learning to manage community-level passion.
National / Professional
Advanced video review, league-specific mechanics, elite fitness testing.
Intense competition for few spots, surviving public and media scrutiny.
Violet Palmer (NBA): First woman to officiate a major U.S. men’s pro league finals.
International / Elite (FIFA)
Global rule interpretations, language skills, handling world-stage pressure.
Political navigation within federations, maintaining peak performance for decades.
Kari Seitz: Officiated in four Women’s World Cups, a standard-bearer for consistency.
Pioneers like Thomas and Palmer are archetypes. They illustrate that referee advancement requires breaking barriers no rulebook mentions. Thomas’s precision in the hyper-speed NFL and Palmer’s unflappable presence in the NBA proved that the required skill set is gender-blind.
It’s a unique blend: part lawyer, part psychologist, part marathon runner. The best officials are students of human dynamics. They manage player egos, coach frustrations, and game tempo with an invisible hand. Their best tool is often a well-timed, calm word.
This leads to the fascinating paradox for the analytically minded. In officiating training, your masterpiece is the game nobody talks about you after. Perfection is anonymity. It’s a career where success is measured by the absence of controversy, a silent testament to your total control of the chaos.
The next time you watch a game, watch the official. You’re seeing a master of real-time analytics, performing a high-stakes ballet. Their training regimen is the unseen foundation of the spectacle you love.
Sports Administration Career Development
While coaches draw plays on whiteboards, another strategist works on spreadsheets. Welcome to the heart of modern sports. Here, the term “suit” doesn’t have to be negative. Today’s sports administrator is a true expert in many fields: economics, diplomacy, and data science.
These careers shape the business of sports. General managers manage teams within a budget. Operations directors keep stadiums running smoothly. Marketing VPs turn jerseys into global brands. And league commissioners handle tough political issues.
So, what degree is right for this field? An MBA is great for finance and strategy. A law degree helps with contracts and agreements. A communications master’s is key for media and fan engagement. The truth is, there’s no single path. The key is to pair foundational business or legal acumen with a deep, authentic understanding of the sport’s ecosystem.
Kim Ng is a great example. She became the first female General Manager in major North American men’s sports. Her success shows the importance of persistence, legal knowledge, and player evaluation. Her story is a roadmap for careers in sports administration.
Look at Jeanie Buss, guiding the Los Angeles Lakers. Her leadership shows that effective control comes from understanding legacy and business innovation. These examples show a broader movement. As highlighted in a perspective on women leaders in sports, diverse perspectives add value and relevance.
This career path combines passion and business. It requires understanding revenue streams, sponsorship deals, and media rights. Securing a TV deal for a decade is a high-stakes challenge.
The journey into sports business is not a detour. It’s a deeper dive into the game’s mechanics. It’s for those who love the game and its business side. Building a sports administration career means loving the game for its complex, thrilling business.
Networking & Professional Growth
Here’s a secret: your next big opportunity might come from a casual chat, not a formal application. In sports, it’s all about who you know, not just what you know. Your network is key to unlocking new opportunities.
Networking is all about social capital. It’s the sum of your connections, trust, and ability to ask for help. For women in sports leadership, building this capital is essential to overcome bias.
To build your network without being awkward, be strategic.
Forget Attending Conferences; Target Them
Don’t just attend events. Research the speakers and find people whose work interests you. Aim for two meaningful conversations, not just meeting everyone. Ask a thoughtful question and follow up with an email to discuss further.
The Alchemy of the Informational Interview
Informational interviews are powerful. Ask specific, humble questions. Instead of “Can I pick your brain?”, say “I was inspired by your work on [specific project]. I’m facing a similar challenge. Would you have 15 minutes to share a lesson you learned?” This shows you’re a peer, not just asking for help.
But the best network is horizontal, not vertical. Create a group of peers to share challenges and opportunities. Meet monthly to discuss and get a reality check against sexism and bias. This support is vital, as shown in resources on strong networks.
Look at leaders like Baroness Sue Campbell of the FA. Her influence grew through building relationships. This is the model: turn transactions into an ecosystem.
Your value is a mix of capitals. Understanding them helps you invest your time wisely.
Networking is more than just schmoozing. It’s about building your professional environment. Your community is your support, your board, and your source of opportunities. Build it with honesty, and it will support you long after your career.
Building Leadership Skills Through Playing
Can a crunching tackle at midfield teach you about corporate negotiation? Does organizing a backline translate to managing a project team? The answer is a resounding yes. We’re exploring how playing sports builds leadership skills.
Decision-making under fatigue, communicating under pressure, understanding team dynamics—these are not abstract concepts. They are muscles developed on the pitch. The brutal self-awareness from both victory and defeat provides a unique perspective. This perspective is invaluable for anyone plotting their path, including those eyeing soccer coaching careers.
Data shows former athletes often become powerful role models. They inspire the next generation precisely because they’ve been in the trenches. For the former player, the challenge is translating “field sense” into boardroom language. It’s about articulating how reading a game’s flow mirrors market trends.
For everyone else, the athlete’s mindset offers a masterclass in resilience and strategic thinking. The most valuable asset you can bring from the pitch to the executive suite, or into soccer coaching careers, might just be the mud on your boots. It’s proof you’ve navigated the chaos and found a way to win.
Remember the classic movie trope? The star quarterback aces his physics final, then throws the game-winning touchdown. Cue the credits. Real life, I’ve found, is a bit more… demanding.
Being a student-athlete is not like a scripted underdog story. It’s more like a high-stakes juggling act. You have to deal with the academic requirements: papers, labs, and keeping a good GPA. At the same time, there are the athletic requirements: dawn practices, film sessions, and the pressure to perform.
This system is built on a beautiful, almost paradoxical, ideal. But who actually designed this schedule? Is it sustainable, or are we just glorifying burnout?
Let’s pull back the curtain. This isn’t just about time management. It’s about understanding the actual rules of the game—both in the classroom and on the field. The balance isn’t a given; it’s a calculated performance.
Scholarship Landscape for Women’s Soccer
If you think all college soccer scholarships are the same, you’re in for a surprise. The American system is complex, like a season finale cliffhanger. It’s a buffet with more than just salad and steak.
NCAA Division I is like a Broadway show. Top schools like Stanford and UCLA are the stars. Here, teams can offer up to 14 scholarship equivalents. But, these are “equivalency” sports, meaning coaches can split these scholarships.
Division II is like a prestige cable drama. It has fewer viewers but is more nuanced. D2 schools offer up to 9.9 equivalents. The focus is on balancing sports and school.
Division III doesn’t offer athletic scholarships. But, D3 schools can give strong academic and need-based aid. It’s a different way to reach your financial goal.
The NAIA is like a hidden track on a hit album. These colleges offer up to 12 scholarship equivalents. The competition is fierce, but the process is less complex.
The NJCAA is another hidden gem. It offers up to 18 scholarship equivalents. It’s great for players needing time to develop or reset academically.
So, where’s the real opportunity? Look beyond the big names. Programs like Clemson and Florida State are building strong teams. Florida State’s scouting is as good as many European clubs.
Division
Scholarship Equivalents (Max)
Approx. # of Women’s Programs
Key Characteristic
NCAA Division I
14
333
High visibility, equivalency sport, intense competition.
NCAA Division II
9.9
265
Balance of athletics & academics, strong regional play.
NCAA Division III
0 (Athletic)
438
Academic/need-based aid only, high academic focus.
NAIA
12
205
Flexible rules, often faster recruitment, smaller campuses.
NJCAA (Junior College)
18
148
High scholarship count, development focus, two-year path.
This table is more than data; it’s a strategic guide. Junior colleges offer the most women’s athletics funding but are rarely talked about. D1 has many programs, but the competition is fierce.
Success in this world needs more than a great highlight reel. You must understand which part of the system values you most. Is it the D1 dream, the D2 balance, or the NAIA’s focused offers? Your strategy should match your playing style. The landscape is vast; play smart.
Academic & Athletic Requirements
The world of soccer talent development is more than just goals and assists. It also includes grades and test scores. Your dream of college soccer scholarships requires balancing school and sports.
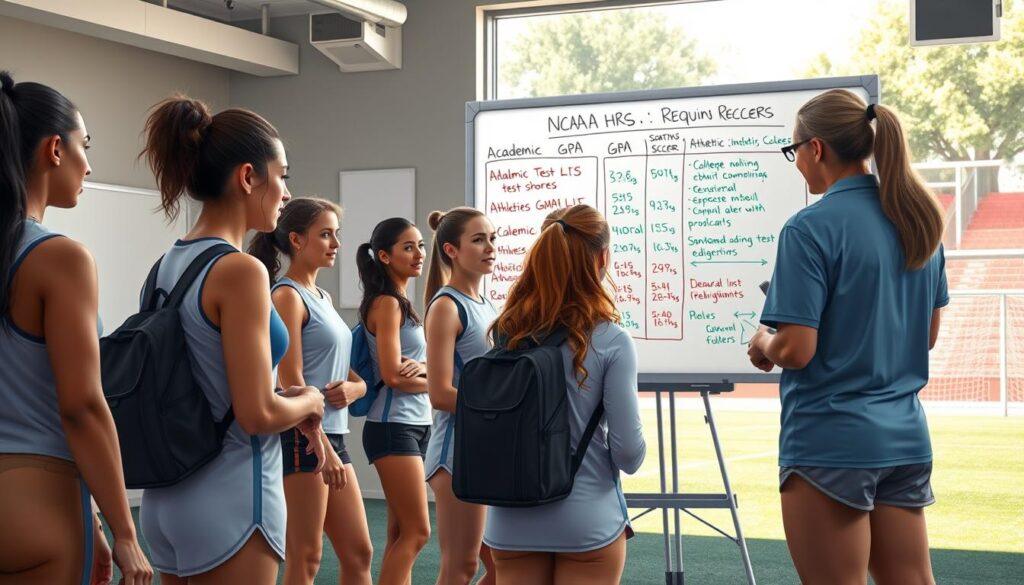
Your grades are key to getting into college. The NCAA eligibility center is strict. A 2.0 GPA is the minimum to get in. Anything less is like showing up unprepared.
For D1 schools, a 3.0 GPA is the starting point. Academic scholarships can make up for athletic ones. This means your brain can help fund your sports career.
The SAT is a test of your focus. A score below 1000 raises questions. But a score above 1100 shows you can handle college-level pressure.
Being a star in high school is just the beginning. At the national level, showcases and ID camps are key. These are where colleges assess your skills.
Your soccer history is like a resume. Scouts look for both current talent and future growth. Being ready to play now or with development is what matters.
Assessment Criteria
The “Project” Prospect
The “Pro-Ready” Prospect
Technical Skill
Raw talent, inconsistent first touch. High ceiling but needs refinement.
Polished, reliable under pressure. Clean passing and trapping.
Tactical IQ
Understands basic positioning. Decision-making can be slow.
Reads the game two steps ahead. Executes complex team strategies.
Physical Readiness
May need strength & conditioning development.
College-athlete physique. Endurance for a 90-minute collegiate pace.
Coach’s Perspective
Investment for years 2-4. Lower initial scholarship offer possible.
Immediate impact player. Justifies a higher initial scholarship investment.
To get college soccer scholarships, you need two things. A strong academic record and standout performances at showcases. It’s not just about playing well. You must show you can excel in specific drills that showcase your skills.
Application Process & Timeline
Getting into NCAA recruiting is like running a campaign, not just filling out a college form. It starts early, not just when you’re a senior. You need to start planning 18 to 24 months before you go to college. This is key to getting women’s athletics funding.
First, you build your dossier. It’s not just a video. It’s a 2-4 minute video that shows your soccer smarts. It’s about your vision, decision-making, and skill. This video is your first chance to impress coaches.
Next, you start reaching out to coaches. But don’t just send the same email to everyone. Personalized communication is key. Show you’ve done your homework on the team. Explain how you can help them.
July 1 after your junior year is a big day. This is when coaches can talk to you directly. But don’t wait for them. Be seen at showcases. These are live auditions where you show your skills.
Here’s a simple plan to help you navigate this process. It covers the important steps, deadlines, and the right mindset for each.
Phase
Timeline Milestone
Key Action & Mindset
Foundation & Dossier
18-24 Months Before Enrollment
Create a professional highlight reel focusing on soccer intelligence. Begin academic eligibility tracking. Mindset: You are an architect, laying the groundwork.
Strategic Outreach
Start of Junior Year
Research programs and identify 10-15 target schools. Draft personalized introductory emails to coaches. Mindset: You are a marketer, selling a unique product—yourself.
The Live Audition
Ongoing, Junior Year
Attend 3-5 major showcase events. Perform under observation and network with club coaches. Mindset: You are an actor on the biggest stage of your young career.
The Sacred Window
July 1, After Junior Year
Be prepared for direct coach calls. Follow up on previous communications. Have your questions ready. Mindset: You are a negotiator, entering active talks.
The Grind & Follow-Up
Senior Year
Manage official/unofficial visits. Complete NCAA Eligibility Center registration. Maintain consistent, respectful communication. Mindset: You are a marathoner, finishing the long race.
This process is tough, but it’s worth it. It’s like training for a marathon. It teaches you discipline, resilience, and how to advocate for yourself. It’s not just about getting women’s athletics funding. It’s your first test in the sports world.
Training Programs to Enhance Scholarship Chances
Think of your soccer talent development as a high-stakes investment. Durability is key. You can’t just train harder; you have to train smarter. In the college game, smarter means protecting your body.
The grind is real. Up to five training days a week, plus weight sessions and recovery. Two-match weekends on tough “A-Turf” add to the toll. Injuries can kill your scholarship chances.
Smarter training starts here. Investing in top-notch impact protection is strategic. It keeps you on the pitch. Being available is your first asset.
Your training environment matters a lot. Playing in a top club team is key. It’s where scouts watch you closely.
Your game film is your calling card. But you need a stage. Attending reputable showcases is essential. It’s where your performance shines.
Sometimes, the gap between talent and readiness is cultural. American pre-seasons can be tough. Programs like Soccer Assist’s camp at Stowe School prepare you.
A smart training program for college soccer scholarships has three pillars:
Physical Resilience: Gear and conditioning to withstand the schedule.
Competitive Exposure: Club play and showcases where you’re seen.
Cultural Preparation: Immersive programs that bridge the pace gap.
Talent development is about being complete. It’s about a body and skills that can handle tough schedules. It’s not for the faint of heart. But for those who train smart, the scholarship offer is a reward.
Financial Aid Beyond Athletic Scholarships
Let’s face it: getting a “full-ride” in women’s soccer is rare. The athletic scholarship you get is just the start. The real magic happens when you add more aid.
Enter the world of “equivalency” sports and the art of stacking. Your coach’s offer is just the beginning. The 2020 NCAA rule change made it easier to add academic and need-based grants to athletic awards. This makes your athletic scholarship look more complete.
Your GPA is key to your financial future. In the world of women’s athletics funding, good grades are as valuable as athletic talent. Schools look for students who excel in both areas.
Take Duke as an example. A player might get a 50% athletic scholarship and also qualify for need-based grants. Clemson has corporate-sponsored awards that can be added to athletic scholarships. These are not random; they’re part of a bigger plan.
When looking at the total cost, think like a financial analyst. Tuition is just one part. You also have to consider housing, food, books, and other fees. The goal is to keep your family’s costs low, ideally between $5,000 and $15,000 a year.
Don’t just look at the athletic scholarship amount. Examine the entire financial aid letter. It’s a critical document. View it as a puzzle with several important pieces:
The Athletic Slice: The official offer from the sports department.
The Academic Merit Grant: Money awarded for your GPA and test scores.
The Need-Based Grant: Federal or institutional aid based on your FAFSA.
The Institutional “Sweetener”: Sometimes called a “director’s award” or “full-tuition initiative.”
The Final Gap: The remaining balance your family must cover.
The smart recruit sees the whole funding package, not just separate awards. By understanding all the aid options, you can turn a good college soccer scholarships offer into a great deal. The final step is to make sure you’ve claimed every dollar of aid available.
Success Stories & Career Pathways
Forget the trophy case. The real prize is the roadmap. A scholarship is just the start. The journey is not always straight.
Take Caio Hughes, who went from Welsh youth teams to JUCO, then D1. Ellisha Clough moved from a UK academy to a Mississippi community college. These stories show the path to success in soccer talent development.
The American college system is like a national academy. The NWSL and MLS draft players from here. UCLA’s women’s team has sent 21 players to the NWSL draft. Wake Forest’s men’s team is a top MLS pipeline.
This system, backed by women’s athletics funding and strong NCAA recruiting, offers a unique four-year development chance. You get a degree and a global soccer network.
The smart player plans ahead. Your college years are just the start, not the end.
Welcome to a key talk about playing soccer in the summer heat. Long tournament days and summer league games create lasting memories. But, the rising temperatures pose real challenges for athletes.
For female players, the heat can affect you differently. Your body reacts in its own special way. It’s not just about feeling comfortable—it’s a key part of your performance and safety.
The stats are alarming. The CDC says heat illness is the top cause of death and disability in high school athletes. This risk isn’t just for football. Female cross-country runners also face it. Knowing this threat is essential for anyone playing sports.
But there’s a silver lining: with the right info and a solid game-day plan, you can conquer the field, rain or shine. Let’s create that plan together.
Know the numbers: heat index vs WBGT, when to modify or postpone; shade and misting strategies
Ever wonder why some hot days feel okay while others are really dangerous? It’s all about two important numbers: the heat index and the WBGT. Learning the difference helps you keep your team safe!
The heat index is what your weather app shows. It mixes air temperature with humidity to show how hot it feels. But, it’s only for shady, calm conditions. It doesn’t show the real effect of direct sun or strong winds.
Wet Bulb Globe Temperature (WBGT) is like a detailed report on heat stress. It looks at temperature, humidity, wind, sun, and clouds. This gives a true picture of the heat players face in the sun.
That’s why groups like the National Athletic Trainers’ Association (NATA) use WBGT to decide on practice changes. It’s the best way to keep athletes safe.
So, what do WBGT numbers mean for your team? The table below shows how to act based on these numbers. Having a plan keeps everyone safe.
WBGT Range (°F)
Risk Level
Practice Modifications
Shade & Misting Strategies
Below 80°F
Low
Normal activities. Monitor players for sensitivity.
Provide optional shade for breaks. Have water available.
80°F – 84.9°F
Moderate
Use caution. Increase frequency of rest breaks (5 min every 25 min).
Mandatory shade breaks. Set up misting stations for cooling during breaks.
85°F – 87.9°F
High
Consider shortening intense exercise. Remove equipment like helmets if possible. Increase rest to 10 min every 30 min.
Breaks must be in shade. Active use of misting fans or ice towels during all breaks.
88°F – 89.9°F
Very High
Limit practice to light, short drills only. Consider postponing to a cooler time.
Extended breaks in shade with aggressive cooling (cold immersion, slushies).
90°F and Above
Extreme
Cancel or postpone all outdoor activity.
No outdoor exposure. Activities should move indoors to air-conditioned space.
Shade and misting are great on hot days! Shade can make it feel up to 10°F cooler. Use canopies or breaks under trees. Rotate drills to avoid direct sun.
Misting cools the skin by evaporation. Set up a misting station with a spray bottle or fan. Mist during breaks, focusing on the face, neck, and wrists. Shade and misting are a strong defense against heat.
Knowing your WBGT and having a plan keeps your team safe. You’re ready to protect them!
Build your plan: pre‑hydrate, during‑play sips by minutes and heat category, post‑match rehydration targets
Creating your hydration plan is like planning a winning play. It’s all about three steps: before, during, and after. This plan helps you know exactly how much to drink at each time.
Remember, hydration is individual. Your needs change based on how much you sweat, the weather, and your body. Start with these guidelines and adjust as needed.
First, focus on pre-hydration. You want to start practice or a match well-fueled. Think of it as filling up your tank before a long trip.
Drink 16 to 24 ounces of water or sports drink 2 to 4 hours before playing. That’s about one to two water bottles. This lets your body absorb the fluid and get ready for action!
Next, it’s time to stay fueled during play. It’s not about drinking a lot at halftime. Instead, take small sips to keep your energy up without feeling bloated.
For activities over 60 minutes, drink water and sports drinks freely. Aim to drink 7 to 10 ounces (about 200-300ml) every 15 minutes. But when it’s hot, you need to drink smarter.
The table below shows a sipping schedule based on heat. It helps you drink the right amount at the right time.
Heat Category
WBGT Range (°F)
Recommended Sip Schedule
Best Fluid Choices
Low Risk
Below 80°F
7-8 oz every 15-20 minutes
Water is perfect.
Moderate Risk
80°F – 85°F
8-9 oz every 15 minutes
Mix of water and sports drink.
High Risk
Above 85°F
9-10 oz every 10-15 minutes
Primarily sports drink for electrolytes.
See how the plan changes? In hot weather, you lose more fluid and electrolytes. Drinking more often with sports drink helps replace them.
Now, let’s talk about recovery: post-match rehydration. This is when you fix your body and get ready for the next session. The goal is to replace every pound you lost through sweat.
Here’s a simple trick: weigh yourself before and after activity. For every pound lost, drink 16 ounces (about two cups) of fluid. This is your rule for recovery hydration!
So, if you lose a pound after a match, drink an extra 16 ounces over the next few hours. Chocolate milk, a recovery drink, or water with a salty snack are all good choices.
Creating your hydration plan makes drinking easier. Pre-hydrate, sip smartly, and use your scale to recover fully. Now you’re ready to make your own plan!
Electrolytes 101: sodium needs, DIY mixes vs products, cramps mythbusting
Let’s clear up what electrolytes are. They’re key for your body’s performance, and sodium is the most lost in sweat. Think of them as spark plugs for your body. They help your muscles work and keep fluids balanced.
Water alone isn’t enough during long, hot workouts. You lose important minerals like electrolytes in sweat. Drinking only water can dilute sodium in your blood, affecting your performance.
Sodium is the most important electrolyte to focus on. It helps your body keep fluids. Without enough, water might just pass through you. That’s why many experts suggest sports drinks and electrolyte replacement for intense exercise.
DIY Mixes vs. Commercial Sports Drinks
Should you buy a drink or make your own? Both have their benefits. Commercial sports drinks are easy to use and have the right mix of electrolytes and carbs. But, they might have added sugars and colors you don’t want.
Making your own mix lets you control what goes in. You can adjust sweetness and sodium to your liking. Here’s a simple recipe:
32 oz (1 liter) of water
¼ teaspoon of table salt (for sodium)
¼ cup of orange juice (for potassium and carbs)
A squeeze of lemon or lime for flavor
Shake it up for a basic, effective hydrating drink!
Feature
DIY Electrolyte Mix
Commercial Sports Drink
Cost
Very low
Higher, per serving
Customization
Full control over ingredients
Fixed formula
Convenience
Requires preparation
Ready-to-drink
Electrolyte Precision
Approximate, unless measured
Scientifically measured
Best For
Training days, cost-conscious athletes
Game days, tournaments, maximum convenience
Busting the Cramp Myth
Now, let’s debunk a big myth: muscle cramps are only caused by low electrolytes. It’s more complicated. Dehydration and sodium loss are big factors, but fatigue and muscle overload also play a role.
When muscles are tired and overworked, they can cramp. So, that late-game calf cramp might be from losing electrolytes and exhaustion. Treating a cramp means stretching, drinking fluids with electrolytes, and resting.
Remember, heat cramps are a warning. Your body needs a break, fluids, and minerals. Using sports drinks or your DIY mix, along with salty snacks, is a smart move. This approach helps you tackle the real cause and get stronger.
By understanding your sodium needs and having a plan, you turn electrolytes into a powerful tool for staying safe in the heat.
Sweat rate test at home; customizing bottles; signs of under‑ vs over‑hydration
Ever wonder why generic water bottle advice doesn’t work? It’s because your sweat rate is as unique as your fingerprint. No two players lose fluid at the same pace, even on the same team. Guessing your hydration needs can lead to fatigue or worse.
We’re going to change that. By finding your personal number, you can turn hydration into a precise science. This knowledge lets you customize your bottles and drink with confidence, knowing you’re staying perfectly balanced.
You don’t need a lab for this. All you need is a precise digital scale and one hour of your typical training. Here’s your step-by-step guide:
Weigh In Dry: Right before your session, go to the bathroom, then weigh yourself in minimal, dry clothing. Note this “pre-exercise weight.”
Train Normally: Go through your standard one-hour practice or workout. Drink water only if you absolutely must, and measure exactly how much you consume (in ounces or milliliters).
Weigh Out Dry: After training, towel off all sweat, change into dry clothes, and weigh yourself again. This is your “post-exercise weight.”
Now, let’s do the math! Use this simple formula:
Your Hourly Sweat Rate (in fluid ounces) = [(Pre-weight in lbs – Post-weight in lbs) x 16] + Fluid Consumed during exercise (in oz)
For example, if you lost 1 pound (16 oz) and drank 8 ounces during the hour, your sweat rate is 24 ounces per hour. This is your golden number! It tells you how much fluid you need to sip each hour to replace what you’re losing.
Customize Your Bottles: From Number to Action
Knowing your hourly sweat rate transforms your gear. Let’s say your number is 24 ounces per hour. For a 90-minute practice, you know you need to plan for about 36 ounces of fluid.
Instead of one giant bottle, consider two labeled bottles: one for the first half of practice, one for the second. This visual cue reminds you to drink consistently. Mark lines on your bottle with tape to show 15-minute intake goals. Sipping small amounts often is far better than chugging large volumes rarely.
This personalized approach is a cornerstone of smart recovery tips for female soccer players, ensuring you start and finish every session optimally hydrated.
Reading Your Body’s Signals: Under vs. Over
Even with a perfect plan, you must listen to your body. Here are the clear signs that tell you if you’re tipping out of balance.
Signs & Symptoms
Under-Hydration
Over-Hydration (Hyponatremia)
Urine Color
Dark yellow or amber
Consistently very clear, like water
Thirst & Mouth
Intense thirst, dry/sticky mouth
No thirst, possibly feeling “waterlogged”
How You Feel
Fatigue, headache, dizziness, irritability
Nausea, bloating, confusion, swelling in hands/feet
Performance Impact
Decreased speed, power, and focus
Muscle weakness, cramping (despite electrolytes)
Common Cause
Not drinking enough to match your sweat loss
Drinking excessive plain water without replacing sodium
Under-hydration is more common. Your body is screaming for fluid it lost through sweat. The fix is steady, consistent sipping based on your sweat rate.
Over-hydration is less common but serious. It dilutes the sodium in your blood. This is why pairing your fluid intake with electrolytes, as we discussed earlier, is so important. If you suspect over-hydration, stop drinking plain water and seek a sports drink with sodium or medical attention if symptoms are severe.
Your body is your most sophisticated piece of equipment. By knowing your sweat rate, customizing your bottles, and understanding these signals, you take complete control of your hydration. You move from reacting to problems to preventing them entirely. Now that’s a powerful advantage on any pitch.
Heat acclimation: safe ramp‑up over 10–14 days; training time-of-day and clothing choices
Becoming heat-fit isn’t about being tough. It’s about slowly getting used to the heat over 10 to 14 days. This process, called heat acclimatization, helps your body cool down better. It’s like teaching your body to handle summer like a pro.
The first 5 to 14 days are the riskiest for heat illness. Starting with full drills on day one is a big mistake. Your body needs a slow, smart start. We suggest gradually increasing exercise intensity and wearing more protective gear over time.
Why does this work? Your body adapts by getting used to the heat slowly. Your body temperature starts lower, you sweat better, and your heart rate gets more stable. This acclimation is your best defense against the heat.
Following a structured plan makes things easier. Below is a 14-day ramp-up strategy. Remember, this is just a guide—always listen to your body and adjust as needed.
Day Range
Primary Focus
Duration & Intensity
Clothing & Equipment
Days 1-3
Introduction & Baseline
60-70% of normal intensity for 45-60 minutes.
Light t-shirt, shorts. No extra pads or layers.
Days 4-7
Building Tolerance
75-85% intensity for 60-75 minutes.
Add light practice jersey. Introduce helmet only (no shoulder pads).
Days 8-10
Increasing Load
85-90% intensity for 75-90 minutes.
Full uniform (helmet and shoulder pads) for the final 30 minutes of practice.
Days 11-14
Near Full Integration
90-100% intensity for full session length.
Full gear for entire practice. Monitor closely for fatigue.
When you train is as important as how you train. Schedule sessions during the coolest parts of the day. Early morning or late evening practices can make a massive difference in environmental stress. If you must train in the afternoon, seek shaded areas and be extra vigilant with hydration and rest breaks.
Your clothing is part of your cooling strategy. Choose light-colored, loose-fitting, and moisture-wicking fabrics. Dark colors absorb heat, while tight, non-breathable materials trap it against your skin. Save the full uniform and dark practice gear for later in the acclimation cycle, once your body has started to adapt.
Patience is your superpower here. Rushing the process undermines the very adaptations you’re trying to build. By committing to this smart, staged acclimation, you’re not just surviving the heat—you’re teaching your body to thrive in it.
Your body is like an engine that can get too hot. Cooling tactics are key to keeping you running well. They’re not just for comfort; they help you perform better.
There are two ways to cool down: being proactive and reactive. Pre‑cooling means getting a little cool before you start. Wearing a cooling vest during warm-up is a good start. It’s like cooling your engine before racing.
When you’re playing, you need quick fixes. Let’s look at your options:
Ice Towels on the Neck & Wrists: This is a top move. Cold towels on pulse points cool your blood. This cooler blood then cools you down. Many teams use ice tubs for quick towel changes.
Cold Drinks & Slushies: Drinking cold fluids hydrates and cools you. Slushies are special. They make your body use energy to melt them, cooling you down. Studies show athletes who drink slushies before or at halftime stay cooler longer.
Misting & Fans: A fine water mist with fan airflow cools your skin fast. It’s great during breaks.
Now, let’s make a halftime routine. You have 10-15 minutes to recharge. Here’s a plan:
Minutes 0-2: Find shade and use an ice towel on your neck.
Minutes 2-5: Drink your hydration bottle and then your slushie.
Minutes 5-8: Sit down and use another ice towel. Use a misting fan if you can.
Minutes 8-10: Move lightly if needed. Focus on calm breathing.
This routine quickly lowers your core temperature. You’re not just resting; you’re recovering to dominate the second half.
Cooling Method
Best Use Time
Key Benefit
Pro Tip
Cooling Vest
Pre-game / Warm-up
Proactive pre‑cooling
Wear for 20-30 min before start in the shade.
Ice Towels
Breaks & Halftime
Cools blood at pulse points fast
Target the neck, wrists, and forehead.
Slushies
Pre-game or Halftime
Internal “heat sink” effect
Use a sports drink base for electrolytes too.
Cold Fluid Sips
During all breaks
Combats dehydration & internal heat
Keep a separate, insulated bottle just for cold water.
Misting + Fan
Any stoppage in play
Instant evaporative cooling
A portable battery-operated fan is a great team investment.
By making cooling a key part of your game plan, you turn a challenge into an advantage. Your body will be more energetic, focused, and powerful until the final whistle.
Red flags and emergency action: heat exhaustion vs heat stroke; onsite roles and scripts for coaches/parents
This section teaches you how to act quickly during a heat illness crisis. Knowing what to do can save lives. We’ll show you how to tell if someone is just tired or in real danger.
Heat-related problems range from mild to severe. Knowing the level of the problem helps you know what to do.
Let’s look at the four main types of heat illness, from mild to severe. This table compares symptoms and first steps for each.
Condition
Key Signs & Symptoms
Immediate Action Steps
Heat Syncope (Fainting)
Dizziness, lightheadedness, tunnel vision, sudden collapse (often after standing for a while). Skin is pale and sweaty.
Move athlete to shade. Lie them down with legs elevated. Provide cool fluids once conscious.
Heat Cramps
Painful muscle spasms, usually in calves, arms, or abdomen. Athlete is sweating and alert.
Stop activity. Gently stretch and massage the muscle. Rehydrate with an electrolyte drink.
THIS IS A MEDICAL EMERGENCY. Call 911 immediately. Start aggressive cooling on-site (cold water immersion is gold standard). Do not wait for EMS.
The difference between heat exhaustion and heat stroke is clear. Look for high core temperature and central nervous system dysfunction. If an athlete is confused or has collapsed with a high body temperature, it’s heat stroke.
Your On-Site Emergency Action Plan
As a coach or parent, having a plan helps you stay calm. Here’s what to do in case of a suspected exertional heat stroke emergency:
Recognize and React: Shout for help the moment you see confusion combined with signs of overheating. Designate one person to be the incident commander.
Call 911 Immediately: The caller must clearly state: “We have an athlete with suspected exertional heat stroke. We are beginning cold water immersion. Send EMS to [specific location].”
Start Cooling NOW: While waiting for EMS, get the athlete into a tub or pool of cold water and ice. If full immersion isn’t possible, use ice packs on the neck, armpits, and groin, and pour cold water over them. The goal is to lower core temperature as fast as possible.
Monitor and Communicate: Stay with the athlete. Keep talking to EMS updates if their condition changes. Do not give them anything to drink.
For heat exhaustion, your script is calmer but clear. Say: “You’re showing signs of heat exhaustion. We’re going to sit you in the shade, get these wet towels on you, and you’ll sip this cool water slowly. We’re going to stay right here with you until you feel better.”
Remember, your calm authority is contagious. By knowing these differences and actions, you move from being a bystander to a vital first responder. You’ve got this.
Role-model snapshot: team that mastered heat with smart routines
Imagine a team where heat safety is a key part of their success. This is not just a dream—it’s real. Let’s look at a women’s team that made staying cool a part of their game.
The team’s journey started with a change in mindset. The coach and captains made player safety in hot weather a top priority. They didn’t just react to the heat; they planned for it. This became their culture.
Every practice and game starts with a WBGT check. A parent checks the monitor, and the result guides their actions. If it’s in the yellow zone, they extend water breaks and move drills to shaded areas. This routine removes all doubt.
Hydration is tailored to each player. They do sweat rate tests to find out their fluid and sodium needs. Their water bottles are labeled with their names and hourly drinking goals. During intense drills, they drink by the clock, not just when they’re thirsty. After games, they drink chocolate milk or make their own electrolyte smoothies.
Their heat acclimation period is very important. They don’t start too hard in preseason. They gradually increase intensity and duration over 10 days. They even practice in their full kits during cooler evenings to build up slowly.
Cooling is a big part of their breaks. Ice towels are always ready. Halftime is for slushies and cold compresses, not just strategy talks. They see cooling as a way to perform better, not just to feel comfortable.
They also know the emergency protocols. Everyone, from new players to team moms, knows the signs of heat exhaustion and stroke. They have a clear plan and roles. This knowledge makes them confident and calm.
The results are clear. Cramps in late games are rare. Energy and focus in the final quarter are high. Players feel stronger and more in control, even in tournaments. They turned a challenge into a competitive advantage.
This shows that beating the heat is more than just drinking water. It’s about creating a smart, team-focused system. When safety is routine, performance follows. Your team can be like this too.
Checklists: tournament packing, practice modifications, printable pee color chart
You now have the knowledge. Let’s turn it into your personal game-day power. These final tools put every strategy into your hands.
Start with your tournament bag. Pack more than just cleats and uniforms. Include a cooling towel, a handheld fan, and extra electrolyte packets from brands like Liquid I.V. or Nuun. Don’t forget a small first-aid kit with instant cold packs. Being over-prepared is smart—especially for athletes competing in demanding environments such as global youth football academies, where travel, climate changes, and intense schedules make heat preparation essential.
Next, post our practice modification chart in your team area. It translates WBGT readings into clear actions. A “yellow” reading means more water breaks and lighter drills. A “red” reading means moving indoors. This chart makes quick, safe decisions easy for everyone.
Imagine you’re running fast, but you’re worried about your bra. It’s uncomfortable, chafing, or digging into your skin. We’ve all been there.
Finding the right sports bra is key. It’s not something you can ignore. Experts say to choose one that fits your size and activity level. This is vital for bounce control and comfort.
A good sports bra keeps you focused on the game, not your bra. It’s not just about feeling good; it’s about playing better. The right support means you can run faster and play harder.
We want to share this knowledge with everyone. We’ll help you find the perfect fit, support, and comfort for your games. Let’s get you ready to play!
Fit fundamentals: band and cup measurement at home, sister sizing, try‑on moves for soccer (jumps, sprints, cuts)
Finding the right sports bra is like getting your soccer cleats just right. It starts with the right size. A good sports bra fit is key for comfort and support during games. Here are simple steps to follow at home.
First, use a soft measuring tape. You need to measure your band and bust sizes. For the band, wrap the tape around your ribcage, just below your bust. Make sure it’s level and parallel to the ground. For your bust, measure around the fullest part of your chest, but don’t pull too hard. Write down both numbers.
Your band size is your base. The difference between your bust and band sizes tells you your cup size. Each inch difference is one cup size (e.g., 1 inch = A cup, 2 inches = B cup). But remember, always check the brand’s size chart. Sizes can vary between brands, so your perfect fit might not be what you expect.
Ever found your size sold out? That’s where “sister sizing” comes in. If your band feels too tight, try a bigger band and smaller cup size. If it’s too loose, go down a band and up a cup. It’s not a perfect swap, but it can help when your first choice isn’t available.
Now, it’s time to test the bra in the fitting room. A bra might feel fine standing up but not during action. Put it through a soccer workout:
Jumping Jacks: Test for vertical bounce control.
Sprints in Place: Mimic forward motion to check for strap slip and overall hold.
Lateral Shuffles: Simulate cutting moves to see if the bra provides enough side support.
If the band rides up during these moves, it’s too big. A band that’s too loose is like shin guards that slide down—it just doesn’t work! You want secure, chafe-free support that lets you focus on the game, not your gear.
Take your time with this process. A great sports bra fit is your first teammate on the field.
Support types: compression, encapsulation, hybrid—who needs what by size and position
Not all sports bras are the same, and for soccer players, picking the right one is key. You need to decide between compression, encapsulation, or hybrid support. This choice helps prevent bounce and chafing during games.
A compression bra is like a tight, all-in-one package. It wraps your chest tightly, keeping breast tissue flat. This style is often called a “second-skin” fit.
Compression is great for high impact support if you’re an A, B, or small C cup. It’s simple, light, and perfect for those who like a unified feel. For soccer’s constant motion, it offers a solid base layer of control.
Encapsulation is like placing two items in a structured box. These bras have separate, molded cups for each breast. They lift and separate, not just press.
This design is a powerhouse for high impact support, best for C+ cup sizes. Lab tests and athlete feedback show it’s superior at preventing movement. If you’ve felt bounce during a corner kick or a sudden cut, this style is designed to solve that.
The hybrid bra is the third option. It combines the best of both worlds. You get the all-over compressive hug of a compression bra, plus the structured, individual support of encapsulated cups.
For soccer’s dynamic mix of endurance runs and explosive sprints, a hybrid is often the MVP. It offers versatile, high impact support that adapts to your entire range of motion on the field.
So, who needs what? If you’re in smaller cup sizes and prefer a minimalist feel, compression is a good choice. For larger cup sizes where bounce control is key, encapsulation is often recommended. And for many players seeking adaptable, secure comfort, the hybrid is the best option.
With this knowledge and our general sports bra guide for fit fundamentals, you’re ready to shop like a pro. Your position matters too—a midfielder logging miles might prioritize something different from a goalkeeper making quick, reactive moves. Choose the support that matches your body and your role on the pitch!
Features that matter: straps, adjustability, racerback vs U‑back, hooks, pads, seams, anti‑chafe fabrics
Let’s explore the key features that make a sports bra perfect for game day. It’s like going on a feature safari. We’re looking for the details that keep you comfortable during every move.
The straps are the first thing to consider. Wide, adjustable straps are essential for soccer. They spread the weight of your bust evenly, avoiding discomfort.
Adjustability is key, whether you’re growing or changing your workout routine. A bra with adjustable straps lets you customize the fit. This ensures a snug, comfortable feel without feeling restricted.
The racerback style is great for soccer players. It allows for more movement, which is important for throwing and heading. The straps are closer together, providing stability.
The U-back style is another option. It’s better for those with broader shoulders, as it offers a wider strap placement. Your position on the field might influence your choice. For example, a midfielder might prefer the racerback, while a goalkeeper might like the U-back.
How you put on your bra is important too. Hook-and-eye closures are easy to use and allow for a precise fit. Pullover styles, on the other hand, offer a smooth feel under your jersey.
Removable padding is a great feature. It adds modesty and a smooth look under thin jerseys. You can remove the pads for washing or if you prefer a natural shape.
The bra’s construction is key for preventing chafing. Look for fabrics labeled as “anti-chafe” or “chafe-free.” These materials are designed to keep you dry and comfortable.
Check the seams too. Flat-locked or seamless construction is a big plus. Brands like Nike and DSG use these methods to ensure a smooth feel. This is important for long games, as any irritation can be distracting.
All these features work together. They turn a good sports bra into a great one. Your comfort and focus should never be affected by your gear.
Heat and sweat: breathability, quick‑dry, washing care to extend life
When you’re running fast on the soccer field, you don’t want a heavy, wet sports bra. Soccer is very sweaty. How your gear handles sweat can greatly affect your comfort and focus.
Advanced fabric technology is the key. Unlike cotton, which soaks up sweat and stays wet, these materials are made to wick moisture away from your skin. It’s like having a personal cooling system in your bra.
Brands like Nike, Under Armour, and CALIA use special technologies. Their Dri-FIT, HeatGear, and Breeze technologies quickly move sweat to the outside where it can evaporate. This keeps you dry and cool, improving breathability.
This high breathability is key. It lets air move around, preventing a sticky, chafed feeling during long games or training. When shopping, look for “moisture-wicking,” “quick-dry,” or “ventilation” tags. These show the fabric is made for action.
But, this smart fabric needs smart care to keep working well. Washing your sports bra right helps it last longer and keeps its wicking powers.
Here are simple care tips to keep your bra in top shape:
Wash in Cold Water: Use a gentle cycle with mild detergent. Hot water can damage elastic fibers.
Skip the Fabric Softener: It blocks the technical fibers’ ability to wick moisture. Your bra won’t work as well!
Air Dry Always: Tumble drying is too hot for your bra. Lay it flat or hang it to dry.
Close Hooks: Fasten any hooks before washing to prevent snagging.
For more on washing athletic wear, Nike has a detailed guide. Taking good care of your gear means it will support you, game after game.
By picking bras with breathable, quick-dry fabric and caring for them right, you’re not just staying comfy. You’re making sure your gear is as tough and ready as you are for every challenge.
Teen considerations: growth spurts, privacy and body‑positive shopping; school/team ordering tips
For young soccer players, finding the right sports bra is more than just support. It’s about growing with confidence. With smart strategies, you can find gear that grows with the athlete and keeps them comfortable.
Growth spurts are a big challenge. A bra that fits today might feel tight later. Look for adaptable designs with adjustable hooks and straps for a wider fit range.
For teen athletes figuring out their cup size, stretchy styles or encapsulation bras are more forgiving. They offer a bit of stretch without rigid cups.
Reviews for the Nike Girls’ Pro Swoosh Sports Bra highlight its flexibility. Parents love its durable fabric that holds up through growth and intense activity. The DSG Girls’ Performance Bound Shelf Bra is also praised for its simple, wide-band compression fit that works for various stages.
Privacy and a positive mindset are key. Shopping for a sports bra can feel vulnerable. Create a low-pressure environment. Use detailed size charts and consider ordering two sizes to try at home.
In stores, ask about quiet hours or use self-checkout options. Focus on performance and comfort, not just measurements. Use positive language to help them play better, not how their body looks.
When ordering for a whole team or school, organization is key. Bulk orders can simplify things and often come with discounts. Here are some effective tips:
Organize a Sizing Session: Work with a retailer to host a private fitting event. This gives each player a chance to try a few styles in a supportive, team-only setting.
Choose a Versatile Style: Pick one or two high-quality, widely-liked models. The Nike Pro series is a frequent team choice because it suits many body types and activity levels.
Collect Sizes Anonymously: Use a simple form where players can list their size and style preference without announcing it to the group. This protects everyone’s privacy.
Order a Few Extras: Always order a couple of extra bras in common sizes. This covers last-minute additions, replacements, or those surprise growth spurts!
The right sports bra for a teen athlete supports their game today and adapts for tomorrow. By focusing on adjustable features, fostering a positive experience, and planning ahead for team needs, you set them up for many chafe-free, confident match days.
Budget to premium: value picks, mid‑range, and pro‑level options; how to read brand size charts
Finding the right sports bra doesn’t have to be hard or expensive. There are great options at every price level. We’ll help you understand the different tiers: value, mid-range, and pro-level. Each one meets different needs and budgets, and there’s no shame in choosing what’s right for you and your sport.
Let’s look at real examples from the field, so you know exactly what to expect when you shop.
Value Picks: The Essential Starters
Value sports bras are your reliable teammates. They offer good support and comfort without costing a lot. They’re perfect for beginners, growing teens, or anyone starting their sports gear collection.
Brands like Champion and DSG (Dick’s Sporting Goods) are great here. You can find styles from $10 to $25. The Champion Spot Comfort Full-Support Bra, often called a “Best Value” pick under $20, is a great example. These bras focus on essential compression or encapsulation and use breathable fabrics.
Think of this tier as your practice gear: dependable, does the job well, and lets you invest more elsewhere.
Mid-Range Performers: Tech and Durability
In the mid-range, from $25 to $55, you see better technology and construction. This is where brands like Nike, Under Armour, and CALIA shine with features for serious training.
You’ll find better moisture-wicking, more strategic seam placement to reduce chafe, and often a hybrid of compression and encapsulation for a more customized feel. A Nike Pro Indy or a Under Armour Infinity Mid bra in this range introduces more durable straps and longer-lasting elastic.
This tier is for players who are committed to their sport and want gear that keeps up with intense drills, league play, and frequent washing.
Pro-Level Investment: Precision for Demanding Play
At the premium level (often $55+), you’re investing in advanced materials and precision engineering. These bras are built for elite athletes or anyone who needs maximum, unwavering support for high-impact play like competitive soccer.
Think of features like targeted power-mesh panels for extreme breathability, seamless laser-cut edges to eliminate all chafing, and highly adjustable, multi-configuration straps. The Nike Alpha line or high-support options from specialist brands fall here.
The investment pays off in unparalleled fit, minimal distraction, and often a longer lifespan due to top-tier fabric and construction.
The Golden Rule: Decoding the Brand Size Chart
Here’s the most important lesson in your entire search: the tag in your drawer means nothing. A “Medium” in Nike is not the same as a “Medium” in Under Armour. Your true guide is always, always the brand’s specific size chart.
How do you use it? First, have your recent band and cup size measurements handy. Then, find the brand’s chart—usually on the product page. Don’t assume! Follow these steps:
Match your band measurement to the chart’s band column.
Find your cup size in the corresponding row.
See what size label (S, M, L, or 34C, 36B, etc.) that intersection points to.
For example, your measurements might point to a “Large” in Brand A but a “Medium” in Brand B. This isn’t about your body changing; it’s about each brand’s unique fit model. Trusting the chart is the single best hack for a perfect sports bra fit and avoiding returns.
Whether you choose a value champion or a pro-level precision tool, using the size chart ensures your pick supports you perfectly, from the first sprint to the final whistle.
Problem solving: nip coverage, digging bands, strap slip, bounce on corners; alterations and hacks
Let’s tackle those common sports bra gripes that can disrupt your focus during a game. Even a great bra might need a small tweak to become perfect for you. We’re here with practical fixes and clever hacks so you can play in total comfort.
Remember, the first solution is always a proper fit. If you’re not there yet, one of these targeted strategies will likely help.
Solving the Nip Coverage Dilemma
This is a common concern for modesty and comfort. Many sports bras, like the CALIA Restore style, come with sewn-in foam pads that provide reliable coverage.
If your bra has removable pads, you can adjust them for a smooth look. No pads? A simple hack is to purchase a set of lightweight, moisture-wicking inserts. They slip right into the bra’s inner lining.
When the Band Digs In
Feeling a tight band dig into your ribs or back is painful. User reviews often mention this “dig in” sensation. First, check if you’re in the right band size. The support should feel snug, not restrictive.
If sizing up the band feels too loose, try a band extender. This small accessory adds an inch or two of breathing room. Another option is to explore “sister sizing”—going up a band size and down a cup size.
For immediate relief, apply an anti-chafe balm where the band rubs. Source data confirms that chafing is often caused by sweat combined with friction.
Stopping Strap Slip for Good
Slipping straps are annoying and can compromise support. This often happens with traditional U-back styles during dynamic movement.
Look for bras with grippy silicone strips along the inner part of the straps. These grip your skin and shirt to stay put. You can also buy a racerback converter—a small clip that pulls the straps together in the back.
Converting a U-back to a racerback not only stops slip but often enhances bounce control.
Conquering Bounce on Corners and Cuts
If you feel movement during sharp lateral cuts (“taking corners”), your bra might not offer enough support. This is a key bounce control moment.
Reassess your support type. Encapsulation bras (which cup each breast separately) often provide superior stability for high-impact lateral motion compared to compression styles. A hybrid bra could be your game-changer.
Ensure your straps are adjusted properly—they should be tight enough to lift without digging.
Smart Alterations and Lifesaving Hacks
Don’t retire a bra just yet! A bra with a slightly stretched band can become your perfect low-impact training or recovery day bra.
For seams that irritate, a preventative layer of anti-chafe balm works wonders. Always wash your bras in cold water and air dry to preserve the elasticity of the band and straps.
If removable pads bunch up, you can carefully stitch them in place at the corners. For persistent issues, some specialty stores offer professional bra alterations.
With these solutions, you can transform almost any good bra into your perfect match day partner. A little adjustment goes a long way!
Role-model voices: local college/pro sharing fit lessons learned
Let’s look beyond just specs and hear from athletes who faced the sports bra challenge. Their real-life experiences offer valuable tips you won’t find in any product description. Learning from their trials and errors is priceless.
Here’s a snapshot of insights from players who’ve been there, done that, and found their perfect match.
Athlete Profile
The Challenge
Solution Found
Key Lesson
Collegiate Volleyball Player
Dealing with a band that rolled up during dives and digs, causing constant distraction.
The DSG Do It All bra with its longer, reinforced band that stayed perfectly in place.
A secure, non-rolling band is a game-changer for comfort and focus during play.
Club Soccer Player, 34DDD
Struggling with painful bounce and movement during sprints and cuts, making it hard to perform.
An encapsulation-style bra that provided total lockdown. Her quote: “There’s no movement while jumping or bouncing.”
For larger cup sizes, encapsulation or hybrid support is often essential for true high impact support.
Multi-Sport Teen Athlete
Feeling overwhelmed by options and unsure what “good fit” actually feels like for soccer and track.
Trying on multiple styles (compression, encapsulation) and realizing comfort is king. Found one that was “the most comfortable sports bra I’ve ever tried.”
You must try on and move in a bra. Ultimate comfort leads to better performance and confidence.
These stories teach us a few key lessons. First, trying on multiple styles is non-negotiable. What works for your teammate might not work for you. The volleyball player’s fix was a specific band design, while the soccer player needed a different support system entirely.
Second, prioritize function over fashion. The right bra might not be the cutest one, but if it lets you forget it’s there and play your hardest, it’s the winner. Seam placement was a big deal for our testers, as bulky seams in the wrong spot can lead to chafing during a long match.
Lastly, there’s strength in community. Asking for recommendations from older players, coaches, or even in online forums can point you toward brands and styles you might not have considered. Many teen athletes find their best fit through a friend’s suggestion.
Use these voices as your guide. When you’re shopping, think of the soccer player who found lockdown support or the teen who prioritized comfort. Let their hard-earned lessons shorten your search and get you to a bra that supports every goal, sprint, and victory.
Buyer’s checklist + printable fit guide and exchange policy tips
Now that you know the basics and advanced tips, let’s make a simple plan. This checklist will help you find the perfect sports bra fit.
First, find out your true size and support needs. Measure your band and cup again. Choose between compression and encapsulation based on your size and activity level. A good sports bra fit means no bounce and full focus on the game. Players training in competitive environments such as global youth football academies often prioritize proper gear fit to support performance and reduce distractions during high-intensity sessions.
Next, look for performance features. Choose fabrics that breathe and dry quickly to handle sweat and heat. Try the bra with soccer moves like jumping and sprinting. Make sure the seams are smooth to avoid chafing.
Make a printable fit guide to help you shop. Write down your measurements, support type, and essential features like adjustable straps. Keep this guide handy when shopping online or in stores.
Be smart about exchange policies. Many suggest buying two sizes of the same bra to try at home. Always check the return policy and look for brands with free return shipping. Be aware of restock fees that might apply.
Finding the right soccer sports bra is a win. It makes every match day more comfortable, confident, and free from chafing.
That burning question, “When can I get back out there?” It’s the first thing on every player’s mind after a setback. We hear you! This guide is your companion, walking with you from the initial hurt to a confident and healthy comeback.
Forget the old-school calendar countdown. Modern sports medicine has made a big change. We now use a criterion-based approach with clear, objective tests. Think of it as your personalized playbook for a stronger, safer return to the pitch.
Feeling better doesn’t always mean you’re game-ready. Coming back too soon is a top cause of that frustrating re‑injury risk. The real goal isn’t just returning to activity—it’s returning prepared.
This method turns uncertainty into an empowering pathway. We’ll show you how hitting specific performance milestones, not just watching the clock, builds your best defense. Let’s build your roadmap together!
Principles: tissue healing windows, pain scales, criteria vs time; the “no limp, no swell, full ROM” rule
Forget the calendar; the true roadmap for returning to soccer lies in meeting specific, measurable milestones. The old question, “Has it been six weeks yet?” is being replaced by a smarter, safer approach. This modern RTP protocol is built on principles that respect your body’s biology while removing guesswork.
First, we must respect tissue healing windows. Think of this as your body’s internal construction schedule. Just as you can’t rush a building’s foundation to dry, you can’t accelerate how ligaments or muscles repair. These biological timelines give us a general framework, but they aren’t the final word on your readiness.
Pain is your body’s messenger, not its warden. Using a simple 0-10 pain scale helps you communicate what you’re feeling. The goal isn’t to reach “zero pain” before doing anything. Instead, we learn to differentiate between sharp, concerning pain and general discomfort from working hard. This turns pain from a stop sign into a useful guide.
Here’s the core principle: criteria beat the clock every time. A criteria-based approach asks concrete questions about your performance, not just the date on your medical chart. This is the heart of a robust RTP protocol.
Instead of “Is it week four?”, we ask:
Can you demonstrate 90% strength symmetry between your injured and healthy leg?
Can you hop, land, and change direction with proper control?
Is your movement quality smooth and confident?
These are your tangible benchmarks. “Cleared” by a doctor often just means you’re medically stable to start this progression. The real work—and the real safety—comes from hitting these performance targets.
This leads us to a powerful, simple rule used by top clinicians: “No limp, no swell, full ROM.” It’s an easy daily checkpoint. “No limp” means you walk normally. “No swell” means no new swelling after activity. “Full ROM” means you have your complete, pain-free range of motion back. Master this trio, and you’ve built a solid foundation for the harder tasks ahead.
By shifting from time to criteria, we turn abstract healing into daily, achievable goals. It empowers you with clarity. You’re not just waiting; you’re actively proving your readiness with every session. For more on building a resilient body, explore these essential recovery tips for female soccer.
Let’s start your journey back from an ankle sprain. First, we focus on strengthening your stabilizer muscles. This path is not a race. It’s a careful plan to make you stronger and more resilient for the game.
Your ankle’s ligaments are like the ropes on a bridge. After a sprain, they’re loose. We need to tighten them up again. This is where balance and knowing your body’s position come in.
Proprioception is like your body’s GPS. It helps you know where you are. After an ankle sprain, this system gets mixed up. We start with simple balance holds on a firm surface.
Then, we move to unstable surfaces like foam pads. The goal is to wake up those tiny muscles that help prevent rolling.
Phase 2: Rebuild Calf Strength
Your calf muscles protect your ankle. Strong calves help with landing and pushing off. Do heel raises every day, focusing on the slow lowering part.
This strength is key for absorbing impact during games.
Phase 3: Master Change of Direction
Soccer involves lots of cuts and twists. We start with gentle figure-8 walks, then jogging. Later, we add in 45-degree cuts and 90-degree turns.
Each step should feel confident and pain-free before moving on. This is your sport-specific testing.
The Tape and Brace Decision: Confidence vs. Independence
Early on, tape or a brace can be helpful. They provide feedback and boost confidence. But, the goal is to use them less as you get stronger.
Use Tape/Brace For: Early training, high-intensity sessions, or if unsure.
Wean Off When: You pass balance tests, calf strength is even, and you do drills without hesitation.
Phase 4: Smart “Return Minutes” and Load Monitoring
How do you know when to play in a game? We watch your “return minutes” closely. GPS minutes and load data help a lot.
Total Distance: Gradually increase your workload.
High-Speed Running: Carefully add back sprinting.
If you don’t have GPS, a time-based plan works well. Start with 15 minutes of small-sided games. Increase by 10-15% each week, if you’re doing well.
This careful increase is key to avoiding another injury.
By following this ankle sprain pathway, you build a strong ankle. You’re not just healing; you’re making your body better for the game.
Hamstring/Quad Pathway: Eccentric Strength and Speed Progression
Recovering from a hamstring or quadriceps injury is more than just healing. It’s about rebuilding your muscles to handle high-speed demands better than before. This pathway focuses on two key tools: eccentric strength and progressive sprint exposure. We’ll show you a plan to turn vulnerability into resilience.
Your hamstring is like a high-performance bungee cord. It needs to control the stretch and snap back. This is called eccentric strength—the muscle’s ability to lengthen under tension. For a hamstring strain, this phase is often the weakest link.
The Nordic curl is a must-have in top-tier rehab. Why? It directly targets the hamstrings’ eccentric capacity. You lower yourself slowly, fighting gravity, which builds the exact control needed to decelerate your leg during a full-speed sprint.
Start with assisted Nordics (using a band or partner) and progress to full versions. Consistency here is your foundation. It makes the muscle tissue more tolerant to the rapid stretching forces it will face on the field.
Once you have a base of strength, we reintroduce speed. But we don’t just go full throttle on day one. We follow a high-speed running progression. Your first sprint session back might be at just 70% of your maximum perceived effort. It feels easy, and that’s the point!
The goal is to expose the muscle to speed without overwhelming it. A simple weekly plan looks like this:
Week 1: Straight-line runs at 70-80% speed, focusing on smooth technique.
Week 2: Introduce 85-90% speed bursts over 20-30 yards.
Week 3: Incorporate 95%+ “near-max” efforts with full recovery.
Week 4: Integrate sport-specific sprints, like chasing a loose ball.
This brings us to the most critical concept: sprint exposure tracking. A single fast run is one thing. Doing it multiple times in a week is the real load. Tracking this exposure prevents the classic error of doing too much, too soon.
You need to manage both the intensity and the volume. Use the table below as a simple template. It helps you see the weekly progression clearly, ensuring you’re applying the precise stress needed for adaptation, not overload.
Week
Intensity (% of Max Speed)
Total Sprint Distance (yards)
Sessions Per Week
Key Focus
1
70-80%
150
2
Form & Control
2
80-90%
300
2-3
Building Volume
3
90-95%
450
3
Near-Max Efforts
4
95-100%
600+
3
Sport-Specific Context
By combining dedicated eccentric work with a tracked speed plan, you give your muscles a clear, safe road back to power. This pathway isn’t just about recovering from a hamstring strain; it’s about returning stronger and more confident in your body’s ability to perform.
Knee pathway: squat/landing control, hop tests, decel tasks, cutting at game speed
Getting your knee ready for soccer is more than just healing. It’s about learning to move well under pressure. After a knee injury, like an ACL tear, your body tries to protect itself. We help you regain trust and strength with each step and turn.
We begin with the basics: squatting and landing right. It’s like learning the alphabet of movement. Can you squat down and get back up evenly? Can you jump and land without your knees buckling? Learning these skills is key. We focus on smooth movements and balanced weight.
Once you’re good at squatting and landing, we move on to hop tests. These tests show how well your knee is doing. A simple hop test tells us about your power and balance. It helps us see how your injured leg compares to the healthy one.
Hop tests are not just about numbers. They also boost your confidence. You see your progress in real terms. We might try different hop tests to check your knee’s readiness in various ways.
Learning to stop quickly is also important. Soccer requires fast stops and starts. Deceleration tasks help you absorb shock safely. We practice stopping, landing after a header, and changing direction quickly. Mastering these skills is key to avoiding injury.
Lastly, we test your skills in cutting and pivoting at game speed. This simulates the fast, unpredictable movements of a real game. We’re not talking about slow turns. We mean quick cuts to dodge defenders, with the ball and adrenaline in play.
This final stage prepares you for the real game. It shows your knee can handle soccer’s demands. Research, like this evidence-based return-to-play protocol, supports these specific tests.
Your journey to soccer readiness is filled with small victories. From your first squat to that fast cut, each step builds your confidence. We’ll support you every step of the way, through every rep, hop, and pivot.
Fitness rebuild: small‑sided games to full pitch; GPS or simple minutes plan; red/amber/green system
Welcome to the exciting phase of your recovery: rebuilding your soccer fitness on the field! We move from isolated drills to the dynamic play you love. This is the On-Field Rehabilitation (OFR) phase, focusing on staged progression.
We begin with small-sided games in a small space. Think 3v3 or 4v4 in a tight grid. These games help you focus on skills and quick decisions without the exhaustion of a full pitch. The small space keeps intensity high while reducing running.
Next, we expand the playing area and add more players. You might go from 5v5 on a half-pitch to 7v7, and then 11v11 on the full field. Each step increases running and tactical complexity, getting closer to real match demands.
To manage this safely, we offer two load management tracks. Choose the one that fits your needs.
The GPS Plan: For teams with tracking tech. We track your GPS minutes—total distance and high-speed running. Each session, we aim for a small increase (10-15%) in these metrics.
The Simple Minutes Plan: No fancy gear needed! Just track total minutes played. Start with 15-20 minutes of small-sided play, then add 5-10 minutes each session as you get used to it.
Both plans help avoid doing too much, too soon. Smart load management is key to avoiding re-injury during this phase.
How do you know if you’re handling the load? Our red/amber/green system helps. Each morning, check muscle soreness, joint stiffness, and swelling.
Based on your answers, you’ll get a color. This color guides your day’s activity. This simple check-in gives vital feedback for your load management strategy.
Color
What You Feel
Recommended Action
Red
Significant pain, noticeable swelling, or stiffness that changes your walking pattern.
Rest day. Contact your clinician. Do not train.
Amber
Mild stiffness or soreness (3/10 on a pain scale), but no swelling or limp.
Proceed with caution. Modify the session—reduce intensity or GPS minutes by 20-30%.
Green
Feeling good! No pain, swelling, or stiffness. Ready to go.
Full steam ahead! Execute your planned session and progression.
See how easy that is? An “amber” day is valuable info. It tells us your body needs a lighter day. Maybe we swap a full-sided game for more technical drills. This system lets you listen to your body and adjust in real-time.
By combining game progression, GPS minutes or minutes-played targets, and the traffic light system, you build fitness with confidence. You’re not just following a calendar; you’re actively managing your comeback. Let’s get you back on the pitch, smarter and stronger!
Psychological readiness: confidence questionnaires, role integration, leadership while sidelined
Coming back from injury is more than just passing physical tests. It’s about gaining mental trust in your body again. Your mind needs a comeback plan, just like your muscles do. Being ready means you can make quick moves or tackle without doubt.
This mental part is strongly linked to a safe return and avoiding secondary injury.
So, how do we measure confidence? Modern sports science has the answer.
Confidence Questionnaires: Your Mental Vital Signs
We can now track your mental readiness, just like physical strength. Confidence questionnaires are great for this. They show your mental state clearly.
These questionnaires might ask:
“How confident are you that your knee will not give way during quick movements?”
“Are you worried about re-injuring yourself when you return to play?”
“How sure are you that you can perform at your previous level?”
Tools like the ACL-Return to Sport After Injury (ACL-RSI) scale measure kinesiophobia. This is the fear of movement because of pain or reinjury. Answering these questions honestly is important for your recovery.
One big challenge in rehab is feeling left out of your team. It’s important to fight this feeling for your mental health and role integration. You can contribute even if you’re not playing.
Talk to your coach about staying involved. Can you attend tactical meetings? Walk through set-piece strategies? Your insights from the sidelines are valuable! Watching game film helps you stay sharp tactically.
This keeps you engaged and ready to return when you’re physically fit.
Leading from the Sidelines
Injury can make you feel like you’ve lost your purpose. Finding ways to lead is a great way to regain your sense of purpose. Your experience is valuable. You can mentor a younger player, help with scouting reports, or lead the warm-up for the reserve squad.
Doing these things shows your team you’re committed. It also gives you a positive focus, fighting the frustration of long rehabs. This proactive approach is key to staying involved in goal-setting.
Remember, your psychological readiness is a real, measurable part of your return-to-play journey. By checking in with your confidence, staying connected to your team, and leading, you build a strong foundation for a successful return to your sport.
The final piece of the return-to-play puzzle isn’t about your muscles—it’s about making sure your entire support squad is reading from the same playbook.
Think of your comeback as a team sport. On your squad, you have the athlete (that’s you!), the coach, your parents or guardians, and the clinician (your doctor or physio). This is your multidisciplinary team. For you to move forward safely, every single person needs to know the game plan.
The most common setback during rehab isn’t a new injury. It’s a communication breakdown. Maybe your coach thinks you’re ready for full practice, but your physio knows your hamstring is at 80%. Perhaps your parents are worried you’re pushing too hard, but you feel great. Without a clear loop, these mixed signals can lead to frustration or, worse, a re-injury.
To prevent this, everyone must be aligned on three things: your current progress, your temporary limitations, and the very next steps. Crucially, you should be actively involved in planning your goals. This isn’t a plan done *to* you, but *with* you.
So, how do you keep a whole team on the same page? The answer is surprisingly simple: documentation. A basic shared log sheet becomes your team’s central hub for information.
Imagine a simple template where you track just a few key things each day:
Pain level (on a 0-10 scale)
Exercises completed
Your confidence in the injured area
Any notes or questions for your clinician
This simple act of logging is powerful. It transforms “my knee feels weird” into “my pain was a 2 during agility drills, and my confidence is a 7.” You turn subjective feelings into objective data.
Your coach can see what you’ve safely done. Your clinician gets clear feedback to adjust your program. Your parents have visibility into your journey. This shared documentation guides decisions with facts, not guesses.
Building this communication loop and using a basic template ensures your physical hard work pays off. It’s the system that turns individual effort into a coordinated, successful team victory.
Success story vignette: local player’s comeback blueprint
A torn ACL can feel like the end, but for Maya, it was just the start of a journey back to soccer. Her story is a real-life comeback blueprint that shows how to overcome challenges.
Maya’s criteria-based return began right after surgery. Her first goal was to have “no limp, no swell, full ROM” in her knee. Each week, she and her physical therapist checked off boxes: quad strength, balance on one leg, and pain-free range of motion. This phased approach kept her focused on controllable steps, not the distant finish line.
The day she took her first hesitant jog on an anti-gravity treadmill was a huge mental victory. It was slow and awkward, but it was forward motion. From there, her blueprint progressed to strength. She built eccentric quad strength with controlled squats and, importantly, worked on her landing mechanics. Every rep was a brick in her foundation.
Then came the functional tests—the true gatekeepers. Passing her hop tests for distance and symmetry was a major milestone. It proved her leg could handle impact and produce power. But the real challenge was the cutting drill at game speed. The first few attempts, she hesitated. Her brain remembered the injury. This is where building confidence off the field became as important as physical rehab.
Her journey wasn’t a straight line. She hit an amber week where swelling spiked after a intense session. Instead of pushing through, her plan had a built-in pivot. They dialed back the load, focused on recovery, and re-tested the criteria before advancing. This setback taught her to listen to her body—a vital lesson for any athlete.
The triumph came on a rainy Tuesday. After months of work, Maya executed a series of sharp 45-degree cuts at full speed, planting and pushing off without a flinch. She passed her final cutting drill. The smile said it all. Her final phase integrated her into play: starting with 4v4 small-sided games to rebuild soccer fitness and decision-making in tight spaces.
Maya’s success story shows the “how.” Her comeback blueprint wasn’t a rigid calendar, but a dynamic map. It used objective tests (hop tests, strength measures) as checkpoints, not dates. It prepared her mind as much as her knee. And it turned a daunting ACL tear into a series of achievable, celebrated wins.
Checklists and sample week‑by‑week schedule
You now understand the principles and pathways. Let’s turn that knowledge into action. This is your practical toolbox for a safe return.
Start with these simple checklists. Print them and use them to guide your daily progress. The pre-running checklist confirms your ankle or knee is stable. The pre-training checklist ensures you have full range of motion and no swelling. The pre-match checklist evaluates your confidence and readiness for game speed.
Next, see how these pieces fit into a timeline. Below is a sample 6-week framework for a common Grade 2 hamstring strain. It shows how to balance eccentric strength work, running progression, and soccer-specific drills.
Sample RTP Protocol (Weeks 1-6):
Weeks 1–2: Focus is on pain-free walking, light Nordic curls, and stationary ball work.
Weeks 3–4: Introduce straight-line jogging, increase Nordic volume, and start small-sided games in a restricted area.
Weeks 5–6: Progress to high-speed running, deceleration drills, and full-pitch tactical sessions. Use your pre-match checklist before any scrimmage.
This template is not a rigid prescription. Every athlete and injury is unique. Use this flexible RTP protocol as a starting point for discussions with your physio or doctor. Adapt the timelines based on your own daily checklists and how your body responds. Players preparing for competitive opportunities, including international soccer talent scouting, should prioritize complete recovery to ensure safe performance and long-term development.
Your confident comeback is built one checked box and one completed session at a time. Take this framework, work with your team, and map your own path back to play.
Welcome to your essential guide for playing with confidence! We’re here to teach you a key part of the game. When learned right, it can empower you on the field. It’s a skill that adds a lot of value to your play.
This skill is a learnable technique. It mixes smart decision-making with physical readiness. You’re in charge, making good choices before the ball comes.
Experts like Bakhos and Tator have shown concussion risks in youth sports. This isn’t to scare you, but to highlight the importance of proper training. The risk is real, but it’s manageable with the right approach.
Our aim is to help you master this skill safely. With the right foundation, it becomes a powerful tool. Let’s start building that confidence together!
Technique pillars: eyes open, mouth closed, attack the ball, use the forehead, core/neck brace, land balanced
Mastering the art of heading involves six key elements. These are like the foundation of a strong house. If any part is weak, the whole thing can fall apart. Learning these pillars turns heading into a powerful, controlled, and safe skill.
Let’s explore each part of a proper heading technique:
Eyes Open: You must see what you’re hitting. It sounds simple, but fear makes us flinch. Keeping your eyes on the ball from its flight to the moment of contact is your first act of courage and control.
Mouth Closed: Clamp your jaw shut! An open mouth is a direct path for force to rattle your teeth and jolt your skull. A clenched jaw helps stabilize your entire head and neck.
Attack the Ball: This is the mindset shift. Don’t wait for the ball to hit you. Move toward it with purpose. This proactive movement allows you to meet the ball at its highest point and generate your own power.
Use the Forehead: The hard, flat bone of your forehead is the “sweet spot.” Hitting with the hairline or temple is dangerous and ineffective. Aim to connect the ball right between your eyebrows and hairline.
Core/Neck Brace: This is your body’s natural shock absorber. Just before impact, tighten your stomach, back, and neck muscles. This rigid brace transfers force through your solid frame instead of letting your head snap back.
Land Balanced: The move isn’t over at contact. A graceful, balanced landing on two feet means you were in control throughout. If you’re falling over, the technique leading up to it was likely off.
Now, let’s dive a little deeper into why these pillars work together. Attacking the ball isn’t about being reckless. It’s about confident movement that lets you use the strongest part of your forehead with precision. When you move forward, you meet the ball, not the other way around.
Using your forehead correctly is like using the sweet spot on a baseball bat. Hit it there, and the transfer of energy is clean and powerful. Hit it elsewhere, and the impact feels jarring and weak. Your forehead is designed to handle this force when the rest of your technique supports it.
That’s where the core and neck brace comes in. Imagine your body as a coiled spring. The brace turns your torso and neck into a single, stable unit. When the ball makes contact, the force travels down this solid column into your legs and the ground, instead of isolating in your head. It’s the difference between a brick wall and a swinging gate during impact.
Lastly, landing balanced is the tell-tale sign of a good header. It proves you were strong, braced, and in control from take-off to touchdown. It’s the graceful finish to a powerful move, and it keeps you ready for the next play instantly.
By treating these six elements as one complete system, you build a heading technique that is both effective and far safer. You’re not just heading the ball; you’re commanding it with your entire body’s strength and intelligence.
Drills: wall work, ball toss, timing off crosses, jump‑and‑head with safe landing; rep counts by age
It’s time to get the ball moving with exercises that focus on timing and control. Think of this as your personal training blueprint, designed to build confidence from the ground up.
We start simple. The goal is quality movement, not power. Perfect practice makes perfect performance.
Wall Work: Your Foundation. Stand a few feet from a wall. Gently toss the ball against it and meet the rebound with your forehead. This isn’t about force! It’s about learning to see the ball and brace your neck and core just before contact. Do this until the motion feels smooth and automatic.
Partner Toss: Adding a Target. Have a partner softly toss the ball to you from 5-10 feet away. Your job is to focus on the ball’s arc, move your feet to get in line, and make clean contact. This drill sharpens your timing without the pressure of a jump.
Timing Off Crosses: The Game Changer. This is where it gets exciting! Start with gentle, lofted crosses from the side. Your focus shifts entirely to the timing of your run and jump. Judge the ball’s flight, attack it at its highest point, and use your forehead. The safe landing—on two feet, knees bent—is just as important as the header itself.
Jump-and-Head with Safe Landing: Putting It All Together. Combine everything. Jump vertically to meet a crossed ball, execute a controlled header, and stick the landing. This drill builds the athletic coordination needed for real games. Remember, a good header is a quiet one—no crashing sounds!
How many repetitions should you do? Quality always beats quantity. Fatigue leads to sloppy form, which increases risk. Here’s a sensible guide for a single practice session:
Age Group
Recommended Drill Reps*
Key Focus
Under 10
5-10 gentle headers
Technique introduction, no jumping
10-12
10-15 controlled headers
Basic form, light jumping
13-15
15-20 varied headers
Timing off crosses, landing
16+
20-30 game-like headers
Advanced timing, contested scenarios
*These are total headers across all drills in a session. Spread them out with plenty of rest. If your timing or form breaks down, stop immediately. You’ve built the muscle memory you need for that day.
Mastering these drills creates a safe, effective path to heading proficiency. Let’s move on to building the physical strength that supports this skill.
Neck and trunk strength: isometrics, resisted bands, plank/antirotation; 2x/week plan
Your neck and torso muscles act as shock absorbers when you head the ball. They don’t just move your head; they also stabilize it. Building neck strength isn’t about getting big. It’s about making your body strong enough to handle the ball safely.
A study by Le Flao and colleagues found that simple training works. Young athletes did a 16-week program, twice a week. They used resistance bands and bodyweight exercises. The results showed better neck strength and less head movement when hitting the ball.
Let’s make training simple. You can use your hands and a resistance band. We focus on three main areas:
Isometrics: Push your head against your palm in all directions. Hold for 5-10 seconds. This builds stability without moving.
Resisted Bands: Use a band around your head and anchor it. Slowly nod and turn your head against the pull. This strengthens your neck through motion.
Plank & Anti-Rotation: Your core is key! Hold a forearm plank and do anti-rotation exercises. This keeps your trunk strong.
Here’s a simple 2x/week routine for non-consecutive days:
Warm-up: 5 minutes of light neck circles and shoulder rolls.
Isometric Holds: 3 sets of 10-second holds in each direction (front, back, left, right).
Band Resisted Nods/Turns: 2 sets of 12 controlled repetitions.
Core Brace: Finish with a 30-second plank and 10 anti-rotation reps per side.
Consistency is key, not how hard you do it. Start light, focus on form, and increase slowly. This strength work, along with technical drills, makes heading safer. Your neck strength is your silent guardian on the field!
Equipment and environment: ball size/psi, wet ball risks, practice caps; communication on contested headers
Before you jump for a header, think about the ball’s size and pressure. Your gear and field conditions are like silent teammates. They can help you play smart or increase your risk. Let’s look at these details that make a big difference.
Ball Size and Pressure Matter More Than You Think
Choosing the right ball is key for safety. Studies show that changing ball mass and ball pressure can lower concussion risk. A lighter, properly inflated ball is safer for your head and neck.
Make sure the ball size matches the player’s age. Young players should not use adult-sized balls. The correct ball pressure (measured in PSI) is also important. Too much pressure makes the ball hard, while too little makes it hard to control.
Age Group
Official Ball Size
Recommended PSI Range
Safety Notes
U-8 to U-10
Size 3
6.0 – 8.5 PSI
Lighter mass is critical for skill introduction.
U-11 to U-13
Size 4
7.0 – 9.0 PSI
Standard pressure supports technique development.
U-14 & Older
Size 5
8.5 – 11.0 PSI
Never exceed max PSI; check pressure weekly.
The Hidden Danger of a Wet Ball
A wet soccer ball is very dangerous. It can become much heavier when wet. This extra weight increases the impact if you head it. Always use a dry ball for heading drills. If it’s raining, limit heading or practice without the ball.
Use “Practice Caps” to Protect Your Brain
Set limits on repetitive heading in your training. For example, youth players might do 10-15 headers per session. This rule helps your brain and neck while building skill. It’s a smart step for long-term safety.
Communication: Your Best Tool for Contested Headers
Being smart on the field is key to safety. Many injuries come from collisions, not the ball itself. Learn to communicate clearly. Call “Mine!” or “Keeper!” to avoid collisions.
Also, be aware of your surroundings before heading. If someone else is in a better position, let them take it. Courage in soccer means making safe, smart plays for everyone.
By managing your equipment, respecting risks, and talking on the field, you create a safety system. Every header becomes a moment of confident skill.
Youth policies: age‑based limits, when to introduce skill, alternatives in sessions
Understanding youth heading limits is key to safe skill development in soccer. These rules protect kids, letting them enjoy the game while growing. They’re not about holding players back.
In 2015, the US Soccer introduced new guidelines for young players. Here’s what changed:
Players under 10: No heading in practice or games.
Players aged 11–13: Limited heading in practice; coaches should introduce the technique gradually with light repetition.
Other big organizations, like U.S. Youth Soccer, also have similar rules. These not as restrictions but as a smart plan. They help kids learn other important skills while their brains and bodies grow.
So, when is the right time to introduce heading? It’s when it’s age-appropriate and built on strength and technique. For 11-13 year olds, it should be gentle and focus on perfect form, not power.
The key is progression. Kids shouldn’t do too much too soon. They need to master basic techniques first.
What do coaches do with under-10 players or on “no-heading” days? They get creative! There are many fun drills that build soccer skills without head-to-ball contact.
Here are some great session alternatives:
Juggling with the Thighs and Chest: Boosts ball feel and coordination.
Footwork and Agility Ladders: Develops balance and foot speed for jumping and landing safely.
Target Practice with Throws: Players use an underhand toss to hit a target on the wall, learning about trajectory and accuracy.
Shadow Jumping: Practice the jumping and landing motion without a ball, focusing on a stable, balanced finish.
These activities keep players fully involved, improving their athleticism and soccer IQ. They turn downtime into skill-building fun.
Remember, youth heading limits are your ally. They provide a clear, science-backed timeline that puts safety first. By following them and using smart alternatives, you’re not avoiding a skill—you’re building a smarter, stronger, and more confident player for the long run. Let’s use this framework to coach with confidence and care!
Progressive Exposure Ladder: From Seated Headers to Aerial Challenges
A progressive exposure approach makes the scary header into easy steps. It’s like a ladder. You start at the bottom and climb up, step by step. This way, you build skills and confidence slowly.
Our ladder has four levels. Each level adds a new challenge while you practice the basics you’ve learned.
Seated Headers: This is your starting point. Sitting on the ground makes it easier. You focus on the key techniques: eyes open, mouth closed, and using your forehead. It’s all about learning the right moves safely.
Standing Headers: Now, you add balance. Standing up, you learn to move your weight forward. This step teaches you to land on both feet. Start with a toss from a friend or a self-toss from a few feet away.
Jumping Headers (with a Safe Landing): Here, you jump a little. The goal is to jump and land softly. The ball should be easy to reach. Remember to bend your knees to absorb the impact.
Aerial Challenges: The last step. You face a ball thrown through the air, like in a game. The serve is more challenging. You need to judge the ball’s path. Success depends on mastering the first three steps.
Don’t rush up the ladder. Take your time on each step until it feels natural. This gradual progression helps you develop safe and effective habits for life.
Smart Decision-Making: Head or Chest?
Great players know when to head the ball. It’s as important as being strong in the neck. We teach you to make quick decisions based on simple cues.
When a ball comes, ask yourself these questions:
Is the ball above shoulder height? If yes, heading is usually the best option for control and power.
Can I get my body behind the ball? If the ball is below your collarbone and you have time, controlling it with your chest or thigh is often safer and gives you better possession.
The key is to always choose the safer option. Using your chest on a borderline ball is safer than a bad header. Start practicing this during drills.
By combining physical training with mental cues, you develop a complete heading skill set. You learn to attack the ball when it’s right and choose wisely when it’s not.
Tracking and safety: symptom checks after impacts, when to stop; pairing with concussion education
Being brave means sometimes stopping and listening to your body. This part is your safety guide. It teaches you to protect your health by knowing when to stop.
After a big hit, your body sends signals. It’s important to understand these signals. Always do symptom checks to stay safe.
Think of symptoms as your body’s alarm. They might show up right away or later. Here’s a guide to help you and your teammates know what to do.
Common Symptom
Immediate Action
Headache or “pressure” in head
Tell your coach or a parent right away. Don’t try to play through it.
Dizziness, balance problems, or nausea
Sit down in a safe spot. Stay away from bright lights and loud noises.
Feeling foggy, sluggish, or confused
Stop playing. You can’t judge your own condition.
Sensitivity to light or noise
Go to a quiet, shaded area and report it.
Just “not feeling right”
Trust your feeling. It’s a good reason to stop and get checked.
The key to sports safety is: “When in doubt, sit it out.” There’s no game worth risking your brain. Stepping off the field shows strength, not weakness.
Knowing about concussions is also key. Experts like Dr. Charles Tator say knowledge helps prevent injuries. You don’t need to be a doctor, but knowing the warning signs is important.
Your job is simple: Monitor, Communicate, and Educate.
Monitor yourself and teammates after hard hits.
Communicate any symptoms to an adult quickly.
Educate yourself on concussion basics with your coach or school.
By making symptom checks a routine, you control your safety. You become a smarter, more resilient athlete, playing with courage and wisdom.
Role-model stories: defenders/forwards known for smart technique, highlighting courage and safety
Legendary defenders and clinical forwards all have one thing in common: perfect forehead contact. Their stories teach us a lot. They show how technique, not just bravery, is key.
So, why do they excel? It’s because they meet the ball with the flat part of their forehead. This gives them control and power. They also brace their body, keeping their neck strong and core tight. And they time their jump perfectly.
Here are some amazing role models from women’s and men’s soccer. They show how safety and success go hand in hand.
Player
Position
Key Technique Strength
Safety Highlight
Abby Wambach
Forward (USWNT)
Unmatched aerial timing and power
Famous for her disciplined approach: always attacked the ball with her forehead, never ducked or turned away.
Julie Ertz
Defender/Midfielder (USWNT)
Fearless in the air with perfect body shape
Her strength training focused on neck and core stability, making her tackles and headers both safe and effective.
Sergio Ramos
Defender (Real Madrid, Spain)
Clinical precision on set-pieces
Studies show he almost exclusively uses clean forehead contact, minimizing risk by avoiding glancing blows.
Cristiano Ronaldo
Forward (Al-Nassr, Portugal)
Incredible hang time and directional control
His legendary jumping ability lets him meet the ball at its highest point, away from opponents, reducing collision risk.
These stars all share a key trait: a clean, solid connection with the ball. They don’t just jump and hope. They train their bodies and minds to be strong.
This changes what we think of courage. Courage isn’t about blindly throwing your head at the ball. True courage is the confidence you get from being well-trained. When you know your technique is sound, you can go up for that header without fear.
You can build that same confidence. Start by focusing on your own forehead contact in every drill. Watch videos of these players. See how they position their bodies. Notice their eyes are always open, and their mouths are closed. They are the ultimate teachers.
Their stories prove a vital point. At the highest level, the most effective headers are also the safest. By emulating their smart habits, you’re not just playing like a pro. You’re playing smart for a long, healthy soccer career.
Coach checklist, parent FAQ, glossary
Inspired by Becky Sauerbrunn? Let’s turn that into your game plan. This toolkit makes everything clear and easy to do.
Your Quick-Reference Coaching Checklist
Before any session, check this list. Make sure players have eyes open, mouth closed, and head the ball with their forehead. They should have a strong core and neck.
Practice safe landings and focus on controlled jump mechanics. Use power to jump up and softness to land. Follow the progressive exposure ladder. Also, check the field safety checklist for hydration, equipment, and environment.
Parent FAQ: Your Questions Answered
“Is heading safe for my child?” Yes, with the right start, technique, and training. We focus on neck and trunk strength first. “What about concussions?” Teaching correct form lowers risk. We also teach smart decisions, like using the chest.
Constant communication and tracking symptoms are key.
Helpful Glossary
Attack the Ball: Be proactive. Move towards the ball to head it, not wait for it.
Core Brace: Tighten your stomach and back before contact. It stabilizes your neck and head.
Jump Mechanics: How you jump and land. Use arms for lift, control in the air, and land with bent knees.
You now have the knowledge. Use these tools to build confidence and safety for every player. Athletes preparing for higher competitive pathways, including international soccer talent scouting, benefit greatly from mastering these safe heading fundamentals early in their development.
What if your biggest edge wasn’t just physical? Welcome to a new game. We’re talking about building mental fitness. It’s a key skill for anyone who competes.
Think of it like strength training for your mind. Just as you wouldn’t skip leg day, you can’t afford to neglect your psychological conditioning. This is where real power begins.
Here’s a powerful fact: research shows your body language in the seconds after a setback doesn’t just reflect your feelings—it actively shapes what happens next. A slumped posture can deepen negative emotions, affect your teammates, and even boost your opponents’ confidence.
But here’s the good news! You can train your reaction. Building a resilient mindset isn’t about being “tough enough” alone. It’s about being smart enough to use all the tools available.
Let’s change the game together. Seeking support for your mindset should be as normal and strategic as seeing a specialist for a physical tweak. A strong, adaptable mind is your ultimate advantage.
Can you train your mind for confidence like you train for soccer? Yes, you can. Confidence is like a muscle that grows with practice.
We’ll look at four ways to boost your confidence. These habits will help you feel more confident from the inside out.
1. Shift to a Mastery Focus
Where you focus changes everything. Instead of just winning, focus on improving your skills.
This mindset is powerful. It helps you build confidence that lasts, not just after one win. You focus on your effort, not just the outcome.
Outcome Focus
Mastery Focus
“I need to score a goal today.”
“I will take three shots on target with proper technique.”
“We have to win this game.”
“We will communicate clearly on every defensive shift.”
“Don’t make a mistake.”
“See the open pass and connect it with pace.”
Confidence depends on the result.
Confidence grows from the process.
2. Keep a “Win Journal”
Your brain tends to remember mistakes more than successes. A Win Journal can change that.
Every day, write down three small wins. It could be a perfect pass or getting good sleep. This builds a record of your progress, boosting your confidence.
3. Craft Your Pre-Match Ritual
Routines signal to your brain and body that it’s game time. They help you feel ready. Your ritual can be simple, like specific music or stretches.
Conscious body language is key. After a mistake, stand tall and clap your hands. This shows control and resets your mind. It’s a practiced part of your routine, not luck.
That critical voice in your head? You can change it. We call this writing your self-talk scripts.
First, notice your negative thoughts. “I always mess up” or “I’m not fast enough.” Then, write a positive script. Turn “I always mess up” into “Mistakes are feedback. What can I learn and try next?”
Practice these new scripts until they become automatic. This isn’t about being positive all the time. It’s about choosing supportive self-talk that helps you move forward.
Building confidence takes daily effort. Start with one of these builders this week. Focus on mastering one drill, journal one small win, or try one new self-talk phrase. That’s how you strengthen your mental muscle for the long season ahead.
Imagine you’ve just missed a big shot, and the crowd falls silent. In those three seconds, you have a choice that can change everything. Sports are full of pressure and mistakes. What makes a player great isn’t avoiding errors, but bouncing back quickly.
Studies reveal something interesting. A “defeated” posture can make you feel worse, deflate your teammates, and boost your opponents. Slumping your shoulders and dropping your head sends a strong message. But, you can choose to reset your posture.
This section is your toolkit for those critical moments. We’ll explore simple, proven strategies to pause and refocus instantly.
The Reset Breath: Your Physiological Pause Button
Stress makes your breathing shallow, which fuels anxiety. The “reset breath” can reverse this. Here’s how:
Inhale slowly through your nose for a count of four.
Hold that breath gently for a count of two.
Exhale fully through your mouth for a count of six.
This long exhale activates your body’s relaxation response. It tells your nervous system, “We’re okay. We can handle this.” Practice this breath daily, so it’s automatic during games.
Powerful Cue Words: Break the Thought Spiral
After a mistake, your inner critic can get loud. A short, powerful “cue word” acts as a mental stop sign. Choose a word that means something positive to you, like Reset, Next, or Focus.
Say it silently but firmly to yourself the moment a negative thought starts. This word isn’t magic—it’s a trigger you’ve trained. It tells your brain to switch tracks from frustration back to the present task. This is a core practice in sports mindfulness.
The “Next Action” Mindset: Control What You Can
You can’t change the missed shot. But you can control the next thing. This is the “next action” mindset. Instead of dwelling on the error, ask yourself one question: “What is the single next thing I need to do?”
Is it getting back on defense? Encouraging a teammate? Setting up for the next play? By focusing on one action, you bypass anxiety and regain your power. This mindset turns panic into purpose.
Captain-Led Huddles: Regrouping the Team
Mistakes and pressure affect the whole team. A quick, captain-led huddle can physically and mentally regroup everyone. It’s not a long strategy talk—it’s a 10-second reset.
The captain calls the team in, makes brief eye contact, and uses a unifying phrase like “We’re good. Next play.” or “Together, right now.” This simple act breaks the negative momentum and creates a moment of collective focus. It turns a point of pressure into a point of connection.
Bringing these tools together creates a robust system for handling in-game stress. Let’s compare them to see which might fit different situations best.
Technique
How It Works
Best For
Time to Use
Reset Breath
Calms the nervous system, lowers heart rate.
Individual stress, pre-free throw, after a personal error.
In the moment, during a stoppage.
Cue Word
Interrupts negative self-talk, redirects focus.
Breaking a spiral of frustration, shifting mindset quickly.
Immediately after the cue event.
Next Action Mindset
Channels energy into a controllable task.
Overwhelm, feeling lost after a mistake.
As play is resuming.
Team Huddle
Resets group energy, reinforces unity.
Collective slump, after a big opponent score.
After a timeout or during a natural break.
Remember, these aren’t just theories. They are skills. Like dribbling or shooting, they get better with practice. Start by adding one reset breath to your pre-practice routine. Pick your cue word this week. The goal is to build your mental muscle memory, so when the game is on the line, your mindfulness tools are ready to work for you.
Body image and social media: comparison traps, feed hygiene, trusted voices; resources for teens
For many young female athletes, social media can feel like a field where everyone else seems better. This isn’t just about looks. Your body image affects how you feel as a player—your power, endurance, and identity.
Let’s talk about comparison traps. You see flawless game-day photos and seemingly effortless skills. But remember, these are highlights, not real life. Filters and selective posting create a world that’s not always true. Constantly comparing yourself can quietly chip away at your confidence.
The good news? You can clean up your digital space. Think of it as feed hygiene. Here’s your step-by-step plan:
Audit Your Follows: Go through who you follow. Does an account make you feel inspired or less-than? Unfollow or mute anything that makes you feel bad.
Seek Diverse Strength: Actively search for and follow athletes of all shapes and abilities. Look for accounts that talk about body image honestly and celebrate strength over looks.
Curate Your Explore Page: Use the “Not Interested” feature on platforms like Instagram to tell the algorithm what you don’t want to see. The more you engage with positive content, the more it will show you.
Set Time Limits: Use your phone’s screen-time settings. Give yourself a break from scrolling, before bed or right before a game.
Next, find your trusted voices. These are coaches, older athletes, or organizations that get it. They focus on performance, health, and mental toughness—not just looks. Listen to the voices that remind you your body is a tool for amazing things, not just a picture to be judged.
If you’re struggling, you are not alone, and help is available. Here are some fantastic resources built for teens:
The National Eating Disorders Association (NEDA): Visit their website for toolkits and a confidential helpline. They have resources tailored to athletes.
The Body Positive: This organization offers online workshops and content to help you develop resilience against unrealistic beauty ideals.
Project HEAL: Provides support and education on body image and eating disorders, with a community that understands the pressures on athletes.
Crisis Text Line: Text HOME to 741741 for free, 24/7 crisis support from a trained counselor.
Your social media world should lift you up, not weigh you down. By taking control of your feed, you protect your confidence and keep your focus where it belongs: on your growth, strength, and love for the game.
Sleep and recovery: routines, phone curfew, travel sleep kits; how sleep supports hormonal health
While you’re resting, your body is hard at work. It’s repairing muscles, balancing hormones, and resetting your mind. Think of sleep as your body’s master repair tool. You wouldn’t fuel your car with soda, so why fuel your recovery with poor rest?
Here’s a key fact: fatigue makes self-regulation harder. Late in a game or after a hard training week, your body is least equipped to handle pressure precisely when it matters most. Prioritizing sleep is how you build a resilient foundation.
Let’s move beyond just “get more sleep.” We’ll help you build a rock-solid routine that cues your body for deep, restorative slumber. Consistency is your best friend here.
Start with a pre-bed ritual. This could be light stretching, reading a book, or listening to calm music. Doing the same things each night signals to your brain that it’s time to wind down.
Implement a Phone Curfew
Blue light from screens tricks your brain into thinking it’s daytime, suppressing melatonin (your sleep hormone). A 60-minute “phone curfew” before bed is a game-changer.
Place your phone in another room. This also stops the mental chatter of notifications and social media, allowing your mind to truly quiet down for the night.
Conquer Travel with a Sleep Kit
For the traveling athlete, unfamiliar hotel rooms can disrupt rest. Pack a “travel sleep kit” to recreate your home routine. Essential items include:
A comfortable sleep mask to block out light.
Earplugs or a white noise app on your phone.
Your own pillowcase for a familiar scent and feel.
Herbal tea bags (like chamomile) for a calming drink.
How Sleep Powers Your Hormonal Health
This is where it gets really interesting! Deep, quality sleep directly supports the hormonal systems that manage your energy, mood, and muscle repair.
During deep sleep stages, your body regulates cortisol (the stress hormone). Balanced cortisol means better energy management and less inflammation.
This is also when growth hormone peaks. This hormone is essential for muscle repair and recovery from the wear and tear of training. Without enough deep sleep, you’re short-circuiting your body’s natural repair shop.
Sleep Stage
Primary Benefit
Impact on Athletic Performance
Deep Sleep (NREM)
Muscle Repair & Growth Hormone Release
Faster recovery, stronger adaptations to training
REM Sleep
Memory Consolidation & Emotional Processing
Sharper game IQ, better mental resilience
Light Sleep
Body Restoration & Energy Conservation
Maintained energy stores for endurance
Making sleep a non-negotiable part of your training plan isn’t a luxury—it’s a requirement. Your performance, health, and mindset depend on it. Start tonight by choosing one small piece of your new routine to implement. Your body will thank you on the pitch.
Injury psychology: grief stages, team role, graded goals; when to seek a sports psych
An athletic injury is more than a physical setback. It’s an emotional journey that needs recognition and a clear plan. Your feelings are valid, and a roadmap can turn this tough time into a period of growth. We’re here to guide you through it.
First, let’s name what you might be feeling. Injury grief is real. You might feel disbelief, anger, sadness, and then acceptance. It’s okay to feel these ways. Recognizing these stages helps you process them instead of getting stuck.
This table breaks down common emotional stages and proactive steps you can take for your injury coping process.
Stage of Grief
Common Feelings
Helpful Coping Action
Denial & Isolation
“This can’t be serious.” Withdrawing from team chats.
Get a clear diagnosis from your doctor. Share the news with your coach and a trusted friend.
Frustration & Anger
Irritability, asking “Why me?”, jealousy of teammates.
Channel energy into controlled rehab exercises. Use a journal to vent feelings safely.
Negotiation & Sadness
Bargaining (“If I rest, I’ll be back faster”). Feeling low energy.
Focus on what you can control, like nutrition and sleep. Let yourself have a good cry.
Acceptance & Forward Focus
Calmer, ready to follow the rehab plan, looking ahead.
Set your first graded goal. Engage fully in your new team role.
Staying connected is key! You are a valuable part of the team. Talk to your coach about a specific sideline job. You could be the stats keeper, the hydration manager, or the lead hype-person. This keeps your identity as an athlete intact and fights isolation.
Now, let’s build momentum. The secret weapon in psychological recovery is graded goals. These are tiny, daily or weekly targets that prove your progress. Think of them as confidence building blocks.
Instead of “rehab my knee,” a graded goal is: “Complete all my ankle mobility exercises without pain for three days in a row.” Check it off! Your next goal might be: “Walk half a lap around the track smoothly.” Each small win rebuilds your sense of control and proves you’re moving forward.
Sometimes, the emotional load gets heavy, and that’s the perfect time to seek a strategic edge. Working with a sports psychologist is a smart move for your comeback, not a sign of weakness. Consider it if:
Your frustration or sadness is affecting daily life beyond sport.
You’re terrified of re-injury and it’s holding back your rehab.
You’re struggling to find any motivation for your recovery plan.
You feel completely disconnected from your team and identity.
A sports psych gives you tailored tools for injury coping, much like a physical therapist gives you exercises. They help you reframe the setback and build mental resilience for your return.
Remember, this journey is part of your story. By honoring your feelings, staying connected, celebrating micro-wins, and knowing when to ask for expert help, you’re not just healing your body. You’re building a stronger, more resilient mind. You’ve got this.
Recognizing when help is needed: signs of anxiety/depression; school counselor vs licensed clinician; crisis resources
Knowing when to ask for help is key for any athlete’s mental health. Just like you see a doctor for injuries, your mind needs care too. Spotting signs early is a big step in self-awareness.
Let’s look at signs that stress might be turning into anxiety or depression. These aren’t just bad days. They’re ongoing changes that affect your life:
Sleep and Appetite Changes: Sleeping too much or too little, or eating a lot less or more than usual.
Lost Motivation: Feeling excited to play turns into not wanting to do anything.
Persistent Sadness or Worry: Feeling sad or worried all the time for weeks without getting better.
Irritability and Withdrawal: Getting angry easily and pulling away from friends and family.
If you see these signs in yourself or a teammate, it’s time to know who to talk to. It can be hard to decide, so let’s break it down. You have school counselors and licensed clinicians to choose from.
A school counselor is a good first choice. They offer support, help with school stress, and listen. They’re perfect for short-term issues and can connect you to more resources. Think of them as your campus guide.
A licensed clinical therapist or psychologist deals with serious mental health issues like anxiety or depression. They provide ongoing counseling with special techniques. Working with a clinician is like having a mental health coach—they give you strategies for long-term healing.
Asking for help is a sign of great strength. But what if you or someone you know needs help right now? In a crisis, you need quick, confidential support. Save these resources:
988 Suicide & Crisis Lifeline: Call or text 988. This free, 24/7 line connects you to trained crisis counselors.
Crisis Text Line: Text HOME to 741741. You’ll get fast, text-based support from a live crisis counselor.
The Trevor Project (for LGBTQ+ youth): Call 1-866-488-7386 or text START to 678678.
Using these resources is brave and proactive. You don’t have to face everything alone. Building a team with professionals is how you stay strong, not just on the field but in all areas of life.
Team culture: inclusion, language that empowers girls, bystander tools for bullying and harassment
The energy in your locker room is more than just background noise. It’s the fuel that powers every pass, sprint, and comeback. This is your team culture. It’s built every day through actions, words, and the mood you choose.
Remember, the body language of your team leaders has a big impact. When a captain or star player looks down, teammates get tight. But when they show calm control, it makes everyone feel safe. This shows that your environment can either fuel or drain you. Let’s build a culture that lifts everyone up.
Inclusion is more than just having a team. It’s about making sure every athlete feels they belong. Start with small things. Does everyone get a genuine greeting at practice? Are inside jokes explained so no one feels left out?
Create rituals that celebrate the team, not just the stars. A simple “highlight of the day” sharing circle after practice can give every voice a platform. When players feel seen for who they are, not just their scores, confidence soars.
The Power of Empowering Language
The words we use shape beliefs. For female athletes, certain phrases can limit, while others empower. Let’s upgrade our vocabulary.
Ditch These Limiting Phrases:
“You play like a boy.” (This implies the male standard is the goal.)
“Don’t be so emotional.” (It dismisses valid passion and intensity.)
“You’re so tiny!” (Focuses on physique over skill and heart.)
Use These Empowering Phrases Instead:
“Your composure under pressure is incredible.”
“I see how hard you’re working. It’s paying off.”
“Your leadership is making us stronger.”
Language that focuses on effort, strategy, and mental toughness builds a team culture rooted in respect.
Bystander Tools: From Witness to Ally
Bullying and harassment are tough realities. A positive culture doesn’t ignore them; it equips everyone to respond. You don’t need to be a hero to help. Use these simple “bystander tools” to safely support a teammate.
Direct Distraction: If you see someone being targeted, create a diversion. Ask the targeted player a specific question about practice or walk over and say, “Coach needs us.” This interrupts the moment without confrontation.
Group Support: Never let a teammate walk alone after a negative incident. Make it a habit to leave together. There’s safety and solidarity in numbers.
Private Check-In: Later, pull the teammate aside. Say, “I saw what happened. That wasn’t okay. Are you doing alright?” This simple act validates their experience and shows they’re not alone.
Report Upward: If the behavior is serious or repeated, tell a coach or trusted adult. You can do this anonymously. Your role is to be the link that gets professional help involved.
Turning passive witnesses into active allies transforms your team into a true sanctuary. It signals that disrespect has no place here.
Building this kind of team culture is a conscious choice. It starts with inclusive actions, is reinforced by empowering words, and is protected by everyone’s willingness to step up. When you create this environment, you’re not just building better athletes—you’re building a stronger, safer sisterhood.
Player stories: local role models on confidence slumps and comebacks
Let’s dive into the real-life stories of local athletes who’ve faced your challenges. Their comebacks are more than just inspiration; they’re a call to action. We’ve spoken with two athletes from our community who turned their struggles into triumphs.
Maya, a high school varsity goalie, hit rock bottom after a last-minute goal cost her team the championship. “I didn’t want to be near the net,” she said. “I felt like I was letting everyone down just by being there.” Her confidence was down for weeks.
Maya found her way back by starting a journal. Every day, she wrote about one thing she did well, no matter how small. This practice of self-talk on paper slowly changed her mindset. “Instead of my brain shouting ‘Don’t mess up,’ I began to hear ‘You’ve got this angle.’ I rebuilt my confidence one written win at a time.”
Chloe, a college midfielder, battled with performance anxiety. “My mind would race during games. I was so afraid of making a mistake that I’d freeze,” she explained. The pressure was taking away her joy for the sport she loved.
Chloe’s comeback began with mindfulness. A sports counselor taught her a 30-second reset breath: inhale for 4 counts, hold for 4, exhale for 6. She used this cue before every throw-in. “It wasn’t about stopping thoughts, but noticing them and letting them pass. That breath was my anchor.” Combining this mindfulness with positive self-talk scripts transformed her game.
These athletes, like pros Sue Bird or Damian Lillard, show that a resilient mindset is built through daily choices. Maya chose to journal. Chloe chose her breath. Their stories show that a confidence slump is just one chapter.
Your comeback story is waiting to be written. Whether through journaling, breathwork, or other structured training and development techniques, the power to turn the page lies in your next small, conscious action.
Helping a young athlete with their mental game is a big job. It needs trust, clear talk, and knowing when to get help. You’re not a therapist or a fixer. You’re a trusted guide who notices mood changes, starts talks, and finds the right help.
Forget the big, serious talks. Good check-ins are casual and curious. They can happen in the car, after practice, or during a walk. Ask open-ended questions that don’t need a “right” answer.
Try these scripts to start conversations:
“I noticed you seemed a little quiet after the game today. Everything okay? No pressure, just checking in.”
“What’s been the best part of your week with soccer? What’s been the toughest?”
“How are you feeling about balancing everything right now—school, soccer, friends?”
Your role is to listen, not to fix. Saying, “That sounds really tough, thanks for telling me,” can be more powerful than advice.
Setting Healthy Boundaries: Support vs. Smother
It’s natural to want to fix problems. But setting healthy boundaries is key. This means supporting without smothering and advocating without taking over.
For example, if she’s having issues with a coach, help her plan what *she* wants to say. Don’t call the coach yourself. If she’s overwhelmed, help her make a schedule. Let her decide what to do. This builds resilience and ownership. A positive team culture starts with adults who set clear, respectful boundaries.
This is very important when dealing with bullying. Your calm, supportive presence is the first step in creating safer spaces for female athletes.
Mapping Your Referral Pathways
Sometimes, a situation is beyond your skills. That’s okay. Knowing your referral pathways is responsible care.
First, look for signs that suggest professional help: sadness or anxiety, big changes in sleep or appetite, losing interest in soccer, or talking about hopelessness.
Next, know who to call:
Sports Psychologist: For performance anxiety, confidence slumps, or mental skills training.
Licensed Therapist/Counselor: For broader mental health concerns like depression, anxiety disorders, or significant stress.
Registered Dietitian: For nutrition concerns tied to energy, recovery, or body image.
When suggesting help, be supportive: “I care about you, and I think talking to someone with special training could give you some great tools. Would you be open to exploring that?” Make counseling seem like a tool for strong people, like seeing a coach for your physical game.
You are the bridge. With these tools, you can build that bridge with confidence.
Worksheets and resource directory
You now have the knowledge. Let’s turn it into action! We’ve created free, printable tools to build your mental fitness plan.
Download our weekly confidence journal. Track your wins and positive self-talk. Use the pre-competition routine planner to lock in your focus before games.
Try the social media feed audit checklist. Clean up accounts that hurt your body image. The sleep schedule tracker helps you build a consistent routine for better recovery.
Good sleep is a pillar of athlete mental health. It directly lowers stress and anxiety.
Our resource directory points you to trusted help. For athlete mental health, explore The Alliance of Social Workers in Sports (ASWIS) and The Association for Applied Sport Psychology (AASP).
Read “The Brave Athlete” by Dr. Simon Marshall. Listen to “The Sports Psychology Podcast.” Apps like Calm, Headspace, and Sleep Cycle support mindfulness and sleep.
If you’re struggling with injury coping or persistent anxiety, a professional can help. Use the AASP’s “Find a Sport Psychology Consultant” directory to locate a licensed expert near you.
Your journey to a stronger mind starts with one small step. Pick one worksheet or resource and begin today!