How to Fuel Female Soccer Athletes: Nutrition Tips for Training, Tournaments, and Recovery

female soccer nutrition

Welcome! Let’s talk about your secret weapon: the food on your plate.

For athletes on the pitch, what you eat is more than just a meal. It’s the direct fuel for your performance, wellbeing, and energy. Think of your body like a high-performance car. You wouldn’t put low-grade fuel in it, right?

The right soccer nutrition can boost your game and speed up recovery. This isn’t just science—it’s your toolkit for success.

We’re here to guide you in becoming your own best nutritionist. We’ll make the complex parts simple and actionable.

Are you preparing for a tough training session? A weekend tournament? Or just a busy school day? This guide will show you how to eat for energy, strength, and quick recovery. Let’s break it down together, step by step.

Daily foundations: simple plate model by training load; protein targets; smart snacks for school days

Let’s explore the simple plate model that changes with your training load each day. Imagine your plate as a pie chart for your food. It’s a simple way to balance your meals without math.

On a light training day, your plate looks different. Maybe you’re just in classes. But on a heavy training or match day, your muscles need more fuel. We adjust your plate to help.

Plate Section Light Training Day Heavy Training / Match Day
Veggies & Fruits Fill 1/2 of your plate with colorful options like spinach, peppers, or berries. Keep it to 1/3 to 1/2 of your plate. They give you vital vitamins and fiber.
Protein Take up 1/4 of your plate with lean chicken, fish, tofu, or beans. Keep a solid 1/4 of your plate. Protein is key for repair every day.
Grains & Carbs The final 1/4 is for whole grains like quinoa, brown rice, or sweet potato. Expand this section to 1/3 or even 1/2 of your plate! This fuels your intense activity.
Healthy Fats A small serving from avocado, nuts, or olive oil cooked into your meal. Same as light day—important for hormone health and satiety.

Now, let’s talk protein intake. Active female athletes need more protein than average. They often need 1.2 to 2.0 grams of protein per kilogram of body weight daily. Let’s make that real.

For a player weighing 145 pounds (about 66 kilograms), that’s roughly 80 to 130 grams of protein per day. Hitting that target is easier than it sounds when you spread it across meals and snacks.

Here’s what 20-30 grams of protein looks like:

  • A cup of Greek yogurt with some nuts
  • A 3-ounce serving of grilled chicken breast
  • Two eggs plus a slice of whole-wheat toast
  • A smoothie with a scoop of protein powder and milk

Including these protein-rich foods throughout your day supports muscle repair. It keeps you feeling full and focused.

For the long stretch between classes and practice, smart snacks are your best friend. The goal is to combine a protein source with a carbohydrate. This duo provides lasting energy and prevents a mid-afternoon crash.

  • Apple slices with a stick of string cheese
  • A small container of Greek yogurt and a pear
  • A handful of almonds with a couple of tangerines
  • Whole-grain crackers with hummus

Planning your protein intake and packing these smart snacks turns a hectic school day into a fueled, productive one. You’ll walk onto the practice field energized and ready to perform.

Remember, these daily foundations are your nutritional base camp. Get these right, and you’re set up for success in training, matches, and recovery.

Pre‑training and pre‑match: timing, low‑fiber options, nerves-friendly choices; caffeine guidance for older teens/adults

Feeling nervous before a big game? Your pre-match snack can help calm your stomach and boost your energy. What and when you eat before activity is a game-changer. The aim is to fuel up without upsetting your stomach.

Getting your carb timing right is key. Think of it in two parts. Eat a solid meal 3 to 4 hours before starting. This lets your body digest comfortably.

For a smaller snack, aim for 30 to 60 minutes before. Choose easy-to-digest carbs for a quick energy boost.

Choosing the right foods is important, even more so with nerves or early starts. Opt for low-fiber, simple carbs for quick energy without stomach upset.

Good choices include bananas, white toast with jelly, plain granola bars, or graham crackers. If in a rush, a sports drink can provide quick carbs.

Here’s a quick guide to help plan your pre-event fueling:

Timing Before Activity Food & Drink Ideas Key Notes
3–4 Hours (Meal) Turkey sandwich on white bread, bowl of pasta with light sauce, rice bowl with lean protein. Includes a balance of carbs, protein, and a little fat. Enough time for full digestion.
1–2 Hours (Larger Snack) English muffin with peanut butter, low-fiber cereal with milk, a smoothie. Stick to familiar foods. Keep fiber and fat content moderate.
30–60 Minutes (Small Snack) Banana, granola bar, pretzels, applesauce, graham crackers. Perfect carb timing for a final energy top-off. Very low in fiber and fat.
Quick Sip (<5 Min) Sports drink, carbohydrate gel, or a few large gulps of juice. For true last-minute situations. Provides rapidly available carbs and fluids.

Now, let’s talk about caffeine. For older teens and adults, a small amount about an hour before can boost alertness and performance. Think a small cup of coffee or caffeinated sports gel.

This is not for everyone, and it’s important to test it during training first! See how your body reacts. Never try something new on game day.

The best plan is the one that works for you. Use these guidelines on carb timing and food choices, then test your favorites during practice. You’ll find your winning combination.

During play: fluids, quick carbs, electrolytes by heat index; halftime plans

When you’re on the field, your body is like a high-performance engine. It needs the right fuel to keep running at top speed. The nutrition game changes once the whistle blows. Your focus shifts from preparation to maintenance.

Staying hydrated is your absolute number one priority. Drinking enough water is key for staying cool and performing well. Don’t wait until you feel thirsty! Sip small amounts consistently throughout the activity.

For intense sessions or matches longer than 60 minutes, water alone isn’t enough. This is true on hot and humid days. Your body needs two things: quick carbohydrates for immediate energy and electrolytes to help absorb that fluid.

Think of electrolytes—mainly sodium and potassium—as the spark plugs for your hydration. They help your body actually use the water you’re drinking. Without them, you might drink plenty but feel sluggish or cramp up.

Great options for during play include sports drinks, energy gels, or even diluted fruit juice. These provide a mix of fast-acting carbs and essential minerals. Practice using them in training so your stomach is comfortable on game day.

Your halftime plan should be simple, fast, and something you’ve done before. You only have a few minutes, so keep it efficient. A few practiced sips of a sports drink, half a banana, or a quick energy gel can make a huge difference for the second half.

To take the guesswork out of it, use the heat index as your guide. The hotter and more humid it is, the more you need to focus on replacing electrolytes and carbs. The table below gives you a clear game plan.

Heat Index Hydration Focus Electrolyte & Carb Strategy Halftime Snack Idea
Below 80°F Water, sipped every 15-20 min. Carbs needed only after 60+ min of play. Optional low-dose sports drink. A few big sips of water or a sports drink.
80°F – 90°F Water + electrolytes. Sip every 10-15 min. Include electrolytes. Add quick carbs (sports drink or gel) for matches over 45 min. 3-4 sips of sports drink or half a banana.
Above 90°F (or High Humidity) Essential: Electrolyte-enhanced fluids. Sip very frequently. Critical to replace electrolytes and carbs. Use sports drink or gel during any activity. Energy gel with water or several sips of a full-strength sports drink.

Following a plan like this helps you avoid muscle cramps and maintain your power, speed, and focus from start to finish. Remember, what you do during play fuels the outcome just as much as your pre-game meal!

Recovery: 30–60 minute window, protein + carbs, anti‑inflammatory foods; evening snacks for sleep

The hour after training is key to recharge your muscles and mind. It’s not just about the exercise itself. Your body is ready to absorb nutrients that repair and restock energy. A smart recovery meal is essential here.

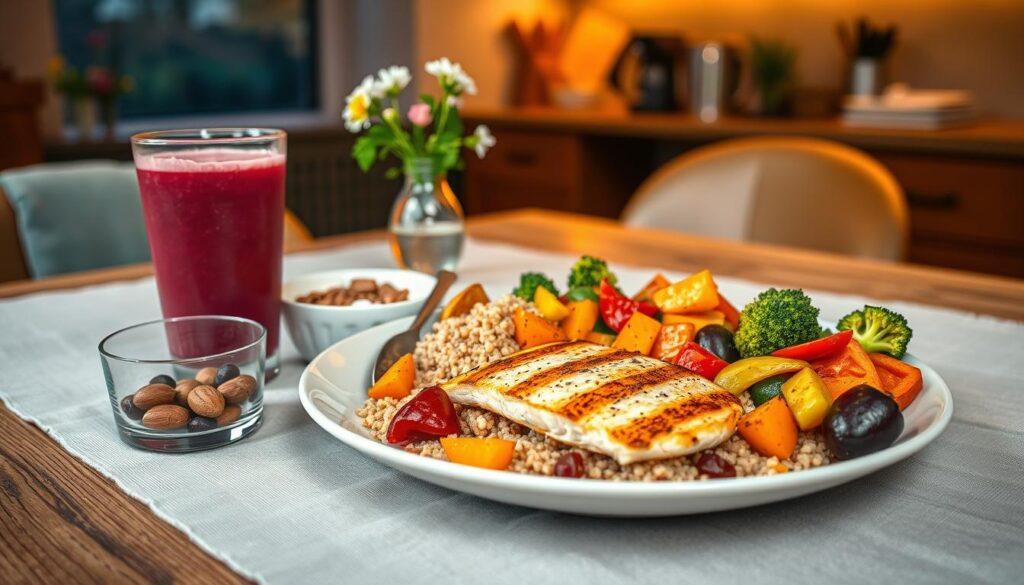
A beautifully arranged recovery meal featuring a colorful plate of grilled chicken breast, quinoa, and a vibrant medley of roasted vegetables including sweet potatoes, bell peppers, and broccoli. In the foreground, a glass of refreshing berry smoothie sits beside a small bowl of mixed nuts and Greek yogurt topped with honey and chia seeds. The middle ground showcases a rustic wooden dining table, adorned with a soft linen tablecloth and a small vase of fresh flowers. In the background, warm, inviting kitchen ambiance is created by soft golden lighting, highlighting the healthful meal. A cozy evening atmosphere is captured, emphasizing relaxation and nourishment, ideal for fueling female footballers after intense training. The image has a shallow depth of field, focusing on the meal with a slightly blurred background for a warm, intimate feel.

Timing is everything. For 30 to 60 minutes after exercise, your muscles are most receptive. They need protein for repair and carbs to refill energy stores. Missing this window can make you feel sore and less ready for the next session.

Your recovery meal should have two main things: protein and carbs. Protein starts the muscle repair, while carbs replace the energy you used. It’s simple, yet effective!

Here are some great options:

Recovery Option Protein Source Carbohydrate Source Best For
Chocolate Milk Whey & Casein Lactose & Added Sugar Quick, portable refuel
Greek Yogurt with Berries Greek Yogurt Berries & Natural Sugars Gut health & antioxidants
Turkey & Cheese Sandwich Turkey, Cheese Whole-Grain Bread A more filling, complete meal
Protein Smoothie Protein Powder Banana & Oats Easy digestion, customizable

To enhance recovery, include anti-inflammatory foods. These reduce soreness. Try tart cherry juice, blueberries, salmon, or turmeric. A small glass of tart cherry juice can be very effective!

If you train late, you need recovery nutrition but avoid heavy meals. A light, protein-rich snack is best. It provides amino acids for repair while you sleep.

Great snacks for late-night recovery include:

  • A small bowl of cottage cheese with honey.
  • A simple protein shake with milk or a milk alternative.
  • A handful of almonds and whole-grain crackers.

These snacks are easy to digest and help you sleep better. Remember, recovery is a continuous process. By focusing on post-workout nutrition and choosing the right evening snack, you’re building a stronger you. Let’s do this together!

Tournament survival: multi‑match days, cooler packing list, travel constraints, gas‑station upgrades

Traveling for competition brings unique challenges. But with planning, you can turn any gas station into a fueling stop. Tournament weekends test your endurance, both physically and mentally. A good nutrition plan is key to success.

For multi-match days, think of your body as a battery. It needs recharging between games. Fuel up with carbs and protein within 30-60 minutes after each game. Then, eat a bigger meal 1-2 hours later before your next game.

The cornerstone of your tournament survival strategy is a well-packed cooler. It’s your mobile kitchen. Don’t scramble for food; have everything you need with your team.

Here’s a detailed packing list to help you prepare. This table breaks down the essentials, why they work, and how much to bring.

Item Why It’s Great Portion Tip
Pre-made Turkey & Cheese Sandwich Perfect balance of protein and carbs. Easy to eat, no mess. 1 per player, per major meal.
Hard-Boiled Eggs High-quality protein for muscle repair. Already peeled for convenience. 2-3 eggs per player.
Greek Yogurt Tubes Portable protein and calcium. Chilled in the cooler. 2-3 tubes per player.
Baby Carrots & Single-Serve Hummus Crunchy veggies for vitamins and fiber. Hummus adds protein and healthy fats. 1 bag of carrots, 2 hummus cups per player.
Reusable Water Bottles (Filled) Hydration is constant. Avoid single-use plastic. At least 2 large bottles per player.
Electrolyte Drink Mix or Sports Drink Replenishes salts lost in sweat, specially in heat. Enough for 1-2 servings between games.

Facing travel constraints like a long bus ride? No cooler? No problem! Pack a “dry bag” with non-perishable items. Think whole apples and bananas, nuts or trail mix, jerky, whole-grain crackers, and shelf-stable milk boxes. These items won’t spoil and provide reliable energy.

Now, let’s talk real life. Sometimes you forget something, or the trip runs long, and a gas station is your only option. This is where knowledge is power. You can absolutely find gas-station upgrades over chips and candy.

  • Look for protein: Grab a string cheese, a yogurt cup, or a packet of nuts.
  • Choose complex carbs: Pick plain popcorn, whole-grain granola bars, or even a plain bagel.
  • Opt for a better sandwich: Many stations now sell pre-made turkey or chicken wraps. Check the label for lower sodium options.
  • Hydrate smartly: Choose water, coconut water, or a 100% juice box over sugary sodas.

For more inspiration on portable meals, check out these day-of-eating ideas from a pro athlete. It’s a fantastic visual guide to simple, effective fueling.

Remember, your performance on day two of a tournament is a direct result of your choices on day one. Planning ahead is the secret weapon that separates the prepared from the exhausted. By mastering your cooler packing, navigating travel, and knowing how to upgrade convenience store choices, you’re taking control. You’re not just surviving the tournament—you’re thriving through it. For a deeper dive into building a champion’s diet, explore this nutrition guide for female soccer players.

Special considerations: vegetarian/vegan, iron absorption with vitamin C, calcium/vitamin D for bone health

Being vegetarian or vegan doesn’t mean you can’t perform well in football. You can get the energy and protein you need with the right foods. Lentils, chickpeas, tofu, tempeh, and quinoa are all great sources of protein. Try making Jackfruit Black Bean Quinoa Tacos or a Spiced Herbed Lentil Salad for a tasty, protein-packed meal!

Iron and calcium are two nutrients that are very important. Iron helps your muscles get the oxygen they need. Female athletes often have low iron levels, which can make them feel tired and slow.

For vegetarian athletes, iron from plants is harder to absorb than iron from meat. But there’s a trick: eat your iron-rich foods with vitamin C. Vitamin C helps your body absorb iron better.

  • Iron-Rich Foods: Spinach, lentils, fortified breakfast cereals, beans, and tofu.
  • Vitamin C Boosters: Bell peppers, oranges, strawberries, broccoli, and a squeeze of lemon juice.

So, a lentil salad with bell peppers or a fortified cereal with strawberries is a great way to boost your energy!

Calcium and vitamin D are also key for strong bones. Football can put a lot of stress on your bones, leading to fractures. Calcium builds bones, and vitamin D helps your body use that calcium.

Good sources of calcium include dairy, fortified plant milks, leafy greens, and tofu. Vitamin D comes from the sun, fatty fish like salmon, and fortified foods like milk and orange juice.

By focusing on iron-rich foods with vitamin C, and making sure you get enough calcium and vitamin D, you’ll be energized and strong. This is true no matter your diet.

Safe Supplements: Your Guide to Label Literacy and Smart Choices

Before you grab that protein powder or vitamin, let’s cover the basics of supplement safety. The aisles are full of promises and confusing terms. Always remember, food first! Whole foods offer a mix of nutrients that supplements can’t match.

But sometimes, supplements are needed, like vitamin D in winter or iron if levels are low. Then, you need to be a label detective. It’s not about the marketing; it’s about checking what’s in the bottle and if it’s safe for you and your sport.

Looking for a third-party verification seal is key. These seals show independent labs have tested the product. They ensure the product matches the label and doesn’t contain banned substances. For athletes, this is a must.

Third-Party Seal What It Guarantees Best For
NSF Certified for Sport Tests for over 270 banned substances, verifies label accuracy, and checks for impurities. Competitive athletes at any level who are subject to drug testing.
USP Verified Ensures the product contains the ingredients listed, in the declared amounts and strength. General quality assurance for vitamins and minerals.
Informed-Choice Similar to NSF, screens for WADA-prohibited substances and verifies label claims. Professional and elite athletes worldwide.
BSCG Certified Tests for drugs, banned substances, and toxic contaminants like heavy metals. Athletes seeking broad-spectrum purity testing.

Avoid products with “proprietary blends.” This means you don’t know the exact amounts of each ingredient. Also, be cautious of mega-doses over 100% of the Daily Value. More isn’t always better and can be harmful.

Iron supplements are special. They are “non-heme” iron, which is harder to absorb than “heme” iron in meat. If a doctor recommends iron, take it as directed. Never take it “just in case.” Too much iron is toxic and can cause serious harm.

Remember, supplements are meant to supplement a great diet, not replace it. If you’re unsure, talk to a sports dietitian or your doctor. They can guide you safely, ensuring your nutrition supports your performance without risks.

Budget menus and shopping lists; dorm/team house cooking hacks

Eating like an elite athlete doesn’t have to cost a lot. With some planning and kitchen tricks, you can eat well without spending a lot. The key is Strategic meal prep.

Spending just an hour or two on the weekend to cook in bulk can change everything. Grill chicken thighs, cook quinoa or brown rice, and chop veggies. This basic meal prepping helps you save time, money, and mental energy during busy weeks.

A well-organized athlete meal prep scene in a cozy, brightly lit kitchen designed for a female football team. In the foreground, a selection of colorful, nutritious meals is neatly arranged in glass meal prep containers, showcasing vibrant vegetables, lean proteins, and whole grains. The middle ground features a team member, dressed in modest athletic wear, skillfully chopping vegetables on a wooden cutting board, exuding focus and determination. In the background, kitchen shelves are stocked with pantry essentials and a chalkboard lists budget-friendly shopping tips. Soft, natural light filters through a window, creating a warm, inviting atmosphere that emphasizes health and teamwork. The composition captures a sense of empowerment and preparation, embodying the spirit of athletes dedicated to their nutrition.

Your shopping list is like a playbook. Choose foods that are good for you and won’t break the bank:

  • Proteins: Eggs, canned tuna and beans, chicken thighs, and Greek yogurt.
  • Carbs: Oats, brown rice, quinoa, whole-wheat tortillas, and sweet potatoes.
  • Produce: Frozen veggies, onions, garlic, bananas, and apples.
  • Healthy Fats & Flavor: Peanut butter, olive oil, and spices like cumin, paprika, and garlic powder.

With these items, making a budget-friendly meal is easy. Try overnight oats for breakfast, a big salad for lunch, and a One-Pot Southwestern Chicken & Quinoa Skillet for dinner.

Even with limited kitchen tools, you can cook great food. Use your microwave and a sheet pan to make meals. Scrambled eggs in a mug or a sheet pan dinner are quick and easy.

Be creative with meals that don’t need cooking. Tomato & White Bean Naan Pizzas and Zesty Tuna Lettuce Wraps are fast. For a quick snack, make a Wild Blueberry Peanut Butter Smoothie.

Eating well on a budget is all about making smart choices. By learning a few meal prep tricks and stocking your pantry, you boost your energy and performance. You’re ready to go!

Role-model spotlights: local college or pro sharing a day of eating

To understand how nutrition affects sports, we’ll follow a college midfielder’s diet. Seeing a day of eating from a real athlete makes all the concepts clear. It’s a blueprint from someone who lives it.

A top female footballer eats to stay energized and recover quickly. Her day begins with Strawberry Maple Overnight Oats. This is more than breakfast; it’s fuel for classes and study.

At lunch, she enjoys a chickpea wrap with veggies and baby carrots. This meal gives her complex carbs, plant protein, and a satisfying crunch.

Before training, she eats an English muffin with peanut butter. This snack offers carbs and fat for lasting energy, perfect for pre-game nerves.

After a tough afternoon on the field, recovery is key. Her dinner is jerk chicken breast with quinoa and a lime cucumber salad. This meal helps repair muscles and replenish energy stores.

Before bed, she has a small bowl of Greek yogurt. It’s a light source of casein protein for muscle recovery and better sleep.

Meal Time Food Key Nutrients Performance Purpose
Breakfast Strawberry Maple Overnight Oats Complex carbs, fiber, protein Sustained morning energy & focus
Lunch Chickpea Veggie Wrap + Baby Carrots Plant protein, vitamins, complex carbs Midday refuel without heaviness
Pre-Training Snack English Muffin with Peanut Butter Simple carbs, healthy fats Readily available energy, nerves-friendly
Recovery Dinner Jerk Chicken, Quinoa, Cucumber Salad Lean protein, complex carbs, antioxidants Muscle repair & glycogen replenishment
Evening Snack Greek Yogurt Casein protein, calcium Overnight recovery support

Every meal and snack has a purpose. It’s about consistent fueling, smart timing, and a balance of nutrients. This menu, inspired by athletes, shows a realistic and totally doable approach.

You don’t need fancy ingredients or a personal chef. You need a plan. This college athlete’s routine shows that high-performance eating is simple and delicious.

Let this example inspire your own meal plan. For more inspiration, check out these inspiring stories of women in sports. Seeing others succeed can light your own path!

Printable meal planner + FAQ

Let’s make your new nutrition plan easy to follow. We’ve got a printable, customizable weekly meal planner for you. Download it to plan your meals and snacks. Use the included template grocery list to shop smart. Many athletes preparing for competitive environments, including global youth football academies, rely on structured meal planning like this to support consistent performance and recovery.

Got questions? Here are quick answers to common ones.

How much water should I drink daily? Start with half your body weight in ounces. Add more if you sweat a lot, like on hot days. Carry a reusable water bottle to remind you.

What if I have no time to cook? Use our batch-cooking tips and 30-minute recipes. A rice cooker or Instant Pot can be a big help. Keep canned beans, frozen veggies, and whole-grain pasta ready.

Are carbs really my friend? Yes! Think of carbs as premium fuel for your body. They give you energy for sprinting and help you recover. Choose whole grains, fruits, and potatoes.

Your journey starts with one simple change. Perfect your post-game snack with chocolate milk and a banana. Pack a protein-rich school lunch with Greek yogurt and almonds. Use your new meal planner to build consistency. You’ve got this!

Train with Your Cycle: Menstrual Health, Performance, and Practical Game‑Day Tips

menstrual cycle training soccer

Welcome! We’re glad you’re here. Ever had a week where you felt amazing on the field, then struggled for days?

There’s a natural rhythm behind those ups and downs. It’s your body’s monthly hormonal flow.

Sports science used to ignore female athletes. This gap in understanding was huge.

But now, we know better. Understanding your menstrual cycle phases is empowering. It helps you perform better and feel more in control!

This guide aims to make this conversation normal. You’ll learn how to plan your workouts with your cycle. This way, you’ll manage your energy and PMS better for game-day.

Let’s stop guessing and work with your body instead of against it!

Physiology overview: phases, hormones, perceived exertion, thermoregulation and hydration needs

Think of your menstrual cycle as a blueprint for peak performance. It’s like having the inside scoop on your body. It explains why some days you feel unstoppable, and others, even simple tasks seem like a marathon.

This overview will give you the basics. We’ll cover the two main phases, the hormones that control them, and how they affect your energy, cooling, and fluid needs.

The Two Main Phases: Follicular and Luteal

Your cycle is like two inner seasons, each lasting about two weeks. The Follicular Phase (days 1-14) is like spring. Hormone levels are low, starting with your period. It’s a time of renewal, preparing to release an egg.

After ovulation, you enter the Luteal Phase (days 15-28). This is like summer. Hormones like estrogen and progesterone rise, preparing for pregnancy. This hormonal shift affects your athletic performance.

Hormonal Highs and Lows

The cycle is controlled by four key hormones:

  • Estrogen: Known as the “energy” hormone, it supports muscle repair, strength, and mood.
  • Progesterone: The “calming” hormone that rises after ovulation. It can increase body temperature and affect fluid balance.
  • Luteinizing Hormone (LH) & Follicle-Stimulating Hormone (FSH): These hormones from your brain trigger ovulation and hormone production.

The dance between estrogen and progesterone most affects how you feel during training and games.

So, what does this mean for you as an athlete? These hormonal changes impact three key areas:

Perceived Exertion: This is how hard a workout *feels*. In the luteal phase, higher progesterone makes workouts feel harder. Your Rate of Perceived Exertion (RPE) might be higher, even if your actual power output is the same. It’s not in your head—it’s in your hormones!

Thermoregulation: This is your body’s ability to cool itself. Progesterone raises your core body temperature slightly during the luteal phase. You may feel warm faster and sweat differently in hot conditions or during intense exercise.

Hydration Needs: Here’s a key connection. That elevated core temperature and altered sweat response in the luteal phase increase your risk of fluid loss. You might not notice you’re sweating more, but your body is working harder to cool down. This makes proactive hydration before, during, and after activity essential during this phase to maintain performance and prevent fatigue.

Phase Hormone Profile Key Physical Impacts Performance Implication
Follicular (Days 1-14) Low & rising estrogen; very low progesterone. Lower core temperature. Improved muscle recovery. Often higher pain tolerance. A great window for high-intensity training, speed work, and learning new skills. Your body is primed for power.
Luteal (Days 15-28) High progesterone; estrogen peaks then falls. Elevated core temperature. Higher perceived exertion. Increased fluid loss risk. Focus on maintained strength, technical drills, and aerobic base. Prioritize cooling strategies and diligent hydration.

With this map of your inner seasons, you’re no longer guessing why you feel different from week to week. You have the knowledge to anticipate changes in your energy, your thermoregulation, and your hydration needs. This foundation empowers you to tailor your training, nutrition, and game-day strategies, which we’ll explore next, to work *with* your cycle, not against it.

Training by phase: strength focus windows, high‑speed running tolerance, deload ideas; sample week-by-phase matrix

Think of your follicular and luteal phases as your body’s built-in periodization plan. It guides you on when to push for new personal bests and when to prioritize strategic recovery. This isn’t about restricting yourself. It’s about working with your physiology to train smarter and feel stronger all month long.

Remember, these are flexible guidelines, not rigid rules. Source research cautions against blanket prescriptions. The best plan is one you adjust daily based on your energy and feel. Let’s break down how to harness each phase.

Follicular Phase: Your Power Window

Welcome to your performance prime time! Starting with your period and lasting until ovulation, rising estrogen levels create an ideal environment for high-intensity work. Your body is primed to build muscle and tolerate strain.

This is your window to focus on:

  • Maximal Strength: Heavier lifts, lower reps. Your nervous system is eager to recruit muscle fibers.
  • High-Speed Running & Sprints: You’ll likely find sprint drills and agility work feel more manageable and powerful.
  • Power-Based Skills: Plyometrics, jumping, and explosive movements often click better now.

Think of this phase as your “green light” for challenging sessions. If you’ve been planning a new 1-rep max test or intense interval day, schedule it here. Your body is ready to adapt and grow.

Luteal Phase: Strategic Endurance and Recovery

After ovulation, your strategy smartly shifts. Rising progesterone increases your core temperature and can alter how you perceive effort. High-intensity work might feel harder. That’s perfectly normal!

This phase calls for “smart sustainability.” It’s the perfect time for:

  • Aerobic Conditioning: Longer, steady-state runs, swims, or bike rides.
  • Technical & Tactical Work: Focus on form, game strategy, and skill drills without max exertion.
  • Deload Weeks: Consider scheduling a planned reduction in volume or intensity here. It aligns with your body’s natural need for more recovery.

Listening is key. On days you feel great, a hard workout is fine. But if fatigue hits, a gentle session or extra rest is a strategic win. Prioritizing sleep and nutrition during this phase is key for effective recovery.

To help you visualize, here’s a sample week-by-phase training matrix. Use it as a starting template and adapt it to your sport and schedule.

Day Phase Focus Session Type Perceived Intensity Athlete Notes
Monday Follicular: Strength Heavy Lower Body Lifts + Sprint Drills High (8/10) Focus on power output. Fuel well pre-workout.
Tuesday Follicular: Power Plyometrics & Sport-Specific Agility High (7/10) Good day for mastering new explosive moves.
Wednesday Follicular: Active Recovery Light Yoga or Mobility Flow Low (3/10) Promote muscle repair without strain.
Thursday Luteal: Endurance Moderate-Pace Aerobic Session (e.g., 5k run) Medium (5/10) Heart rate may be slightly elevated; focus on pace.
Friday Luteal: Skill/Technique Form Drills & Tactical Review Low-Medium (4/10) Mental focus is high; perfect for strategy.
Saturday Luteal: Deload/Recovery Walk, Stretch, or Complete Rest Very Low (1-2/10) Essential for hormonal balance and recovery.
Sunday Luteal: Prep Meal Prep & Schedule Review for Coming Week N/A Planning ensures you support your body’s needs.

See how the focus changes? The follicular week packs the high-intensity work, while the luteal week emphasizes sustainability. Notice the built-in recovery day on Saturday. Quality sleep is your secret weapon during this entire phase, helping your body manage stress and repair itself.

Your personal matrix might look different. The goal is to be intentional. Track your energy, note how workouts feel, and adjust. You’re the expert on your body—this framework just helps you use that expertise to perform and feel your best.

Game‑day strategies: warm‑up tweaks, cramp management, heat considerations, bathroom planning, discreet supplies kit

Your menstrual cycle doesn’t take a day off, so your game-day plan shouldn’t either. Whether you’re feeling powerful in your follicular phase or more fatigued in your luteal phase, a few smart tweaks to your routine can make all the difference. This is about practical, actionable steps that let you focus on the game, not your symptoms.

Let’s break down your game-day strategy into two parts: what you do before the match starts, and how you adapt once you’re in the thick of it.

Pre-Match Preparation

Success starts long before the first whistle. Your pre-game routine is your foundation.

If you’re dealing with cramps, a standard warm-up might not cut it. Try a longer, dynamic warm-up that focuses on the hips, lower back, and core. Think leg swings, cat-cow stretches, and gentle torso twists. This increases blood flow and can significantly ease discomfort.

Hydration is your secret weapon. Begin drinking water and electrolytes at least two hours before play. If you’re in your luteal phase, your body holds onto fluid differently and you might sweat more. An electrolyte mix can help you stay balanced, even on a hot day.

Speaking of heat, research suggests your heat tolerance can be lower in the luteal phase. Be proactive! Pack cooling towels, a spray bottle, and plan to use shaded areas during breaks. Wear light-colored, breathable gear.

Two often-forgotten but critical tips:

  • Bathroom Planning: Know where the restrooms are. Schedule a final pit stop 30 minutes before game time to avoid mid-game urgency.
  • Discreet Supplies Kit: Stash a small pouch in your bag with period products, safe pain relief (like ibuprofen if you tolerate it), extra shorts, and wet wipes. Being prepared eliminates anxiety.

In-Game Adjustments

Once the game is on, listen to your body and make small, smart adjustments.

If cramps flare up during a break, try some deep belly breathing and gentle standing stretches. Avoid sitting completely; keep moving lightly to prevent stiffness.

Your hydration strategy shifts from preparation to maintenance. Take small, frequent sips during every break—don’t wait until you’re thirsty. If you feel overheated, use those cooling towels on your neck and wrists for quick relief.

Mentally, acknowledge how you’re feeling without judgment. A quick self-check (“I’m cramping a bit, but my breathing is steady”) can help you refocus. Remember, you’ve prepared for this. Trust your plan and play your game!

Nutrition + Supplements: Fueling Your Cycle for Performance

What you eat fuels your body and works with your hormones. Think of your menstrual cycle as a monthly training plan for your metabolism. By syncing your nutrition with your cycle, you give your body the specific building blocks it needs to perform, recover, and stay strong. This isn’t about a restrictive diet; it’s about strategic fueling that turns food into a powerful advantage on the pitch.

Fueling Through the Phases

Your nutritional needs shift subtly from week to week. Let’s break down what to focus on in each main phase.

During the follicular phase (right after your period), your body is primed to rebuild. This is a critical time to replenish iron. Menstruation can deplete your iron stores, leading to fatigue and sluggishness. Focus on iron-rich foods like lean red meat, lentils, spinach, and fortified cereals. Pair them with vitamin C (like bell peppers or oranges) to boost absorption.

This phase is also a great time for omega-3 fatty acids. Found in fatty fish, walnuts, and flaxseeds, they help manage exercise-induced inflammation, keeping your muscles feeling fresh.

A vibrant arrangement of iron-rich foods strategically displayed for female soccer players. In the foreground, a wooden table holds colorful plates featuring cooked spinach, grilled lean red meat, a variety of lentils, chickpeas, and quinoa. Prominent in the middle, fresh fruits like strawberries and oranges enhance the scene, symbolizing vitamin C to aid iron absorption. In the background, a softly blurred soccer field under bright, natural daylight creates a dynamic atmosphere, emphasizing athletic performance. A shallow depth of field draws attention to the food items while capturing the essence of a healthy, active lifestyle. The image conveys a sense of vitality and sportiness, inviting viewers to focus on nutrition for optimal performance.

As you move into the luteal phase, your body’s engine runs a little hotter. Your basal metabolic rate increases, meaning you may naturally burn more calories. It’s completely normal—and smart—to honor a slightly bigger appetite, for complex carbohydrates like whole grains, sweet potatoes, and oats. These carbs provide steady energy for training.

This phase is also prime time for bone health. The hormone progesterone can slightly increase bone breakdown, so amp up your intake of calcium (dairy, leafy greens, fortified plant milks) and Vitamin D (sunlight, fatty fish, eggs) to support repair and keep your skeleton robust for those powerful kicks and tackles.

If you’re constantly battling fatigue despite good sleep, consider talking to a doctor about testing for an iron deficiency. A simple ferritin blood test can reveal your iron stores.

  • When to Test: Ideal timing is during the follicular phase, as iron levels are most stable then.
  • What it Shows: Ferritin measures your stored iron. Even if you’re not anemic, low ferritin can impair performance and recovery.
  • Next Steps: If levels are low, your doctor might recommend dietary changes or a supplement, which we’ll discuss below.

Navigating the Supplement Aisle Safely

Food should always come first, but sometimes supplements can help fill a nutritional gap, even with demanding training schedules. The key is choosing wisely. The supplement industry isn’t tightly regulated, so products can contain impurities or not have the ingredients listed on the label.

To ensure safety and quality, always look for a third-party verification seal. These independent organizations test supplements for what’s actually in the bottle.

Nutrient Key Role for Athletes Top Food Sources When to Consider a Supplement
Iron Carries oxygen in blood to muscles, supports energy production. Lean beef, lentils, spinach, fortified cereal. If ferritin test shows deficiency, or if you follow a vegetarian/vegan diet.
Omega-3s Reduces inflammation, supports brain health and recovery. Salmon, mackerel, walnuts, chia seeds. If you rarely eat fatty fish (2-3 times per week).
Calcium Builds and maintains strong bones, supports muscle function. Yogurt, milk, kale, fortified tofu. If you avoid dairy and don’t consume fortified alternatives regularly.
Vitamin D Helps absorb calcium, supports immune function and muscle health. Sunlight, trout, eggs, fortified milk. For most athletes, specially in winter months or with limited sun exposure.

The gold-standard seals to look for are NSF Certified for Sport® or USP Verified. These tell you the product is free from banned substances, contains the ingredients listed, and has been manufactured safely. This is non-negotiable for competitive athletes!

Building a personalized fueling plan takes time, but starting with these cycle-aware nutrition basics can make a huge difference. Listen to your body, fuel it with intention, and you’ll be supporting your performance from the inside out.

REDs awareness: signs of low energy availability; when to seek help; building a fueling plan

Imagine pushing through fatigue and injuries, thinking it’s just part of being an athlete. But your body might be signaling a deeper energy crisis. Understanding Relative Energy Deficiency in Sport (REDs) is key to training smart.

What is REDs?

REDs occurs when you don’t eat enough to support your training and basic body functions. It’s like a bank account: too many withdrawals (exercise) without enough deposits (food) leads to a deficit.

This low energy availability is serious. It affects not just elite athletes but also recreational players. Your menstrual cycle is a health indicator. Irregular or absent periods are a warning sign.

The effects of low energy availability are far-reaching. It can weaken bones, slow metabolism, hurt the immune system, and strain the heart. It’s a body-wide issue.

How do you know if you’re at risk? Look out for these signs:

  • Irregular or missing periods for several months.
  • Constant fatigue that doesn’t go away with rest.
  • Frequent injuries, like stress fractures.
  • Difficulty recovering from normal workouts.
  • Feeling unusually cold all the time.

If these signs sound familiar, it’s not a sign of weakness or dedication. It’s your body asking for help.

Taking Action for Your Health

So, when should you seek help? The answer is simple: now. Ignoring these signs won’t make them go away; it often makes things worse. The first and most important step is to start a conversation.

Talk to a trusted doctor or a sports dietitian who understands athletes. They are not there to judge your training but to partner with you. Together, you can build a personalized fueling plan that supports your athletic dreams and your overall well-being.

This plan isn’t about restrictive dieting. It’s about strategic eating—making sure you get enough quality calories, around your workouts, to fuel your performance and protect your health. Your health is your most important performance metric. Investing in it is the smartest training decision you can make.

Contraception notes: how different methods may affect symptoms and tracking; medical guidance boundaries

Choosing birth control as an athlete is unique. It affects how you feel, perform, and track your cycle. It’s not about good or bad choices, but being informed to train smarter.

Knowing how your contraception works is key. Some methods keep hormone levels steady, while others work locally. This means you might not follow the usual “follicular phase for power, luteal phase for endurance” advice. But, you can tune into your body’s signals.

Focus on tracking your personal patterns of energy, mood, and recovery. This personalized data is powerful for optimizing your game.

Hormonal vs. Non-Hormonal Methods

Contraceptives are mainly hormonal or non-hormonal. Each type affects your body differently, during training.

Hormonal methods, like the birth control pill, patch, ring, or hormonal IUD, release synthetic hormones. They aim to prevent ovulation. This can lead to lighter, more predictable periods or even no bleed at all.

The classic birth control pill creates a steady hormone state. You won’t experience natural estrogen and progesterone swings. Traditional phase-based training plans don’t apply. Yet, you might notice your own monthly patterns in sleep, motivation, or joint laxity. Tracking these symptoms is incredibly valuable!

Non-hormonal methods, like the copper IUD or barrier methods (condoms, diaphragms), don’t introduce hormones into your system. Your natural menstrual cycle continues. The training adjustments we’ve discussed can be very relevant. A copper IUD may cause heavier or more crampy periods for some, which is a key factor to manage around competition.

To help you see the differences at a glance, here’s a breakdown of how common methods might impact you as an athlete:

Method Type How It Works Common Impact on Cycle Considerations for Training
Birth Control Pill Suppresses ovulation with steady synthetic hormones. Predictable, often lighter periods. No natural cycle. Track energy & mood, not phases. Be mindful of potentia nutrient needs like B vitamins.
Hormonal IUD Releases progestin locally in the uterus. Periods often lighter or stop. You may stil You might have subtle cyclic symptoms. Good for managing heavy menstrual bleeding.
Copper IUD Non-hormonal; copper creates an inhospitable environment for sperm. Natural cycle continues. Periods can be heavier. Perfect for phase-based training. Plan for possible cramping/heavy flow on game days.
Barrier Methods Physically block sperm (condoms, diaphragm). Zero impact on your natural hormone cycle. Full ability to use cycle-synced training. No hormonal side effects.

Remember, this table is a general guide. Your individual experience is what matters most. The most important step is having a informed chat with your healthcare provider.

Communicating with Your Coach and Doctor

This is where knowledge turns into power. Having open conversations with your support team is essential for your health and performance.

With Your Doctor: Always seek professional medical guidance. Come prepared to appointments. You might say, “I’m an athlete, and I’m wondering how this birth control option could affect my energy levels, recovery, and periods.” A good provider will discuss your athletic goals alongside your reproductive health.

With Your Coach: You don’t need to share private medical details. Instead, focus on symptoms that affect training. You could explain, “My energy dips predictably every month,” or “I need to manage cramping during certain weeks.” This helps your coach adjust workouts or game-day strategies without overstepping.

Here’s our biggest note: We are educators, not doctors. Our goal is to give you the knowledge and language to advocate for yourself. This information empowers your conversations but does not replace personalized medical advice.

Your body is your most important piece of equipment. Understanding how contraception fits into your athletic life helps you take control and perform at your best, no matter what method you choose.

Tracking tools: paper vs app; privacy and data safety for teens; pattern spotting workbook

Tracking your cycle is like creating a personal playbook. It turns guesses into strategies, helping you train better and feel in control. The right tools make it easy and insightful.

You can choose between a paper journal or a digital app. The best tool is the one you’ll use every day. Being consistent helps spot important patterns.

Choosing Your Tracking Method

Let’s look at your options. A paper journal offers privacy and a hands-on feel. You can track energy, mood, sleep, and workouts easily. Plus, it doesn’t need batteries!

Digital apps do the hard work for you. They predict cycles, show trends, and connect with wearables. Apps like Clue and Flo are popular for health tracking.

For athletes, apps like FitrWoman or Wild.AI are game-changers. They use cycle data for personalized training and nutrition. Some even let you share with a coach safely.

Tool Type Best For Key Features Considerations
Paper Journal Those who value simplicity & offline privacy Complete control, no tech needed, highly personal Pattern spotting requires manual review
General Cycle Apps (e.g., Clue, Flo) Easy automated tracking & predictions Cycle predictions, symptom logging, community features Review data privacy settings carefully
Athlete-Specific Apps (e.g., FitrWoman, Wild.AI) Serious athletes linking cycle to performance Training adjustments, nutrient timing, coach integration Often requires a subscription fee

The choice is yours! Try a method for a full cycle and see what feels natural. The goal is to make cycle tracking a part of your routine.

Protecting Your Privacy

If you’re a teen athlete, keeping your data safe is key. Always talk to a parent or guardian when setting up an app. Make sure to read the privacy policy and look for promises like “we don’t sell your data.”

Many apps let you use a nickname instead of your real name. You can also disable optional permissions, like location sharing. Your health information is yours. Taking these steps keeps your cycle tracking journey safe and private.

Ready to put it all together? We suggest creating a “Pattern Spotting Workbook.” Note more than just start and end dates. Each day, write about:

  • Energy level (1-10 scale)
  • Sleep quality
  • Mood and motivation
  • Workout performance
  • Any physical symptoms

After two or three cycles, look back. You might find patterns, like stronger workouts in certain phases. This is your blueprint! For a great start in understanding your cycle patterns, check out our beginner’s guide.

Remember, knowledge is power. By choosing your tools wisely and protecting your information, you turn your cycle into your greatest athletic advantage.

Stories from the pitch: women who used cycle tracking to stabilize performance and confidence

A quiet revolution is happening on soccer fields across the country. Female athletes are using menstrual cycle tracking to improve their game. You’re not alone in dealing with energy swings and mood changes. Hearing about others’ success can guide your own journey.

These stories are about progress, self-awareness, and taking control. Let’s look at some players who used data to make a difference.

Real Athletes, Real Results

Chloe, a collegiate midfielder, used to dread games during her pre-menstrual week. She felt bloated, tired, and irritable, making her play at 70%.

After tracking her cycle, she noticed a pattern. In the week before her period, she felt more tired. She now plans her game-day better. Chloe eats more magnesium and does a longer warm-up. This makes her feel ready, not defeated.

Maya, a forward, found her strength training easier in the first two weeks of her cycle. She scheduled her heaviest lifts and sprint workouts then. In this phase, she broke her squat record and got faster.

Zoe, a goalkeeper, solved a hydration mystery. She learned her body temperature changed more in her luteal phase. Zoe now drinks more electrolytes before her period. This simple change helped her stay focused during long games.

A dynamic female soccer player in action on the field, demonstrating confidence while dribbling a soccer ball. She's an athletic woman with a focused expression, wearing a professional soccer kit in vibrant colors. In the foreground, her poised posture showcases strength and determination. In the middle ground, a blurred teammate is seen in the background, also engaged in the game, emphasizing teamwork. The scene is set in a sunny stadium with green grass, capturing a lively atmosphere filled with energy. The lighting is bright and natural, casting soft shadows to enhance the details of her attire. The angle of the shot is slightly low, giving an empowering perspective that highlights her athleticism and skill, embodying the spirit of sportsmanship and empowerment.

These athletes show that small changes can make a big difference. The table below shows how they aligned their training with their cycles.

Athlete & Position Primary Challenge Cycle Phase Focus Key Strategy Performance Outcome
Chloe (Midfielder) Low energy & mood swings from PMS Luteal Phase Adjusted pre-game nutrition; extended dynamic warm-up More consistent game-day performance; reduced anxiety
Maya (Forward) Inconsistent power output Follicular Phase Scheduled max strength & speed sessions in this window Set new personal records; improved sprint times
Zoe (Goalkeeper) Hydration & focus lapse pre-period Luteal Phase Increased electrolyte intake 3-4 days prior to menstruation Better concentration and thermoregulation during matches

The Confidence Boost

The biggest win for these athletes wasn’t just physical. It was mental. Knowing why you feel a certain way removes doubt. You stop blaming yourself for an “off day” and start planning for it.

This knowledge builds deep confidence. You understand your body’s schedule. This mindset shift is key for building confidence in aspiring female soccer. It turns a monthly challenge into a source of strength.

Your story is next. Start tracking, find your patterns, and make one small change. You might be surprised by how much control you really have.

Coach/parent guide: supportive language, schedule considerations

Coaches and parents play a big role in helping girls see their menstrual health as a strength, not a weakness. Many girls miss out on training because of their periods. But you can help change that.

By being informed and supportive, you give girls the freedom to focus on their game, not their worries. This is how you can make a big difference.

For Coaches: Building a Supportive Environment

Your attitude sets the tone for the whole team. A supportive environment starts with you. It’s built on what you say and how you schedule.

Master Supportive Language

Words are powerful. Avoid saying things that might make girls feel bad or judged. Instead, ask open-ended questions that show you care.

Try these alternatives:

  • “How are you feeling today? Should we adjust the session intensity?”
  • “I noticed your energy seems different. Want to talk about modifying the drill?”
  • “Your safety and how you feel come first. Let me know if you need a break.”

This approach encourages honesty. It shows your athlete that her well-being is your top priority.

Offer Flexible Schedule Considerations

Being too rigid can hurt an athlete who’s not feeling well. Flexibility is a sign of strength, not a weakness, in your coaching. Be ready to change plans or swap drills if needed.

Consider these adjustments:

  • If an athlete is in her luteal phase and reports low energy, postpone a max-strength test.
  • During heavy flow days, allow more frequent bathroom breaks without question.
  • Offer alternative, lower-impact core work if cramping is present.

This flexibility prevents injuries, builds trust, and keeps athletes engaged.

Your home is the foundation. Your role is to advocate, educate, and support. You connect your athlete with her coach.

Normalize the Conversation

Talk about cycles openly and without shame. Ask how she’s feeling in relation to her training. This makes the process easier to talk about.

Help with Tracking and Observation

You can help her track her cycle. Use an app or journal together. This way, you can spot patterns and plan better for recovery.

Champion Recovery and Sleep

Recovery is just as important as the workout. Make sure she gets enough rest, and protect her sleep schedule. This is key, as her body temperature is higher during the luteal phase.

Your support in prioritizing rest gives her permission to slow down when needed. This is essential for long-term performance and health. When coaches and parents work together, you empower a resilient, confident young woman.

Resources, checklist, glossary

You now know how your menstrual cycle affects your energy and performance. This section gives you tools to use every day.

Your Go-To Toolkit

For tracking your cycle, try apps like Flo or Clue. They help you log symptoms and predict your phases. “Roar” by Dr. Stacy Sims is a great book for athletes. Websites like The Female Athlete Project have articles on iron deficiency and REDs.

Start your action checklist today. First, mark your menstrual cycle phase on a calendar. Then, schedule a doctor’s visit to check your iron levels. Keep a small kit with heat patches for cramps and extra hydration packets.

Plan your recovery around your cycle. Sleep more during your luteal phase. Drink more water based on your body’s needs. If you’re on birth control, note any PMS changes to talk to your doctor.

Key Terms Defined

Follicular Phase: The first half of your cycle, from day one of menstruation to ovulation. This phase often supports higher-intensity training.

Luteal Phase: The second half, after ovulation. Body temperature rises, and PMS symptoms like cramps or mood swings may occur.

REDs (Relative Energy Deficiency in Sport): A serious condition where insufficient calorie intake impairs health, affecting bone density, immunity, and menstrual function.

Hepcidin: A liver hormone that controls iron absorption. Its levels can increase during inflammation, impacting iron stores.

Keep this glossary and checklist handy. Refer back as you track your cycle and refine your game-day strategies. For athletes participating in competitive pathways or international soccer talent scouting, understanding these physiological signals can help optimize performance, recovery, and long-term development. Your body’s signals are a guide to unlocking your best performance.

Girls’ Soccer Concussion Safety: How to Spot, Remove, and Safely Return Players

concussion protocol soccer youth girls

Welcome! Let’s talk about keeping our young athletes safe and thriving on the field. A head injury is a serious event. How we respond in the first moments can shape an entire season—and a life.

In youth girls’ soccer, the risk is real, and it’s highest during preseason. Athletes are getting back into shape, and that’s when many brain injuries happen. The pressure to play through it can be strong, but knowing what to look for is our superpower.

That’s why acting fast is non-negotiable. Spotting the early red flags and getting a player off the field immediately is the most critical step. It’s not just about safety today; it’s about protecting their long-term well-being.

Think of this as your playbook. We’ll explore how quick, smart identification leads to a smoother, safer recovery road. Understanding the “why” empowers us to master the “how.” Let’s get started!

Spot the signs: immediate symptoms, delayed signs, red flags; sideline script for captains and parents

A concussion doesn’t always show itself with a big fall. Sometimes, the signs are small and take time to show up. Your job is to be a symptom detective. Look for signs right after a play, later signs, and the most urgent ones that need a hospital visit.

Immediate Symptoms: What to Look for on the Field

Don’t think a player must be knocked out to have a concussion. Most happen without losing consciousness. Look for signs like being dazed, confused, or unsure of the game details.

They might complain of a headache, feel dizzy, or have trouble balancing. Notice if they answer slowly, repeat themselves, or seem foggy.

Seeing stars or blurred vision are also signs. If something seems off after a hit, investigate it.

Some symptoms show up later, at home or the next day. That’s why watching closely is key.

These signs might include being sensitive to light or noise. They could feel mentally tired, have trouble focusing, or feel “in a fog.”

Look out for mood changes, like being irritable or sad. Changes in sleep patterns are also important.

Red Flags: When to Go to the Emergency Room Immediately

While most concussions are managed with rest, some are emergencies. These red flags mean call 911 or go to the ER right away.

These signs point to a serious brain injury. They include:

  • One pupil (the black part of the eye) appearing larger than the other.
  • Significant drowsiness or an inability to be awakened.
  • A headache that keeps getting worse and won’t go away.
  • Slurred speech, weakness, or numbness.
  • Repeated vomiting.

If you see these red flags, don’t wait. This is the “when in doubt, get it checked out” rule in its most urgent form.

Your Sideline Script: Simple Phrases for Captains and Parents

In the moment, it can be hard to know what to say. Here’s a simple script to check on a player. Think of it as your verbal checklist:

  • “Hey, how are you feeling right now?”
  • “Does your head hurt? On a scale of 1 to 10?”
  • “What’s the score? What quarter/half are we in?” (Tests memory and orientation).
  • “Follow my finger with your eyes.” (Watch for smooth eye movement).
  • “How do the lights/sounds feel to you?”

Using these direct, calm questions can help you understand the athlete’s concussion symptoms better. Being observant is your first and most powerful tool for safety.

Remove and refer: when in doubt sit them out; documentation, who calls whom, urgent care vs ER

Managing concussions starts with a simple rule: if unsure, don’t let the athlete play. This guide will help you understand what to do if you think someone has a head injury. We’ll show you how to act from the first sign to when a doctor takes over.

When in Doubt, Sit Them Out

This advice is more than just a suggestion. Many states require kids to stop playing if a concussion is suspected. Why is this rule so important?

Playing with a concussion can lead to Second Impact Syndrome, a serious condition. It happens when another injury occurs before the first one heals. The “when in doubt” rule means you don’t have to guess. Only a trained healthcare provider can say if it’s safe for the athlete to play again.

Remember: You are the first line of defense. Your decision to remove the player is key to everyone’s safety.

A detailed and informative illustration of a "Concussion Removal and Referral Protocol" in a clinical setting. In the foreground, a female soccer player in a modest sports uniform sits on a bench, displaying signs of concern while being assessed by a medical professional in a white coat, with a clipboard in hand. In the middle, visual representations of the protocol steps, such as flowcharts or icons, illustrating the decision-making process: "Remove," "Refer," and options for "Urgent Care" and "ER." The background features a well-lit sports facility, with subtle hints of a soccer field and safety gear, creating a clinical yet supportive atmosphere. Use bright, clear lighting to emphasize the urgency and professionalism of the scene, shot from a slightly elevated angle for a comprehensive view.

After removing the player, start documenting and talking to others. Write down everything right away. This information is vital for the doctor.

What to Document:

  • Cause of Injury: How did it happen? (e.g., head-to-ball collision, fall).
  • Observable Signs: Was there loss of consciousness? Any memory loss (amnesia) about the event? Did you see any seizures?
  • Player Reports: What symptoms is the athlete describing? (Headache, dizziness, confusion).
  • Relevant History: Note any previous concussions and current medications.

This documentation helps with the first steps of cognitive rest. It gives the doctor a starting point.

Now, let’s talk about who should call whom. Follow this order for clear communication:

  1. Coach/Trainer to Parent/Guardian: The coach or trainer calls first. Explain the situation, signs, and why the athlete is out.
  2. Parent/Guardian to Healthcare Provider: The parent or guardian then calls a doctor, urgent care, or ER. Share the documentation.
  3. Healthcare Provider to School/Team: After checking, the doctor will give clearance for returning to school and play. This note goes to the school and team.

Urgent Care vs ER: Making the Right Call

Choosing between urgent care and the ER can be tough. Use this guide to decide based on the symptoms you’ve noted.

Situation Go to the Emergency Room (ER) Schedule Urgent Care / Doctor Visit
Timing Go immediately. This is a “drop everything” situation. Can often wait until the next day, if symptoms are mild and stable.
Key Red Flags Loss of consciousness (even briefly), worsening headache, repeated vomiting, seizure, slurred speech, weakness/numbness, increasing confusion. Persistent headache, dizziness, sensitivity to light/noise, “fogginess,” but no severe or worsening red flags.
Best For Ruling out more serious brain injuries (like bleeding) that need advanced imaging (CT scan). Official concussion diagnosis, management plan, and starting the process for return-to-learn and cognitive rest guidance.
Analogy Like calling 911 for a possible heart attack—you need immediate, thorough evaluation. Like seeing your primary doctor for a persistent flu—you need expert care, but it’s not urgent.

If symptoms are mild with no red flags, a next-day appointment is fine. The doctor will confirm the concussion and outline a recovery plan. If any red flags are present, go straight to the ER. It’s always safer to be cautious.

By following this protocol, you ensure the athlete gets the care they need to recover safely.

Assessment tools: what SCAT5/6 is and isn’t; baseline testing value; role of ATs and physicians

Getting a concussion right means more than just guessing. It needs special tools and experts working together. This part explains the main tools and people that help a player from injury to being cleared by a doctor.

What the SCAT5/6 Is (and What It Isn’t)

On the sidelines, you might hear about SCAT5 or SCAT6 (Sport Concussion Assessment Tool). It’s like a checklist for head injuries. It helps someone, like an Athletic Trainer, check symptoms, memory, balance, and coordination.

The SCAT is great for a quick check on the field. But, it’s not a final say. If it shows a concussion, the player must stop playing. Only a doctor can say for sure after a full check-up.

It’s a first step, not the last word.

The Real Value of Baseline Testing

Baseline testing takes a “snapshot” of a healthy brain before the season. Athletes do tests that check memory, speed, reaction time, and balance.

Many think baseline tests diagnose concussions right away. That’s not right. They really help when checking if it’s safe to play again.

After a concussion, symptoms might go away before the brain heals. By comparing post-injury tests to the baseline, doctors can see if the brain is back to normal. This helps make sure a player isn’t playing too soon.

A good baseline testing program checks many areas:

  • Balance and coordination
  • Verbal and visual memory
  • Reaction time and processing speed
  • Visual tracking

Two key people are key to safety on the field. Knowing their roles helps everyone work better together.

Athletic Trainers (ATs) are the first to act. They do the SCAT check, manage the “remove” step, and watch the athlete later. They connect the player, coach, and doctor.

Physicians, like sports medicine doctors or neurologists, give the official diagnosis and clearance. They look at the baseline testing and handle tough cases.

Think of it this way: the AT handles the initial recognition and management. The physician makes the diagnosis and final clearance.

Role Primary Setting Key Responsibilities Ultimate Goal
Athletic Trainer (AT) Sideline, School, Clinic Immediate injury assessment (e.g., SCAT5/6), symptom monitoring, initial care coordination, communication with family/coach. Ensure safe removal and guide athlete to appropriate medical care.
Physician Medical Office, Clinic Provide official diagnosis, interpret medical tests and baseline testing data, manage treatment plan, authorize all return-to-activity milestones. Deliver medical clearance when the brain is fully healed and safe for activity.

Together, these tools and experts make a safety plan that puts the athlete’s brain health first. It’s about safety over a quick return to the game.

Return‑to‑learn: classroom adjustments, screen time, homework pacing; collaboration template with school staff

Before a student-athlete can even think about sports, their brain needs to successfully return to learning. This phase, called return-to-learn, is the essential first step in concussion recovery. Think of it as cognitive rest for the classroom. After a brief rest period of 1-2 days, most kids should head back to school, even if it’s just for a half-day at first.

Why is this so important? Your brain uses a huge amount of energy to focus, read, and solve problems. After a concussion, it has less energy to spare. Pushing too hard academically can trigger symptoms and slow overall healing. A smart, supported return to school sets the stage for a safe return to play.

A vibrant classroom scene reflecting a supportive learning environment for students returning from concussion recovery. In the foreground, a diverse group of students, including girls in professional business attire and modest casual clothing, are engaged in collaborative activities, utilizing modified tools like notebooks with large print and fidget items. In the middle ground, a teacher provides individualized attention, gesturing towards a whiteboard filled with gentle reminders for screen time limits and pacing homework. The background features a sunny window, with soft natural light illuminating the room, creating a warm, inviting atmosphere. The composition should capture a sense of calm, collaboration, and focus on mental wellbeing, highlighted by various educational materials on desks and walls infused with positive messages about recovery and learning.

Classroom Adjustments, Screen Time, Homework Pacing

Practical accommodations make all the difference. You’re not asking for special treatment; you’re supporting necessary brain healing. Work with the school to create a plan that might include:

  • Rest breaks: Permission to leave class for a quiet space if symptoms flare.
  • Extended time: More time for tests and assignments to reduce pressure.
  • Reduced screen time: This is a major trigger! Limit computer, tablet, and phone use. Ask for printed materials when possible.
  • Lighter homework loads: Temporary reduction in volume or complexity.
  • Preferential seating: Sitting near the front to reduce visual and auditory distractions.

Managing screen time is often the biggest challenge. The bright lights, scrolling, and focusing can cause headaches and dizziness. Be proactive! Set strict time limits and encourage frequent breaks using the 20-20-20 rule: every 20 minutes, look at something 20 feet away for 20 seconds.

Homework pacing is about quality over quantity. Break assignments into tiny, manageable chunks. Celebrate finishing a single math problem or reading one paragraph. The goal is to keep the academic engine idling, not revving at full speed. This careful cognitive rest allows the brain to heal without falling behind.

Collaboration Template with School Staff

You don’t have to manage this alone. Successful school coordination turns “my kid has a concussion” into “our team is helping this student recover.” A clear plan involving parents, healthcare providers, teachers, the school nurse, and counselors is key.

Use this simple template to start the conversation. It provides a script for an email or a quick meeting.

  1. Initiate Contact Early: Reach out to the school nurse or counselor as soon as your healthcare provider recommends a return-to-learn plan.
  2. Provide Clear Documentation: Share any doctor’s notes that outline specific limitations and recommended accommodations.
  3. Request a Team Meeting: Ask for a brief coordination meeting (in-person or virtual) with key staff. This ensures everyone hears the same plan.
  4. Present the Student’s Needs Simply: “My daughter, [Name], is returning to school after a concussion. Her doctor has recommended reduced screen time, rest breaks, and a lighter homework load for the next two weeks. How can we work together to make this happen?”
  5. Set a Review Date: Agree to check back in after a week to adjust the plan as symptoms improve.

This kind of proactive school coordination is proven to support better outcomes. For a deeper look at effective strategies, research on academic accommodations for concussion programs shows how structured plans help students thrive. Remember, you are your child’s best advocate, and the school is your partner in ensuring a smooth and successful return-to-learn.

Graded return‑to‑play: 6‑step plan with exertion thresholds and symptom checklists; what to do if symptoms spike

Returning to play after a head injury is like climbing a ladder. You must secure each rung before moving up. A graded return-to-play plan is that ladder. It’s a safe, structured series of RTP stages designed to test the brain’s recovery under increasing physical demand.

This process takes at least one full week, but often longer. The golden rule? The athlete must be completely symptom-free before moving to the next step. Rushing this is the biggest mistake we see!

The 6‑Step Plan with Exertion Thresholds and Symptom Checklists

Here is the standard progression, endorsed by medical organizations worldwide. Each stage has a specific goal and exertion level. You’ll use a simple symptom checklist before, during, and after each activity.

  1. Symptom-Limited Rest (24-48 hours post-injury): This is the starting line. Complete physical and cognitive rest is key. No sports, no schoolwork, limited screen time. The goal is to let the brain settle.
  2. Light Aerobic Exercise: Once symptoms are gone at rest, start here. Think of a gentle bike ride or a brisk walk for 10-15 minutes. Exertion threshold: Keep the heart rate below 70% of max. No soccer-specific movements yet. Check for symptoms like headache or dizziness.
  3. Sport-Specific Exercise: Now we add soccer motions without impact. Light jogging, running laps, or dribbling in a straight line. Exertion threshold: Moderate activity, but no jumping, heading, or changing direction quickly. The symptom checklist now includes focus and balance.
  4. Non-Contact Training Drills: This is a big step! The player can participate in most practice drills. Passing patterns, shooting, tactical work. Exertion threshold: Higher intensity, more complex movements, but absolutely no contact with other players. Coaches must modify drills to ensure safety.
  5. Full Contact Practice: After medical clearance, the player rejoins normal team practice. This includes controlled scrimmaging and heading drills. Exertion threshold: Game-like intensity. The symptom checklist is critical here to see if the brain handles the chaos and contact of a real practice.
  6. Return to Full Game Play: The final rung on the ladder! The athlete is cleared for competition. Continue monitoring for any symptoms, but confidence should be high after successfully completing all prior RTP stages.

Your symptom checklist at each step should be simple. Ask: “Do you have a headache? Dizziness? Foggy feeling? Trouble concentrating?” If the answer is “no” to all, after 24 hours at that stage, you may progress.

What to Do If Symptoms Spike

Here’s the part many fear, but it’s perfectly normal. What if symptoms come back? Don’t panic! This is your body’s signal, not a failure.

Your action plan is clear and calm:

  • Stop the activity immediately. Do not “push through.”
  • Return to the previous step where the athlete was last symptom-free. If symptoms spiked during Step 4 (non-contact drills), go back to Step 3 (sport-specific exercise).
  • Rest for 24-48 hours until symptoms resolve completely.
  • Re-start from that previous, symptom-free step. This “step back” is a built-in safety feature of the plan.

This hiccup means the brain needs a little more recovery time at that level of exertion. It’s a protective feedback loop, not a setback. By following this process, you’re ensuring the athlete’s long-term health is the top priority.

Mastering these RTP stages turns a scary process into a confident journey. You’ve got a map, a checklist, and a plan for every bump in the road. Now, let’s get back to play—safely and smartly!

Heading considerations: age‑based rules, neck‑strength add‑ons, limiting cumulative exposure in practices

Let’s look at how to prevent concussions in young athletes, focusing on heading. We’ve talked about what to do if someone gets hurt. But the best defense is always a good offense. For soccer, that means smart rules about when and how to head the ball.

Age-Based Rules: Why They Matter

Younger brains are more at risk, so safety guidelines are strict. Organizations like U.S. Soccer have set age-based heading limits. These rules help introduce heading safely when athletes are ready.

For example, kids under 11 shouldn’t head the ball. Kids from 11 to 13 should start with limited heading in practice. These heading limits protect young brains while teaching proper technique.

Neck-Strength Add-Ons: The Nuanced Truth

Some think neck strength can prevent concussions. But it’s not that simple. A stronger neck might help if you see the hit coming.

But most concussions happen unexpectedly or when players are off-balance. Awareness and vision are more important than muscle strength. Neck strengthening is good for training, but it’s not a magic solution for concussions.

Limiting Cumulative Exposure in Practices

Coaches have a big role to play! Most heading happens in practice, not games. Smart coaching means reducing cumulative exposure.

Instead of 50 headers in one session, use fewer reps. Mix heading with other drills. This way, you respect heading limits while improving players.

What about protective gear? Mouthguards protect teeth but don’t prevent concussions well. Soft-shell helmets or headbands might prevent cuts but don’t lower concussion risk much.

The best prevention is smart rules and practice changes, not just gear. By following age-based guidelines, focusing on awareness, and managing practice, we make soccer safer for everyone.

Communication flow: coach/parent/medical triangle; privacy and support language for teens

After a head injury on the field, the most critical play isn’t a tactical move—it’s establishing a clear line of communication between the coach, parents, and medical professionals. A concussion is a team injury, and managing it well requires everyone to be on the same page.

When information flows smoothly, the athlete gets consistent support, and recovery accelerates. Breakdowns in communication, on the other hand, can lead to confusion, setbacks, and added stress for the teen. This is true during the return-to-learn phase, where school coordination is key.

Mapping the Coach/Parent/Medical Triangle

Think of the ideal support system as a triangle. The athlete sits in the center. The coach, the parent, and the healthcare provider form the three connected points. Each has a distinct role, but they all share the same goal: a safe, full recovery.

The table below outlines how this team should work together.

Role Key Responsibilities Best Practices
Coach Recognize signs, immediately remove athlete, notify parents, enforce activity restrictions. Create a culture that discourages “toughing it out.” Follow state laws requiring parent notification.
Parent/Guardian Provide immediate care, communicate with medical provider, monitor symptoms at home, advocate for child. Keep a simple symptom log. Be the link between the doctor’s instructions and the coach’s actions.
Medical Provider Diagnose, create a management plan, guide return-to-learn and return-to-play, clear for activity. Provide written instructions for all parties. Facilitate school coordination for academic adjustments.
Athlete Report symptoms honestly, follow prescribed rest and exertion plans, communicate how they feel. Understand that reporting is smart, not weak. Use the support team around them.

This triangle only works with trust and transparency. A positive sports culture makes athletes comfortable reporting symptoms. Remember, in most states, it’s not just good practice—it’s the law for coaches to inform parents of a suspected concussion.

Privacy and Support Language for Teens

For the teen athlete, a concussion can feel isolating. They might feel frustrated, sad, or left behind. How we talk to them matters immensely. Our language must respect their growing independence and privacy while providing unwavering support.

Instead of demanding “Tell me how you feel,” which can feel invasive, try empathetic, open-ended questions that empower them. This support extends to school coordination, ensuring teachers are informed while respecting the teen’s comfort level.

Here are some phrases that foster honesty and reduce pressure:

  • “It’s really common to feel frustrated right now. I’m here, not to bug you, but to help you navigate this.”
  • “Your job is to heal. My job is to handle the conversations with your coach and teachers. You focus on you.”
  • “Is there anything about this process that’s making you anxious? We can figure it out together.”
  • “Taking the time you need is the strongest and smartest thing you can do for your long-term game.”

The ultimate goal of this entire communication flow is to wrap the athlete in a coordinated, responsive support system. When the coach, parent, and medical provider communicate clearly, the teen feels secure, understood, and focused on one thing: getting better.

Role-model vignette: a local player who navigated RTP successfully and returned stronger

When Maya, a 15-year-old soccer star, got hurt, her recovery showed the power of a good plan. She went up for a header and fell awkwardly. Her coach saw her confusion and took her out of the game.

Maya then faced headaches, light sensitivity, and mental fog. She felt isolated and angry at her body. This emotional struggle is a big part of concussion recovery.

Her support system was key. Her parents listened, her friends encouraged her, and her team helped her recover. They made a return-to-learn plan that helped her heal.

When Maya’s brain was ready, she started her graded return-to-play plan. She began with light jogging and checked for symptoms. She then moved to drills, practice, and full training. Her patience paid off.

Maya didn’t just get back to playing. She became more aware and resilient. She learned discipline, communication, and teamwork. These lessons are valuable beyond soccer.

Maya’s story shows that following a medical plan can make you stronger and smarter. Her journey from uncertainty to triumph is a guide for any athlete facing a concussion.

Maya’s Concussion Recovery Roadmap
Recovery Phase Key Actions Biggest Challenge Positive Outcome
Acute Phase (First 72 hrs) Physical & cognitive rest, symptom monitoring, medical evaluation. Managing frustration and fear of the unknown. Clear diagnosis and a structured plan reduced anxiety.
Return-to-Learn Phase Shortened school days, limited screen use, paced homework. Feeling “behind” academically and disconnected from peers. Academic confidence returned without symptom flare-ups.
Graded Return-to-Play Phase Systematic progression through 6-step exertion protocol. Resisting the urge to skip ahead or rush the process. Regained physical fitness and sport-specific skills safely.
Full Return & Beyond Unrestricted play, continued neck-strength work, advocacy. Initial nervousness about contact and re-injury. Enhanced game awareness and a renewed love for soccer.

Each phase built on the last, providing safety and heart. Stories like Maya’s are vital. They show that setbacks can lead to major comebacks, building confidence in aspiring female soccer players. Her resilience shows the right way to recover from a concussion.

Myths vs facts, downloadable action plan, emergency card

Let’s clear up confusion and give you the tools to act fast. Knowing the truth about concussions and having a plan ready makes everyone on the field safer.

Myths vs. Facts

A common myth is that a player must be knocked out to have a concussion. The fact is most concussions happen without any loss of consciousness. Another myth claims helmets prevent concussions. While helmets protect against skull fractures, they do not stop the brain from moving inside the skull. Lastly, baseline tests are valuable tools, but they do not diagnose a concussion. A clinical evaluation by a medical professional is required for diagnosis.

Armed with the facts, you’re ready for the next step. We’ve created two practical resources to keep this knowledge at your fingertips.

Downloadable Action Plan

This one-page guide summarizes the critical steps: Spot, Remove, Assess, and Return. It’s designed for your soccer bag or clipboard. Use it as a quick-reference cheat sheet during games and practices to follow the proper protocol.

Emergency Card

Print this card and keep it with your gear. It lists vital contact information for your team’s medical staff and family. Most importantly, it clearly outlines the red flags—the warning signs that mean you need to seek emergency care immediately. Coaches and players involved in international soccer talent scouting often travel or attend camps where having this card ready becomes a crucial safety net for managing those critical red flags.

With accurate information and these ready-to-use tools, you can face the season with greater confidence and preparedness.

How to Prevent ACL Injuries in Women’s Soccer: Year-Round Strength and Mechanics Plan

ACL injury prevention women soccer

If you play, coach, or love someone on the pitch, you’ve probably heard the scary number. Female athletes face a risk of serious knee ligament issues that is two to ten times higher than their male counterparts.

But here’s the key: this isn’t just bad luck. It’s a complex puzzle. Our unique movement patterns, hormonal cycles, and muscle firing all matter. The modern game’s intensity adds another layer.

We also can’t ignore the mental game. The fear of a “pop” or the long road back from rehab is real and taxing.

The good news? This isn’t a fate you have to accept. Research shows that with consistent, smart training, you can slash that risk by more than half. This means less chance of future problems like osteoarthritis and more seasons doing what you love.

Think of this as your starting line. We’re here to break down the “why” and build your personalized, year-round ACL prevention strategy together. Let’s build a stronger, more confident you.

Biomechanics 101: knee valgus, trunk control, foot strike; how poor decel and plant angles create risk

Imagine landing from a jump; if your knee buckles inward, you’ve just witnessed the primary mechanical flaw we must fix. To build a safer, more powerful athlete, we need to understand three key players: knee valgus, trunk control, and foot strike. Think of this as your body’s movement blueprint—it shows us exactly what to correct.

Let’s start with knee valgus. This is the technical term for your knee “caving in” toward your other leg during a cut, pivot, or landing. Your ACL acts as a key stabilizer. When the knee collapses inward, it puts a lot of stress on that ligament. Injuries often happen when the knee is nearly straight during deceleration, making it a vulnerable hinge.

Next is trunk control, or what experts call “trunk dominance.” This occurs when your shoulders and upper body lean sharply toward your plant foot. Instead of your powerful hips and glutes absorbing the force, your upper body weight adds extra load to that single knee. The vital cue here is to “sink into the hips” and avoid being “too tall” or upright.

Your foot strike and the angle of your leg when you plant are the final pieces. If your foot lands far from your body’s center of mass, or if your shin is at a steep angle, it forces your knee into a dangerous position. Good landing mechanics require a soft, balanced foot contact that allows for proper knee alignment.

So how do these flaws combine to create risk? A stiff, upright landing with a wobbly trunk and a collapsed knee turns your joint into a shock absorber it was never meant to be. The poor deceleration angles overload the ACL from multiple directions at once.

Mastering valgus control is about retraining these patterns. It’s not just about strong muscles; it’s about teaching them to fire in the right sequence during dynamic movements. This foundational understanding is your first and most critical step toward injury-proofing your game.

Now that you can spot the problem, the exciting part begins: learning the fixes. In the next section, we’ll dive into simple screens and coaching cues to improve your landing mechanics and build that essential control.

Screening and teachable fixes: drop jump, single‑leg squat, T‑test—coaching cues and video feedback tips

Imagine using a phone to spot and fix risky movements. You don’t need a lab to find signs of an ACL tear. All you need are simple tests and the right words to correct them.

This is where ACL prevention starts. It’s not just about doing exercises. It’s about understanding why athletes move a certain way and teaching them to change.

A dynamic scene depicting a women's soccer player performing a valgus control screening in a sports training environment. In the foreground, the player is in a focused position executing a single-leg squat on a training mat, with a coach providing feedback and observation nearby. The middle ground features cones arranged for the T-test drill, illustrating agility and movement patterns. In the background, a well-lit indoor sports facility with green turf and gym equipment enhances the athletic atmosphere. The lighting is bright and focused, capturing the intensity of the training session. The mood exudes determination and professionalism, highlighting the importance of injury prevention and technique improvement in women’s soccer.

Let’s look at three key screenings. They’re like a movement interview. They ask the body questions, and the answers show if an athlete controls their valgus well.

The Drop Jump: Have an athlete step off a low box, land, and jump straight up. Watch how they land. If their knee caves inward, that’s knee valgus. Tell them, “Check your shin angle.” Encourage them to keep their shin vertical over their foot when landing. This helps stabilize the knee.

The Single-Leg Squat: This test shows control under load. Ask an athlete to stand on one leg and squat down slowly. Watch from the front. If their standing knee caves inward or their trunk leans, give them a cue. Tell them, “Sit back into your hip,” to engage their glutes. Or, “Stack your shoulders over your ankle,” to improve trunk control. These moments teach strong movement patterns.

The Modified T-Test: This screening checks control during changes in direction. Set up four cones in a T shape. The athlete sprints forward, shuffles side-to-side, and backpedals. Watch their plant foot during the shuffles. If the ankle rolls or the knee is unstable, it’s like a risky cut in a game. It’s a key part of assessments like the Cutting Movement Assessment Score (CMAS).

Video feedback is magic. Film these screenings on your phone. Show the athlete the clip side-by-side with a corrected version, or point out the moment their knee caves. Seeing the problem makes the feeling of the correction click instantly. It turns a complex concept into a simple visual lesson.

Your role as a coach is critical in ACL prevention. You’re not just a drill sergeant. You’re a movement teacher. Correction is key. By using these screenings and clear cues, you turn observation into action. You give your athletes the power of valgus control and the confidence to move safely.

Proven exercises: Nordics, Copenhagens, RDLs, hip abductor/extensor work, calf/soleus strength, decel and cut

Welcome to your exercise playbook! Here, we turn biomechanical knowledge into real strength. These movements are your tools for a strong knee.

We start with basic exercises and move to advanced ones. We connect gym strength to field safety. Let’s build your knee’s strength safely.

Your hamstrings are key for stopping. A Nordic hamstring curl trains the strength to stop your shin from sliding forward. This is important for ACL safety.

To start, kneel on a pad with a partner holding your ankles. Slowly lower your chest toward the floor, resisting gravity. Even a few inches is a win! Try to lower farther each week.

Groin and Hip Guardian: Copenhagen Planks

This Copenhagen adduction exercise strengthens your inner thigh and hip. It prevents your knee from caving inward during side-to-side movements. This is a common cutting error.

To start, lie on your side with your bottom knee bent and your top leg straight. Lift your hips into a side plank, pushing your top leg down into the bench. Hold for time. It’s tougher than it looks!

Posterior Chain Power: RDLs and Deadlifts

Your glutes and hamstrings work together. Romanian Deadlifts (RDLs) teach this hinge pattern. Focus on feeling a stretch in your hamstrings as you push your hips back.

Progress to single-leg RDLs for more stability. For advanced strength, aim for a conventional deadlift with a target of 1.25 times your body weight. This builds raw power that protects your knees during landing and jumping.

Building Hip Armor: Abductor and Extensor Work

Your hip abductors (outer glutes) protect your knee. Weakness here leads to valgus collapse. Start simple:

  • Clam Shells: Lie on your side, knees bent. Keep your feet together and lift your top knee like a clamshell opening.
  • Banded Side Steps: Place a resistance band around your thighs and take slow, controlled steps sideways.
  • Hip Extensions: On all fours, lift one leg straight back, squeezing your glute at the top.

Progress these to banded hops and weighted exercises to mimic soccer forces.

Don’t Forget the Foundation: Calf and Soleus

Your calf muscles control ankle stiffness. Strong calves help absorb impact better. Include calf raises with both a straight knee (gastrocnemius) and a bent knee (soleus) in your routine.

From the Gym to the Gridiron: Deceleration and Cutting Drills

Strength is useless if you can’t use it on the field. This is where application is key. Integrate drills that force you to use your new strength:

  • Deceleration Landings: Jump from a low box and focus on landing softly, absorbing the force through your hips and hamstrings.
  • Angle of Attack Cuts: Practice changing direction while consciously “checking your shin angle”—keeping your knee aligned over your toes.

Start these drills at slow speeds, focusing on perfect form. Speed comes later, after the movement pattern is automatic.

Here’s a quick reference for your strength targets and starter moves:

Muscle Group Key Exercise Starter Variation Advanced Target
Hamstrings Nordic Hamstring Curl Partner-Assisted Lowering Full Range Curl
Adductors/Hips Copenhagen Plank Short Hold (15-30 sec) Long Hold (45+ sec)
Posterior Chain Deadlift Bodyweight RDL 1.25 x Body Weight
Hip Abductors Banded Exercise Clam Shells Banded Lateral Hops
Quads/Glutes Squat Bodyweight Squat 0.75 x Body Weight

Remember, consistency beats intensity every time. Master the movement before you add load or speed. Your knees will thank you for every rep!

Practice integrations: 12‑minute ACL block, pre-session micro plyos, “check your shin angle” cueing language

The best ACL prevention isn’t just a clinic. It’s a habit in every warm-up. Let’s make your team’s routine a strong shield against injury. We’ll make safety a part of practice.

Forget the “dinky 10-minute warm-ups” that research warns against. A true prevention program needs dedicated, coached time. It’s about quality movement, not just checking a box.

Your secret weapon is a consistent 12-minute “ACL Prevention Block.” This isn’t extra work. It’s a smarter way to use the time you already have.

Blueprint of the 12-Minute Block

Think of this block in three parts. Each part has a clear job to prepare the body and mind for safe play.

  • Minutes 1-4: Dynamic Activation. Light jogging, leg swings, and movement prep. The goal is to wake up the muscles and joints.
  • Minutes 5-9: Core Strength & Plyometrics. Here’s where we build power safely. We integrate decel training principles and progressive plyometrics. Start with low-intensity jumps and build up.
  • Minutes 10-12: Sport-Specific Drills. Practice cutting and landing with the new techniques you just learned. Use smart cues here!

Before this block even starts, try pre-session micro plyos. These are 2-3 minutes of very low-level jumps. They prime the nervous system for safe landings without causing fatigue. Think of it as turning on the body’s “safety software” before practice loads.

A dynamic scene depicting a women's soccer training session focused on deceleration training and plyometrics. In the foreground, a female athlete in modest athletic wear is executing a plyometric drill, engaging her legs with precise technique. The middle ground showcases a soccer field with cones set up for drills, emphasizing a structured training environment. Coaches are seen in the background, providing cues to the athletes, highlighting the "check your shin angle" cueing language. Soft, natural lighting illuminates the scene, creating a vibrant atmosphere emphasizing movement and energy. The angle captures both the action and the supportive coaching environment, conveying a sense of empowerment and focus on injury prevention.

Your words as a coach are powerful tools. Specific, positive language can change a player’s movement in an instant.

Instead of “Don’t let your knee cave in,” try a proactive cue like “Check your shin angle.” This simple phrase directs attention to the lower leg. It encourages the player to align their shin over their foot during a cut or landing.

Other great cues include:
“Land like a feather, not a brick.”
“Push the ground away with your whole foot.”
“Brace your core before you cut.”

Use video feedback during these blocks. A quick phone video can show a player what “good” feels like. This makes the learning stick!

Structuring Your Plyometric Progressions

Not all jumps are created equal. A safe progression is key to effective plyometrics and decel training. Start low, master the form, then gradually increase the demand.

Tier Example Exercises Coaching Focus Sample Volume
Low Intensity Two-foot hops in place, mini squat jumps, lateral skips Soft landing, knee over toe, quiet feet 2 sets x 10 reps
Medium Intensity Single-leg hops (forward/back), broad jumps, 180° turns Stable hip control, balanced stance, controlled deceleration 2 sets x 6 reps per leg
High Intensity Depth jumps (from low box), single-leg bounds, resisted cuts Maximal force absorption, rapid directional change, perfect shin angle 3 sets x 4 reps with full rest

Move up a tier only when the current tier looks easy and controlled. Rushing leads to bad habits and higher risk.

This integrated approach turns theory into muscle memory. When your players hear “check your shin angle” during a scrimmage, they’ll auto-correct. That’s the moment prevention becomes a true habit.

Consistency is your greatest ally. A dedicated 12-minute block, three times a week, builds more resilience than a one-off workshop. You’re not just warming up; you’re building a team of confident, durable athletes.

In‑season vs off‑season plan: progression calendar, deload weeks, travel tournament adaptations

Think of your ACL prevention plan like a road map for the entire year. You need different routes for the off-season highway and the in-season backroads. Throwing random exercises into your schedule when you have time isn’t a plan—it’s a recipe for inconsistency and, sadly, injury.

A year-round sport demands a year-round strategy. The goal is to build an athlete who is resilient under pressure, not just fit for a week. This is where periodization comes in. It’s a fancy word for a simple idea: systematically changing your training focus to match your body’s needs and the demands of the calendar.

Let’s break down the two main phases and what your focus should be in each.

The Off-Season: Your Building Phase

This is your foundation time. With games off the schedule, your priority is to build raw strength, muscle capacity, and work on any technique flaws. Think of it as construction season.

  • Focus on Max Strength: Heavy(ish) lifts like squats, Romanian deadlifts (RDLs), and hip thrusts.
  • Correct Imbalances: Dedicate time to single-leg stability, hip abductor strength, and calf/soleus work.
  • Learn New Skills: Introduce complex deceleration and cutting drills at slower speeds to engrain proper mechanics.

The In-Season: Your Maintenance & Sharpness Phase

When games start, your goal shifts. You’re no longer trying to break down muscle fibers to build them back bigger. Now, you’re maintaining the strength you’ve built and keeping your nervous system razor-sharp for game speed.

  • Maintain Strength: Reduce lifting volume but keep the intensity high. One or two solid strength sessions per week is plenty.
  • Priority on Plyos and Reactivity: Use short, potent blocks (like the 12-minute ACL block) for fast, nervous system-driven drills.
  • Emphasize Recovery: This phase is about staying fresh. More focus on sleep, nutrition, and soft tissue work.

Here’s a quick look at how the focus shifts:

Training Element Off-Season Focus In-Season Focus
Strength Work Build maximum capacity (higher volume) Maintain strength (lower volume, higher intensity)
Plyometrics & Agility Learn technique, moderate volume High intensity, low volume, game-speed reactivity
Primary Goal Construct a robust athletic foundation Peak performance and injury resilience for games

The Non-Negotiable: Deload Weeks

This is where many plans fail. Your body gets stronger during rest, not during the workout. A deload week is a planned, lighter week of training every 4-6 weeks.

It allows your tissues, tendons, and nervous system to fully adapt to the stress you’ve applied. Skipping these is a direct ticket to overuse injuries and performance plateaus. Think of it as a mandatory pit stop on your yearly road map.

Adapting for Travel and Tournaments

Tournament weekends are chaotic. Your plan must be flexible. The key is consistency, not perfection.

  • Pack Your “Micro-Gym”: Bring resistance bands. A 10-minute band session for glutes and hips in your hotel room is a game-changer.
  • Pre-Game Activation: Replace your usual warm-up with a condensed, 5-minute version focusing on hip circles, leg swings, and mini-band walks.
  • Post-Game Recovery: Prioritize hydration and a simple protein-rich snack immediately after the last game. Even 5 minutes of gentle stretching can aid recovery.
  • Manage Load Spikes: If you’ve had a light week and then jump into 3 games in a day, that’s a massive spike. Be extra diligent with your cool-down and consider a very light “movement” day the following day instead of complete rest.

Remember, the best ACL prevention plan is the one you can stick to through all the seasons. By periodizing your year, respecting deloads, and having smart travel strategies, you build the consistent, resilient athlete that can handle anything the game throws your way.

Footwear/field notes: studs vs turf, surface moisture, friction risks

Strength and technique are key, but so are your shoes and the field. Every move you make on the field is influenced by these. So, your footwear and the field’s condition are critical for safety.

Let’s look at the choices you make every time you step onto the field.

Choosing Your Shoes: Studs vs. Turf Shoes

Choosing the right shoe is more than a fashion choice. It’s about getting the right grip for the surface. Too much grip can hurt your knee, while too little can cause slips.

Firm Ground (FG) Cleats (Studs): These are for natural grass fields. They give you the traction you need for quick moves. But, they’re not good on artificial turf or very dry ground.

Turf Shoes: These have short, rubber nubs for synthetic turf. They offer good grip without digging into the turf. Using cleats on turf can increase your risk of injury.

Surface Type Recommended Footwear Key Risk if Mismatched
Natural Grass (Moist) Firm Ground (FG) Cleats Low risk with proper studs
Natural Grass (Hard & Dry) Turf Shoes or AG Cleats Excessive foot fixation with FG cleats
Artificial Turf (Newer) Turf Shoes or Artificial Grass (AG) Cleats High rotational friction with FG cleats
Artificial Turf (Worn/Wet) Turf Shoes Unexpected slips and loss of control

Surface Moisture: The Friction Game-Changer

Weather changes everything. A wet field can make you slip, even if it seems safer. A dry field can make your foot stick, leading to knee injuries.

Always test the field’s grip during warm-up. This helps you avoid surprises during the game.

External Support: Brace vs. Tape

Many players consider using a knee brace or kinesiology tape for support. What does the science say?

Functional braces are mainly for athletes coming back from injuries. They offer support and confidence. But, they don’t strongly prevent first-time ACL injuries.

Kinesiology tape works differently. It helps your brain know where your joints are. This can improve muscle control and movement.

In the brace vs tape debate, tape might have a slight edge. But, neither is a magic solution. They’re tools to help, not replace, good technique and strong muscles.

Your best strategy is to control what you can. Choose the right shoes, understand the field, and build your body’s resilience. This approach keeps you safe and lets you play your best, season after season.

Post‑injury confidence: return metrics and psychological readiness; success stories from women players as motivation

Objective metrics show you’re ready, but your mind must catch up. You’ve passed strength tests and your doctor says you’re good to go. Yet, stepping back onto the field can feel daunting. This section aims to help you bridge that gap.

Following your healthcare professional’s advice is essential. They base clearance on solid data. Key return metrics include:

  • Strength Symmetry: Your injured leg should have at least 90% of the strength of your healthy leg.
  • Hop Tests: These measure power, stability, and trust in single-leg landing mechanics. Can you hop for distance and stick the landing without wobbling?
  • Movement Quality: Coaches and therapists watch your deceleration and cutting form in sport-specific drills.

These numbers are your foundation. But the final hurdle is often psychological readiness. That moment of hesitation before a sharp cut, or the fear of planting your leg hard—that’s what we need to address.

Confidence isn’t just healed; it’s rebuilt through action. Many women athletes who’ve successfully returned talk about this. Their stories highlight a powerful truth: the same prevention principles that protect your knees are the keys to reclaiming your game. Mastering controlled landing mechanics and trusting the strength you’ve built becomes your new superpower.

Think of confidence as a muscle. You strengthen it with repetition. The Nordic hamstring curls, Copenhagen planks, and deceleration drills you learned for prevention? They’re now your tools for empowerment. Every clean rep where you control your descent builds neural trust. It tells your brain, “We can handle this force safely.”

Celebrate the small wins. The first time you complete a plyometric circuit without overthinking your landing mechanics. The practice where you stop guarding that knee. This is how you move from being cleared to play to being ready to compete. You’re not just getting your knee back. You’re reclaiming your identity as an athlete, armed with more knowledge and resilience than ever before.

Team rollout toolkit: captains as ambassadors, station cards, accountability charts

To keep ACL prevention going for your whole team, you need more than just knowledge. You need a system that makes it fun and holds everyone accountable. A simple list of exercises isn’t enough. You must create a culture where caring for your body is key to soccer success.

Your team rollout toolkit is the answer. It gives you the structure, teaching tools, and motivation to turn drills into a team effort. Let’s look at the three main tools to help you coach this program well.

Your team leaders are your secret weapon for getting everyone on board. Instead of the coaches telling everyone what to do, let your captains lead. Choose players who are respected, consistent, and love training.

They become your prevention ambassadors. They show off exercises, give tips on form, and motivate the team during ACL prevention sessions. This peer leadership makes the program feel like a team effort, not just something the coaches are pushing.

2. Simple, Visual Station Cards

Clear instructions mean less confusion. For your strength and plyometric circuits, make simple station cards. These visual guides are placed at each exercise spot in your training area.

A good station card has three things: the exercise name, a simple graphic or photo, and a key coaching cue. For example, a “Drop Jump” station card might say “Knees over toes, soft landing.”

This lets players move through circuits on their own. You, the coach, can focus on observing and giving feedback instead of repeating instructions.

3. Fun, Visual Accountability Charts

What gets measured gets done. But tracking should be fun, not a chore. Create a big, colorful chart in the team room. Use it to mark off when everyone completes a prevention session.

Get creative! Use stickers, markers, or magnets. Celebrate when the team reaches milestones, like “10 Sessions in a Row!” This visual scoreboard turns hard work into a shared victory. It shows progress and builds pride in the team’s commitment.

Tool Primary Purpose Key Features
Captain Ambassadors Build peer-led buy-in and leadership Peer demonstrations, form reminders, team motivation
Station Cards Provide clear, independent exercise instructions Exercise name, visual cue, key coaching point
Accountability Chart Track progress & celebrate team consistency Visual, fun, celebrates streaks, posted publicly

When you use these three tools together, you’re not just doing drills. You’re building a prevention-positive culture. Mastering plyometrics form becomes a team standard. Showing up for strength work becomes a shared value.

This culture does more than protect knees. It builds unshakeable team confidence and unity. Learn more about building unshakable team confidence in our guide to building unshakable team confidence. Start with your toolkit this season, and watch your team’s commitment to health and performance grow.

Common mistakes, FAQs, and printable 8‑week template

Let’s get you started on the right path. Many jump into advanced plyometrics without mastering basic landing skills. Another mistake is ignoring decel training, which is key for safe cutting and pivoting.

People often ask about support gear, like brace vs tape. For most, neither replaces strong muscles. Tape gives feedback, while braces help after injuries. Always talk to a sports medicine expert.

We’ve made a helpful resource for you. Download our 8-week template. It mixes strength exercises, like Nordics and RDLs, with plyometrics and deceleration drills. The plan is easy to follow, tracks your progress, and lets you take notes.

This template is your guide. It helps you build a strong base around your knees. Stick to the basics, follow the plan, and play with confidence for years.

Girls’ soccer injury prevention made simple: Learn essential warm-ups, strength exercises, and movement strategies to reduce risk on the field

soccer injury prevention for girls

Welcome to your playbook for keeping young athletes safe, confident, and right where they want to be—on the field! We’re so glad you’re here.

Girls’ soccer is booming with more players than ever. That’s fantastic news! But with more play comes a real need for smarter preparation.

Skipping a proper warm-up is a common mistake. Young players who skip this critical step may unknowingly set themselves up for common setbacks. These can include an ankle sprain, knee issues, or muscle strains in the hamstring and groin areas.

Think of injury prevention not as extra work, but as the essential foundation that lets raw talent shine through. It’s about building smarter movement patterns from the start.

By taking a proactive approach, we do more than just protect against girls soccer injuries. We build unshakable confidence in every player. This guide will show you how.

The science of risk: growth and maturation windows, Q‑angle myths vs realities, fatigue and late-game risk, field/turf

Learning about movement science can change how we keep players safe. Let’s explore the key scientific factors. This way, you can move from worry to confident action.

First, let’s talk about growth and maturation windows. During a growth spurt, bones grow faster than muscles and tendons. This can affect coordination and balance, making athletes more prone to mistakes. It’s not a weakness—it’s a natural phase!

Rest and recovery are just as important as training. Younger bodies need time to adapt.

Younger players don’t have the same physical capacity as older athletes. They need more frequent breaks. Ignoring this can lead to overuse and girls soccer injuries. Listening to the body’s signals during these growth phases is a superpower.

Next, let’s debunk a myth: the Q‑angle. You might think a wider hip-to-knee angle causes knee problems in female athletes. But it’s more complex. While anatomical differences exist, they don’t destine someone for injury. The real risk comes from how we move, not just our anatomy. Focusing on building strong movement patterns is more impactful than fearing your anatomy.

Now, let’s explore game day science. Fatigue increases the risk of injury. As muscles tire, they can’t stabilize joints as well. Reaction times slow down. This is why many non-contact injuries happen in the final 15 minutes of a match or a grueling practice. It’s not bad luck; it’s physiology.

This highlights the need for smart effective training routines. These should build endurance and resilience while prioritizing recovery. Coaches and parents can help by ensuring proper hydration, encouraging paced effort, and advocating for sensible substitution patterns.

Lastly, the field vs. turf debate. Both surfaces have pros and cons. Natural grass is softer but uneven. Newer turf systems are more consistent but have higher friction. The key is to adapt. Ensure cleats are right for the surface. Incorporate lower-body strength and proprioception work to handle different terrains. The best surface is the one an athlete is prepared for.

By grasping these scientific principles—growth windows, biomechanical truths, fatigue effects, and surface dynamics—you can create a safer, smarter soccer experience. Science isn’t scary; it’s our best playbook for prevention.

Movement audit: cutting, deceleration, landing, change of direction—what “good” looks like for youth players

Let’s play movement detective! Learning what safe cutting and landing look like is key. This is called a movement audit. It helps spot risks before they turn into injuries.

This process is not about finding flaws. It’s about building awesome body awareness. Experts call this neuromuscular training.

Think of the knee like a car’s headlight. It should point straight ahead, following the foot’s line. When a player cuts or lands, we never want to see those “headlights” pointing inward. This inward buckle is a major red flag.

As our sources emphasize: “Do not let your knees buckle inward.” Let’s break down what to look for in soccer’s four key moves.

The Controlled Cut: A good soccer cut is quiet and powerful. Watch the player’s hips and shoulders. They should stay level and face the direction they want to go.

The plant foot stamps down firmly, and the knee stays stacked over the ankle. There’s no wild, swinging arm or a wobbling torso. It looks efficient, not frantic.

Mastering the Stop (Deceleration): This is how a player slows down or changes pace. Good deceleration is a gradual brake, not a sudden crash. Look for a slight bend in the hips, knees, and ankles as they absorb the force.

The weight should be centered, not lurching forward or backward. This control is pure gold for balance and injury prevention.

Landing Like a Feather: This is where landing mechanics are everything. Whether jumping for a header or coming down from a sprint, a safe landing is soft and silent. Both feet should hit the ground at the same time, with knees bent to absorb the shock.

The chest is up, and the player is ready for the next move instantly. As research shows, programs designed to reduce injury risk focus intensely on “proper landing techniques during training.”

Swift Change of Direction: This combines everything! A clean direction change starts with the eyes and head turning first, followed by the shoulders and hips. The player pushes off strongly from the outside foot, staying low and driving in the new direction.

There’s no stutter-step or crossing feet. It’s one smooth, explosive motion.

Remember, we’re auditing for quality, not demanding perfection from a growing body. The goal is to create that mind-body connection—that’s the neuromuscular training in action. When you see a player moving well, celebrate it! “Great job keeping your knees aligned on that turn!” This positive feedback reinforces good patterns and builds their confidence in their own balance and control.

By focusing on these movement basics, you’re not just preventing injuries; you’re building a more agile, powerful, and confident soccer player. You’ve just learned the detective’s handbook for safe, effective movement!

The Warm‑Up That Works: FIFA 11+ (Youth & Adult Versions), Dosage, Coaching Cues, Progressions by Season Phase

Imagine a warm-up that can cut injury risk in half. That’s the power of the FIFA 11+ program. It’s not just jogging and stretching. It’s a structured routine for soccer players.

Research shows it can reduce injuries by up to 50%! Let’s explore how it works and how it can change your team.

The magic is in its neuromuscular training. It trains your brain and muscles to work better during soccer. The program has three parts, each with a clear goal.

Part 1: Running Exercises (8 minutes). This phase wakes up the body with controlled movement. Players do six drills:

  • Straight Ahead run
  • Hip Out and Hip In (zig-zag runs)
  • Circling Partner (light shoulder contact)
  • Quick Forward & Backward runs

The goal is to increase heart rate and prep the joints in multiple directions.

Part 2: Strength, Plyometrics, and Balance (10 minutes). This is the core injury-prevention section. It targets often-neglected muscles. Exercises include:

  • The Bench and Sideways Bench (core stability)
  • Hamstring curls (for knee protection)
  • Single-Leg Stance (balance)
  • Squats and controlled Jumping (power and landing control)

Each exercise emphasizes perfect form over speed.

Part 3: Running Exercises (2 minutes). Players finish with higher-intensity runs like “Across the Pitch,” “Bounding,” and “Plant & Cut.” This mimics game speed and reinforces safe cutting techniques learned earlier.

Which version should you use? The FIFA 11+ Kids is for players under 14. It uses simpler instructions and more playful elements. The adult version is for ages 14 and up, with the full, more demanding set. Always start with the correct version for your group’s age and skill level.

Dosage is simple: do it before every practice. The entire routine takes about 20 minutes. Consistency is key! Don’t skip it on “light” days. This regular dose of neuromuscular training builds a durable athlete over time.

Great coaching cues make the exercises work. Instead of “jump higher,” say “land as quietly as a cat.” For squats, cue “chest up, knees behind toes.” During balance drills, remind players to “focus on a spot on the ground.” These simple phrases guide players toward safer movement patterns.

How do you progress the FIFA 11+ through the season?

  • Pre-Season: Focus on technique. Go slow, correct every player, and maybe repeat Part 2. Build the foundation.
  • In-Season: Maintain the routine at full speed. It’s your non-negotiable practice starter.
  • Post-Season/Off-Season: You can reduce frequency to 1-2 times a week to maintain baseline strength and balance.

This progression matches training demands and keeps players engaged.

Implementing the FIFA 11+ is one of the smartest investments you can make in your team’s health. It turns warm-up time into powerful, protective training. Start next practice!

Strength foundations at home or school: bodyweight to banded to dumbbell—squats, hinges, lunges, calf/hip work; 2x/week

You can build a strong foundation at home or in school with simple tools and your body. It’s not about getting big. For soccer players, it’s about becoming resilient, injury-proof athletes with confidence and power.

This training is all about neuromuscular training. It improves how your brain and muscles work together. This means better control, safer moves, and stronger kicks.

And the best part? You only need to do it twice a week. A “little and often” approach fits into a busy schedule. It’s better than long, marathon sessions!

We focus on four key movements: squats, hinges, lunges, and calf/hip work. These movements strengthen your knees and ankles. They help prevent common groin and hamstring strains.

Start with bodyweight to learn the form. Bodyweight drills like squats, step-ups, and calf raises boost joint stability and coordination. Once you’re good, add bands or light dumbbells for more challenge.

Your progressive plan is outlined below. It’s like leveling up in a video game. You move to the next level only when you’ve mastered the current one.

Your Progressive Strength Foundation Plan (2x/Week)
Exercise Bodyweight Focus Banded Focus Dumbbell Focus Key Benefit
Squats Bodyweight squat, focusing on depth and knee tracking over toes. Try adding a toe raise at the top. Place a mini-band above knees to activate glutes and improve hip stability. Hold a single dumbbell at chest (goblet squat) to add load while maintaining good posture. Builds quad and glute strength for powerful jumps and stable landings.
Hinges (Deadlift) Practice the hip hinge motion without weight, feeling a stretch in the hamstrings. Stand on a band and hold the ends to add tension as you hinge back. Hold two light dumbbells at your sides (Romanian Deadlift) to strengthen the posterior chain. Targets hamstrings and glutes, essential for sprinting and preventing hamstring pulls.
Lunges Forward, reverse, and lateral lunges to build single-leg stability in all directions. Place a mini-band around your thighs during lateral lunges to challenge hip abductors. Hold dumbbells in each hand to increase the load on your stabilizing leg muscles. Improves balance and unilateral strength, mimicking game movements like kicking and cutting.
Calf Raises Double-leg calf raises on the floor, then progressing to single-leg for more challenge. Use a band for resistance by looping it under the ball of your foot and pulling up on the ends. Hold a dumbbell in one hand while doing single-leg raises on a step for increased range. Strengthens ankles and calves, providing a stable base for all running and jumping.
Hip Bridges Lying on your back, drive hips upward, squeezing glutes at the top. Place a mini-band just above your knees and press out against it as you bridge up. Rest a dumbbell across your hips (use a towel for comfort) to add resistance. Activates glutes and stabilizes the pelvis, protecting the lower back and groin area.

How do you make this work in real life? At home, dedicate 15-20 minutes before homework. At school, use the weight room during a free period or after practice. The key is control, not speed. Move slowly, feel the muscles working, and always prioritize good form over adding more weight.

This isn’t just about getting physically stronger. This neuromuscular training improves coordination and confidence on the field. You’ll feel more in command of your body during late-game sprints or tricky changes of direction.

Start where you are. Master the bodyweight column in the table for a few weeks. When you’re ready, introduce a band or a light dumbbell. Remember, you’re building a foundation that will support every slide tackle, every shot, and every victory for seasons to come!

Ankle/knee control: proprioception, single‑leg balance, hops; taping vs braces; when to use each

Your body has a built-in GPS for joint positioning. Training it is key to avoiding common soccer injuries. This system is called proprioception. It’s your brain’s ability to sense where your ankle, knee, and other joints are without looking.

Think of it as your internal balance and stability coach. When it’s sharp, you can cut, land, and pivot with confidence. When it’s off, your risk of a twist or ankle sprain goes up. The good news? We can train it like any other skill!

Let’s start with a foundational drill that turns balance practice into a fun game. Grab a soccer ball and a friend.

Single-Leg Stance – Hold the Ball Drill:

  • Stand on one leg, knee slightly bent. Find your balance.
  • Have your partner toss you the ball. Catch it and return the pass.
  • Try 10-15 passes on each leg. The goal is to maintain control without your standing foot wobbling.

This simple activity forces your ankle and knee to make tiny, constant adjustments. It directly builds the stability needed to prevent an ankle sprain during unpredictable game moments.

Once single-leg balance feels solid, add movement with controlled hops.

Start with small, two-footed “pogo” jumps in place, landing softly. Then progress to hopping side-to-side on one foot, aiming for quiet, stable landings. Next, try hopping forward and backward in a straight line. Always focus on control, not height or speed.

These hops teach your joints to absorb force properly. This is a game-changer for knee health during sprints and sudden stops.

Now, let’s tackle a big question: should you use tape or a brace? Both are tools, but they serve different purposes.

Feature Athletic Taping (e.g., Kinesio Tape) Ankle/Knee Brace
Primary Purpose Provides sensory feedback (proprioceptive cueing) and mild support. Offers mechanical support to limit extreme joint movement.
Best For Minor instability, a “reminder” for proper movement, or during return-to-play. Recovering from a recent ankle sprain, chronic instability, or high-risk play on uneven turf.
Pros Lightweight, allows full range of motion, can be worn under socks. Strong, consistent support, often more durable for full-game use.
Cons Support weakens as tape loosens; requires proper application skill. Can be bulky, may weaken ankle/knee muscles if over-relied upon.
Key Consideration A tool for balance training, not a crutch. A protective shield during high-risk phases, not a permanent solution.

When should you use each? Here’s a simple guide:

  • Use Taping: As a proactive cue during practice. If you have a history of tweaks, tape can remind your joint to stay stable. It’s great for integrating into your warm-up.
  • Use a Brace: When returning from a recent injury, as advised by a doctor or athletic trainer. Also, consider it during tournament play on consecutive days when fatigue is high.
  • Focus on Strength First: Remember, no tape or brace replaces strong muscles and good balance. Use supportive gear for specific situations, but your long-term goal is to build your body’s own resilient architecture.

Your ankle and knee control journey is about empowerment. Train your proprioception, master single-leg balance, and use support gear wisely. Your future self on the field will thank you!

Sprint and plyometric safety: short accelerations, landing quietly, pogo and snap-down drills; volumes by age group

Let’s boost athleticism safely by mastering sprinting and plyometrics. We focus on control and quiet landings. Speed and jumping power are exciting in soccer. We aim to develop them safely for growing bodies.

It all begins with handling force correctly. We start with short, controlled accelerations. Think of a quick 10-yard burst from a jogging start. The goal is to drive the knees and pump the arms with purpose, but always in control. This builds a foundation for safe, explosive speed.

A dynamic scene capturing a female soccer player demonstrating plyometric landing mechanics on a grass field. In the foreground, she is depicted in a balanced squat position, showcasing the proper technique for landing softly from a jump. She wears a modest athletic outfit, exuding focus and control. In the middle ground, two soccer cones are positioned to outline a training area, with another player performing a snap-down drill, illustrating the plyometric exercise. The background features a sunny, clear sky and a soccer goal, enhancing the athletic environment. Natural lighting casts soft shadows, emphasizing the movements and technique, while a slightly elevated angle offers a comprehensive view of both players. The mood is energetic and focused, promoting safety in athletic training.

Next, we explore plyometrics—or jump training. It’s not about jumping as high as possible right away. It’s about learning to land correctly first. Our golden rule? Land as quietly as a cat. A silent landing means your muscles are absorbing force smoothly, not crashing into your joints.

Good landing mechanics are non-negotiable. You should land softly on the balls of your feet. Your hips and knees must stay slightly bent. Most importantly, do not let your knee buckle inward. Keep it aligned over your second toe. This protects the ACL and other structures.

Two fantastic drills build these skills. First, try pogo jumps. Stand in place and bounce lightly on the balls of your feet. The goal is to develop “springy” leg stiffness, like a pogo stick. Keep the jumps small and quick.

Second, practice snap-down drills. From a small jump, focus entirely on the landing. “Snap” into a soft, stable position the instant your feet touch the ground. Knees bent, chest up, and absolutely no wobble. This teaches your brain and muscles to brace for impact.

How much is enough? Volume is key for safety and development. Younger players need lower doses to learn the pattern. Older, more experienced athletes can handle more. Here’s a simple guide for weekly plyometric volume based on age and experience:

Age Group Recommended Drills Weekly Volume (Contacts*) Key Focus
8-10 years (Beginner) Pogo Jumps, Low Hops 40-60 Learning the pattern, soft landing
11-13 years (Intermediate) Snap-Downs, Broad Jumps 80-120 Control, preventing knee valgus (inward buckle)
14+ years (Advanced) Box Jumps, Hurdle Hops 120-200 Power development, sport-specific transfer

*A “contact” is each time a foot touches the ground during a jump exercise.

Remember, these drills are about quality, not quantity. Two short sessions per week, mixed into your warm-up or practice, are perfect. Listen to your body. If fatigue leads to sloppy form, it’s time to stop.

By building power with this safety-first mindset, you create a faster, more resilient athlete. You learn to move with confidence, knowing your body can handle the demands of the game.

Practice design: micro-doses inside technical work; building a “prehab” station; coach checklists

The best way to prevent injuries is to make safety skills seem natural. Your practice design is key to making this happen. Instead of adding extra exercises, we weave them into your drills. This is the power of micro-dosing.

It’s like adding vitamins to a smoothie. The benefits are there, but players just enjoy the fun. For example, during a passing drill, players receive the ball while standing on one leg. This micro-doses single-leg balance into your drills.

After a sprint, players should slow down with “soft knees” over three steps. This teaches them to land safely, reducing joint stress. Our program boosts athletic performance and lowers injury risk by focusing on safe landing techniques.

Now, let’s create a prehab station. It’s a fun area players visit for 5-7 minutes at practice start or end. It turns prevention into a game!

Here’s a simple blueprint:

  • Balance Zone: A foam pad or balance board for 30-second holds.
  • Strength Corner: Mini-band loops for clam shells and lateral walks.
  • Plyo Box: A low box for practicing quiet, two-foot landings.
  • Agility Ladder: For quick footwork with an upright posture cue.

Change exercises weekly to keep it exciting. This station ensures consistent, team effort.

Lastly, a simple coach checklist keeps the focus sharp. Print it out and use it every session!

  • Before Practice: Review the plan. Identify 2-3 drills where you can insert a balance or deceleration cue.
  • During Practice: Look for tired players. If landings are loud, remind them about “soft knees.”
  • After Practice: Ask players about physical challenges. Note any trends for next week.

This isn’t about working harder. It’s about working smarter. By designing your practices with these layers, you build strong athletes without wasting training time. Let’s make prevention a seamless part of the game they love!

Role-model Spotlights: Local Standout Players Who Integrated Prevention and Saw Results

Meet some local soccer players who made a big change by focusing on health. Seeing others succeed can really inspire us. It shows that we can all make a difference.

We’ve worked with the Farmington Sports Arena Football Club (FSA FC) to help athletes reach their best. Their stories are from our community. They show how small habits can lead to big changes.

Maya, a high school varsity striker, used to dread practice. “My knee would ache after every sprint or cut,” she shared. This pain was taking away her confidence and love for the game.

Maya’s life changed when she started doing the FIFA 11+ youth warm-up before every practice. She also added strength training two times a week, focusing on squats and balance. “It wasn’t about getting bulky,” Maya explains. “It was about feeling strong and stable.”

The results were transformative. Maya’s knee pain disappeared in a few months. Her confidence grew too. “I wasn’t holding back anymore. I could cut and land without worrying about my knee.” Maya’s scoring record improved, but the real win was playing without pain.

Chloe’s Journey: Building Resilience with FSA FC

Chloe, a dedicated midfielder for FSA FC, struggled with ankle rolls and late-game fatigue. She felt like she was always one wrong step away from the sidelines.

Her club’s focus on integrated prehab changed everything. Chloe started using “prehab stations” during practice for quick ankle drills. At home, she did a simple bodyweight routine for hip and calf strength.

“The difference wasn’t overnight,” Chloe admits. “But slowly, I stopped rolling my ankle. I had more energy in the final 15 minutes of games because my body was better prepared.” She transformed from an injury-prone player to a reliable, 90-minute force on the field. Her story proves that small, daily actions build unshakeable resilience.

Maya and Chloe aren’t superstars with secret regimens. They are dedicated athletes who made injury prevention a non-negotiable part of their soccer journey.

Their real-life results—less pain, more confidence, and higher performance—are achievable for you, too. You can start with the same warm-up and strength foundations they used. Let their success be your motivation to build a stronger, healthier season.

Parent/athlete FAQs and myths

Confused by conflicting advice? This Q&A section addresses top parent and player concerns with straightforward, expert-backed information. We know you have questions, and we’ve heard the myths! Think of this as a comforting chat with a trusted coach.

This is a big one! The truth is, properly supervised strength work is not only safe but essential. For girls in soccer, building foundational strength helps protect joints and bones. We’re talking bodyweight squats, lunges, and band work—not heavy powerlifting. Starting with 2 sessions a week builds resilience without risk.

Question: Do they really need a full 15-minute warm-up?

Yes, and here’s why. A dynamic warm-up like the FIFA 11+ prepares the body’s systems for action. It increases blood flow, wakes up the nervous system, and primes muscles for cutting and jumping. Skipping it is like starting a car in freezing weather and immediately racing it. That initial investment pays off in performance and safety.

Question: What’s the best pre-game fuel?

Great question! The goal is to top off energy stores without causing stomach upset. Fuel up within two to three hours before kickoff. Focus on foods rich in carbohydrates, like a banana with peanut butter, oatmeal, or a turkey sandwich. These provide steady energy. Avoid brand-new foods on game day!

Myth: Playing through pain shows toughness.

This is a dangerous myth we must bust. Pain is your body’s alarm system. “Playing through” minor soreness from exertion is one thing, but sharp pain, joint pain, or pain that changes movement is a red flag. Ignoring it often turns a small tweak into a season-ending injury. Teach your athlete to communicate any pain early.

Question: How much should my player drink?

Hydration is a silent game-changer. Drink plenty of water before practice and every 15 to 20 minutes during activity. Thirst means you’re already behind! For games under 60 minutes, water is perfect. Proper hydration prevents muscle cramps, heat-related issues, and keeps the mind sharp for those late-game decisions.

We hope this clears things up! Your proactive questions are the first step in building a smarter, safer soccer experience. You’ve got this.

Monitoring: soreness scale, growth spurt flags, return-to-practice rules after minor tweaks

Monitoring your athlete’s body is like checking the weather before a big game. It prepares you for what’s coming. Even with perfect warm-ups and strength work, small tweaks and daily fatigue happen. The goal isn’t to prevent every single ache. It’s to catch small signals early so they don’t turn into injuries that bench your player.

This section gives you simple tools. You’ll learn how to talk about soreness, spot the signs of a changing body, and follow safe return rules. Let’s build that culture of listening together.

The Soreness Scale: Your Communication Tool

“My knee feels funny” isn’t very helpful. A 1-10 scale gives you both a common language. Here’s how to use it:

  • 1-3 (Green Light): Normal muscle soreness after hard work. It’s a dull ache that eases with movement.
  • 4-6 (Yellow Light): Sharp or persistent pain during activity. This is the zone where you really listen. As experts advise, “Speak up about pain or discomfort, even mild soreness.”
  • 7-10 (Red Light): Pain that limits movement or happens at rest. This means stop and rest.

The key is the trend. Is the number going down with rest? If not, it’s time to adjust. Remember, “Rest when needed—allowing the body to heal can prevent minor issues from becoming major injuries.”

Growth Spurt Flags: When Coordination Takes a Break

During a rapid growth spurt, bones can grow faster than muscles and tendons. This can temporarily throw off an athlete’s brilliant coordination. It’s not a sign of laziness!

Common growth spurt flags include:

  • Suddenly looking “clumsy” or tripping more often.
  • Complaints of new aches in heels, knees, or shins.
  • Fatigue setting in much earlier in games or practices.
  • A noticeable change in running or cutting form.

A focused scene depicting a young female soccer player in the foreground, measuring her height against a growth chart on a wall. She is dressed in a modest soccer uniform, showing determination as she stands barefoot on a training field. In the middle ground, a coach attentively observes, holding a clipboard and noting observations about the player’s development and readiness to return to practice. The background features a soccer field with goalposts and a clear blue sky, infusing the scene with a sense of optimism and growth. The lighting is soft and natural, casting gentle shadows, while the atmosphere is supportive and encouraging, highlighting the importance of monitoring physical growth in young athletes.

When you see these flags, it’s a cue for extra patience. Focus on basic technique, ensure plenty of sleep and nutrition, and maybe dial back intense plyometrics for a week or two.

The Safe Return Playbook

After a minor tweak, sprain, or even a bad cold, how does an athlete come back smart? Rushing is the biggest risk. We follow a conservative, step-by-step rulebook based on a core principle: “Gradually return to play after breaks.”

The table below outlines clear rules for common scenarios. Think of it as your safety checklist.

Scenario Action Step Rationale
24-48 Hour Illness (Fever, Flu) No activity until fever-free for 24 hours without medicine. Then, a light, 30-minute practice before full return. Illness stresses the heart and immune system. Returning too soon risks more severe illness or fatigue-related injury.
Minor Ankle Twist (No swelling, can walk) Rest 2-3 days. Pass a balance test (single-leg stand for 30 sec). Then, re-introduce running in straight lines before cutting. Protects the healing ligaments. The balance test checks if proprioception (joint sense) is back online.
General Muscle Soreness at Level 4-5 Active recovery day. Swap soccer for swimming, biking, or a gentle walk. Skip intense drills. Promotes blood flow to heal muscles without the impact and stress of sport-specific movements.
Missed 1+ Week of Training Don’t jump back into a full game! Schedule 2-3 moderate practices to rebuild fitness and coordination first. Fitness and neuromuscular coordination fade quickly. This gradual rebuild prevents strains and improves performance.

These rules aren’t about holding players back. They’re about building long-term resilience. By teaching our athletes to listen to their bodies and respect the healing process, we give them the tools for a lifetime of healthy, joyful play.

Resources: printable weekly plan + video playlist map

Let’s turn knowledge into action with your personalized toolkit for injury prevention. We believe the best learning happens when you can see and do. That’s why this final section is packed with ready-to-use resources designed to make your journey simple and effective.

You’ve learned the science, the movements, and the exercises. Now, it’s time to build them into your routine. We’re with you every step of the way!

Your Downloadable, Printable Weekly Plan

Consistency is the secret to building resilient athletes. Our printable weekly plan combines all the essential elements—dynamic warm-ups, strength foundations, and balance work—into a manageable schedule. It’s built for real life, fitting around school, practice, and family time.

Simply download the PDF, print it, and hang it on your fridge or in your locker. It serves as your daily reminder and checklist. No more guessing what to do or when to do it. The plan provides clear instructions, sets, and repetitions, progressing logically through the week to build capacity safely.

Reading about an exercise is one thing. Seeing it performed correctly is another. We’ve mapped out a complete video playlist that brings every drill and movement to life. This is your visual guide to perfect form.

Each video in the playlist corresponds to a key exercise from the articles. You’ll see professional demonstrations of cutting technique, proper landing mechanics, bodyweight squats, and balance drills. Watch them before you try a new movement or if you need a quick form check. It’s like having a coach in your pocket!

To give you a clear picture of how your week can look, here’s a sample structure from your printable plan. This table outlines a balanced approach that mixes different types of training with adequate rest.

Day Primary Focus Key Activities Approx. Time
Monday Dynamic Warm-up & Strength FIFA 11+ routine, bodyweight squats and lunges 25 minutes
Tuesday Sport Practice Team training with integrated plyometric drills 60 minutes
Wednesday Active Recovery & Balance Light jogging, single-leg balance series, calf raises 20 minutes
Thursday Strength & Control Banded hip work, deceleration technique review 30 minutes
Friday Sport Practice or Game Team activities with focus on safe landing cues Varies
Saturday Game Day or Fun Activity Match play or alternative cross-training (e.g., swimming) Varies
Sunday Full Rest Stretching, hydration, and nutrition focus

How do you get these resources? It’s easy! Use the download link for the PDF plan and the access link for the video playlist. We recommend saving the playlist to your YouTube account so you can always find it.

Start this week. Print the plan, watch the first few videos, and begin with Monday’s session. Small, consistent actions create lasting change and powerful protection on the field. You have all the tools—now go build your foundation for safer, stronger soccer!

Glossary and troubleshooting

Let’s make sure all the terms we’ve used are crystal clear! Think of this as your quick-reference guide for the injury prevention journey in girls’ soccer.

“Proprioception” is your body’s built-in GPS, telling your brain where your joints are in space. “Plyometrics” are exercises, like pogo hops, that build power by stretching and contracting muscles quickly. “Neuromuscular” training simply means exercises that improve how your nerves and muscles work together for safer movement. The “Q-angle” is a measurement from hip to knee; while it’s a real anatomical factor, it’s not a destiny for knee injuries.

What if your athlete complains of knee pain during cutting? First, have them rest and apply ice. If pain persists with activity, it’s time to visit a sports medicine professional. Don’t push through sharp or persistent aches.

Is an exercise like a single-leg squat too difficult? That’s okay! Try a regression. Use a band for support or hold onto a chair. Focus on perfect form with a smaller range of motion before adding load or speed.

You now have a strong foundation. Use this glossary and troubleshooting advice as your playbook. Consistent, smart practice builds resilient athletes. Remember, seeking guidance from a qualified professional is a sign of a dedicated soccer family.

Women Referees in Soccer: History, Growth, and On-Field Authority

female referees stories

The world of sports is changing fast. Women are now playing big roles in officiating games. The arrival of female referees is reshaping the game and motivating young athletes.

The Calgary District Soccer Referees Association (CDSRA) is leading this change. They’re training female officials to join the refereeing world. Their work highlights the need for diversity in sports, setting a good example for girls and women. For more on women’s impact in sports, check out former women soccer players creating impact.

A Short History of Women Officials

The journey of female referees has been slow but steady. It’s filled with important moments and achievements. These have opened doors for future women in sports officiating.

Early Beginnings

Women’s roles in sports officiating started with their growing involvement in sports. As women’s sports became more popular, the need for female officials grew. Many women started as players and then became officials, staying in the sports they loved.

Many female referees started as players. This path, seen in programs like the CDSRA, uses their experience and knowledge. It also gives them a unique view of the game.

Despite progress, female referees face many challenges. These include stereotypes, bias, and a lack of representation. But, their hard work and the support of groups like the CDSRA have helped overcome these hurdles.

Key Milestones in the History of Women Officials

Year Milestone Description
1970s First Women Officials The first women began officiating in various sports, marking the beginning of a new era.
1990s Increased Representation Women’s representation in officiating roles increased, with more women participating in major competitions.
2000s Professional Development Programs and training initiatives were established to support the development of female officials.

The journey of women officials shows their strength and commitment. As sports evolve, female referees will keep competitions fair and honest at all levels.

Pioneering Referees: Individual Stories

Pioneering female referees have changed sports officiating. Their stories are about personal success and paving the way for others.

Trailblazers in Sports

Individuals like Ranjita Devi and Ri-iolang Dhar made history in India. They officiated in men’s matches, showing inclusivity in sports.

Ranjita Devi became a role model with her determination and skill. Her journey proves women can excel in male fields with hard work.

Ri-iolang Dhar’s story is about perseverance and passion. She officiated men’s matches, proving her skills and helping sports become more inclusive.

These pioneers show women can impact sports officiating. Their stories inspire others, promoting inclusivity and diversity in sports.

The Unique Challenges Faced by Female Referees

The path of female referees is filled with unique hurdles. Despite their skills and training, they face stereotypes and biases. These can affect their work and career growth.

One big challenge is the lack of representation in sports leadership. This makes it tough for them to get support and move up in their careers.

Overcoming Obstacles

Female referees use support systems like mentorship and professional networks. These help them deal with the tough parts of their jobs.

Groups like the CDSRA aim to fight biases and stereotypes. They work to make sports officiating fairer for women.

  • They create training for female referees.
  • They offer places for women to share their stories.
  • They push for policies that support equality in sports.

By tackling these issues and giving support, we can make sports officiating more inclusive. This helps everyone, making the sport better for all.

Why Representation Matters in Officiating

Inclusivity in sports officiating is more than just numbers. It’s about making everyone feel welcome. Having female referees is a big step towards this goal.

Female role models in sports officiating are very important. When girls and women see others like them in charge, it shows them they can do it too. Role models inspire participation and make people feel they belong, which is key for more women in officiating.

The Impact of Role Models

More female referees mean a supportive community. Groups like the CDSRA offer friendship and support. This is essential for women to overcome challenges in male-dominated sports.

The CDSRA’s community shows the strength of inclusivity. It gives female officials a place to connect and support each other. This helps women succeed in officiating roles.

Representation is not just about individuals; it affects the sport as a whole. Diverse officials make sports more welcoming for everyone.

  • Increased diversity among officials
  • More inclusive sports environments
  • Inspiration for young girls and women to participate in sports officiating

As we move forward, promoting representation in officiating is key. This way, we can build a fair and inclusive sports culture. A culture that values everyone’s contributions, no matter their gender.

Overcoming Stereotypes

Female referees are breaking down barriers with their determination and skill. They are showing they are just as good as their male counterparts. This is changing how people see them in sports.

It’s not easy to overcome stereotypes. Female referees face many challenges. But they are leading the way with their hard work and talent.

Breaking Down Barriers

One big challenge is proving they have the authority and skill. But they are changing minds with their professionalism and dedication.

Key achievements of female referees include:

  • Officiating in high-profile matches
  • Receiving positive feedback from players and coaches
  • Contributing to the development of officiating standards

The number of female referees is growing. This shows a positive change in sports officiating.

Year Number of Female Referees
2018 120
2020 150
2022 180

The progress of female referees is significant. It’s not just about numbers. It’s about the impact they have and the barriers they break for others.

Inspiring Stories for Aspiring Referees

The path to becoming a top referee is tough, but female referees who’ve made it are truly inspiring. They’ve broken barriers and opened doors for others. Their stories are a beacon of hope for those who dream of following in their footsteps.

Journeys to Success

Female referees who’ve reached high levels, like League1 and Project8, share stories of hard work and dedication. Their paths show the effort needed to excel in refereeing. Many talk about the importance of mentorship in their growth.

Aspiring referees can learn a lot from these stories. By understanding the challenges faced by their role models, they can prepare for their own journey. The trailblazers in women’s soccer prove that with determination and support, great achievements are possible.

A dynamic scene showcasing a female referee on the field during a crucial moment of a match, her expression exuding confidence and focus. In the foreground, she stands boldly, wearing a professional referee uniform with a distinct patch, signaling to players with a raised hand. The middle ground captures a diverse group of female colleagues, sharing in the camaraderie and determination, each engaged in their roles. In the background, a vibrant stadium filled with enthusiastic fans, waves of colorful banners, and dynamic lighting that casts an inspiring glow on the scene. The angle is slightly low, emphasizing the referee and fellow officials, which conveys empowerment and achievement. The mood is uplifting and motivational, symbolizing the breaking of barriers and inspiring future generations of referees.

The success stories of these referees remind us that our dreams are within reach. By sharing their experiences, they motivate others to chase their dreams and become role models. The journey may be tough, but with the right mindset and support, anyone can overcome obstacles and reach their goals.

For those aiming to make a career in refereeing, these female referees’ journeys are full of inspiration and guidance. Their stories emphasize the value of resilience, hard work, and a love for the sport. By learning from their experiences, aspiring referees can create their own paths to success.

How to Become a Referee: Step-by-Step

Aspiring referees can follow a clear path to their goals. It’s not just about knowing the game’s rules. It’s also about building skills and confidence to officiate well.

Getting Started

The first step is to join local soccer communities. Many places have training for new referees. For example, the CDSRA teaches the basics of refereeing, from rules to managing games.

To start:

  • Find local soccer groups with referee training.
  • Join a training session to learn the basics.
  • Start with local games to get hands-on experience.

Training and Development

As referees get more experience, they can move to advanced training. The CDSRA has programs for all levels, from local to international. For more info on becoming a soccer referee, check this resource.

Training focuses on:

  1. Deeper rule understanding and game management.
  2. Physical fitness to keep up with refereeing demands.
  3. Mental prep for handling pressure and making tough calls.

By following these steps and using training programs, aspiring referees can start a rewarding journey. This journey promotes inclusivity and supports referees from all backgrounds.

The road to becoming a great referee is about constant learning and experience. Embracing the referee journeys with an open mind and dedication to excellence can be very rewarding.

The Growth of Equality in Officiating

More women are becoming referees, leading to a more inclusive sports world. This change is not just about numbers. It’s a big cultural shift in sports.

Women in refereeing roles show a broader push for equality and representation. Women in sports officiating are breaking barriers and reshaping sports management.

Progress and Challenges

Despite progress, female referees face challenges like stereotypes, bias, and unequal chances. It’s key to tackle these issues to keep women in officiating roles growing.

Some major challenges include:

  • Limited access to training and development programs
  • Stereotyping and bias from players, coaches, and fans
  • Lack of representation in higher-level officiating positions

Sports organizations are starting initiatives to help. These include mentorship programs, training workshops, and policies for gender equality in officiating.

The path to equality in officiating is ongoing. While progress has been made, more work is needed. We must ensure women have equal chances to excel in refereeing.

Looking Ahead: The Future of Women in Officiating

The future for women in officiating is bright. More opportunities are opening up for female referees. Women are becoming more visible in officiating roles as sports evolve.

Emerging Trends

Several trends show women’s officiating is on the rise. One key trend is the increasing presence of female referees in high-profile matches. This highlights their skills and shows progress towards gender equality in sports.

Another trend is the growing emphasis on inclusivity in sports. This shift leads to more support for female referees. Women are now empowered to pursue officiating careers, making sports more diverse.

A diverse group of female referees, representing various ethnicities, stands proudly on a vibrant sports field, showcasing their authority and teamwork. In the foreground, a Black referee in a crisp black and white uniform gestures with a confident smile, while an Asian referee beside her reviews a digital tablet, highlighting modern technology in officiating. In the middle ground, a Latina referee prepares to blow her whistle, emphasizing the proactive role of women in sports. The background features a cheering crowd, filled with supportive fans of all ages, encapsulating inclusivity. The scene is bathed in warm, golden sunlight, casting dynamic shadows and creating an empowering atmosphere. The camera angle is slightly low, enhancing the referees' stature and showcasing their professionalism.

The impact of role models is huge. Successful female referees inspire others. Their stories and achievements motivate aspiring female referees.

Trend Description Impact
Increasing Presence in High-Profile Matches More female referees are being appointed to significant games. Enhances visibility and credibility of female referees.
Growing Emphasis on Inclusivity Sports organizations are focusing on creating more inclusive environments. Leads to more opportunities for female referees.
Role Models Experienced female referees are inspiring newcomers. Motivates women to pursue officiating careers.

In conclusion, the future for women in officiating is bright. Trends and initiatives are making the environment more inclusive. We can expect to see more women in officiating roles in the future.

Conclusion

The journey of female referees in sports is filled with perseverance and progress. The latest research shows a significant increase in qualified women referees from 2016 to 2020, with a 72% rise.

Organizations like the CDSRA play a vital role by supporting women in sports officiating. They provide opportunities for growth and success, helping female referees gain experience and recognition. The stories of these pioneering referees inspire others, demonstrating that with determination and hard work, anyone can achieve their goals.

As sports continue to evolve, it’s important to prioritize inclusivity and diversity in officiating. By sharing the stories of female referees and promoting women in sports, we can create a fairer environment for everyone. Additionally, some of these leagues and programs connect talented referees to pathways in international soccer talent scouting, opening doors to officiate at higher levels and gain global recognition.

Modern Women’s Soccer Tactics: A Data-Driven and Strategic Perspective

womens game tactics

The world of women’s sports is filled with game changers. These are athletes whose skills and strategies can change a game’s outcome quickly.

Understanding the tactical analysis of women’s game tactics is key. It helps teams get ahead in competitions.

Some players or strategies can greatly affect a game’s result. This makes studying them both interesting and complex.

Looking into the art and science of women’s game tactics shows us the skill and athleticism involved. It deepens our appreciation for these athletes.

Introduction: Why Tactics Matter

Effective game planning and player intelligence are key to success in women’s sports. They give teams a competitive edge. Understanding opponents, predicting their moves, and adjusting strategies is vital for winning.

In professional women’s football, tactics are not just about formations; they’re about understanding the strengths and weaknesses of both your team and your opponents. Coaches and analysts study past games, player statistics, and strategies to outmaneuver opponents.

Studying the opponent’s tactics is a key part of game planning. For example, analyzing a team’s formation and common plays can reveal vulnerabilities. The 4-4-2 formation is a classic example, where understanding player roles helps in devising a counter-strategy.

Tactical Element Importance Example
Game Planning High Analyzing opponent’s past games
Player Intelligence High Understanding player strengths and weaknesses
Adaptability Medium Adjusting strategy based on game progress

By focusing on these tactical elements, teams can improve their chances of success. Integrating player intelligence into game planning leads to better decision-making. This results in better outcomes on the field.

Tactical Trends in Women’s Football

Women’s football is on the verge of a tactical shift. Key matches are showing off new strategies that are changing the game. The rise in popularity and competition has led to more creative tactics. Teams are always finding new ways to beat their opponents.

Tactical Analysis is key to understanding these changes. By looking at important games, experts can spot patterns and plans that help teams win. For example, flexible formations are becoming common. They let teams change their plan during the game based on what the other team does.

These new tactics are changing how teams play. The focus on possession football has made teams better at controlling the ball. They aim to keep the ball while looking for chances to score. This approach has worked well in big games.

Another big trend is using data analytics to make tactical choices. Coaches look at player and team data to find ways to get better. This helps them create specific plans to improve their team’s performance.

The way tactics are evolving in women’s football isn’t just about team plans. It also affects how players are trained. Now, training includes teaching players about different game situations. This prepares them for any game scenario.

How Top Teams Approach Tactics

Successful teams in women’s football stand out because of their tactical skills. Strategy plays a big role in winning games. Top teams use smart strategies to beat their rivals.

They focus on game planning, studying their opponents’ strengths and weaknesses. By learning from the pros, we can see how they get ready for matches.

When top teams play the same opponent often, they change their tactics. This is to keep up with the opponent’s new strategies. As ESPN recently pointed out, teams like Manchester City and Chelsea are very flexible in these situations.

Tactical Approaches of Top Teams

Team Tactical Approach Key Strengths
Manchester City Flexible Formation Adaptability, Midfield Control
Chelsea High Pressing Defensive Solidity, Quick Transitions
Barcelona Possession-Based Technical Skill, Creativity

The table shows how different top teams in women’s football play. Each team uses their strengths and knows their opponents’ weaknesses. This shows how complex and detailed football tactics have become.

Signature Plays and Turning Points

Signature plays and turning points are key in women’s football. They show player intelligence and tactical skill. These moments can change the game’s direction, leaving a big impact.

When a team or player makes a signature play, it can be a game-changer. It needs a deep game understanding, exceptional skill, and the ability to read the game. Tactical analysis is important for spotting these play opportunities.

Team Signature Play Rate Success Rate
Team A 25% 80%
Team B 30% 75%
Team C 20% 90%

The table shows the signature play rate and success rate of different teams. For example, Team C has a lower play rate but a higher success rate. This shows good tactical analysis and player intelligence.

Using signature plays can really help a team. It’s about strategic planning, player skill, and adapting to the game.

By focusing on tactical analysis and improving player intelligence, teams can make and use turning points. This can change the game’s outcome.

Player Voices: Learning from the Experts

Professional women athletes and coaches share valuable lessons in game tactics. They show how to use effective strategies and techniques. This helps aspiring footballers learn from the best.

Understanding player intelligence is key. Top players and coaches stress knowing the opponent’s strengths and weaknesses. This helps teams plan better and outsmart opponents.

Let’s see what experts say. They talk about the need for flexible tactics and adapting to the game’s flow. They also mention making smart substitutions to change the game’s direction.

Tactical Aspect Expert Advice Benefit
Flexibility Be prepared to adjust your strategy based on the game’s progression. Enhances ability to respond to unexpected opponent moves.
Player Positioning Understand the strengths of each player and position them according to their skills. Maximizes team efficiency and player effectiveness.
Game Planning Develop a detailed plan that includes backup strategies. Prepares the team for different game scenarios.

By learning from the pros, football fans can deepen their game knowledge. Whether you play, coach, or just love the game, expert advice from women’s football is priceless. It helps everyone improve their skills.

Tactical Advice for Aspiring Footballers

Effective game planning and tactical analysis are essential for aspiring footballers. They help improve performance on the field. Learning from professional teams, including women’s football, is very helpful.

Start by studying the game plans of successful teams. Look at how they change their strategies during matches. For example, seeing how top women’s football teams adjust their formations is very insightful.

A dynamic football training session focusing on tactical analysis. In the foreground, a diverse group of female footballers, dressed in professional sport attire, engaged in a strategic discussion, with one player demonstrating a tactic on a whiteboard. The middle ground highlights a vibrant football field, with cones arranged to illustrate formations and drills. In the background, a blurred audience of aspiring young players attentively observing, creating an inspiring atmosphere. The scene is illuminated by soft, natural lighting to evoke a sense of focus and determination, with a low-angle shot that emphasizes both the players' engagement and the tactical elements of the game.

To get better at tactical analysis, watch game footage. This can be professional matches or your team’s games. Focus on player movement, team formations, and how they handle different situations.

Here are some tips for aspiring footballers to improve their tactical understanding:

  • Study the tactics of top teams and players.
  • Analyze game footage to understand different strategies.
  • Practice adapting your game plan based on the opponent’s strengths and weaknesses.
  • Work on your decision-making skills during games.

By focusing on game planning and tactical analysis, you can greatly improve your team’s performance. This will also boost your own game.

Case Studies: Tactical Masterclasses

Looking into tactical masterclasses in women’s football shows the game’s complexity. It gives us insights into winning strategies.

Women’s football has had many key matches that changed the game. These games often show tactical brilliance. This brilliance not only wins the game but also shapes future matches.

Now, let’s dive into some of these key matches and the strategies used by top teams.

Match Tactics Employed Outcome
2019 Women’s World Cup Final High-pressing game, quick transitions USA won 2-0
2020 Olympic Games Semifinal Defensive solidity, counter-attacks Canada won 1-0
2022 UEFA Women’s Champions League Final Possession-based football, set-piece mastery Barcelona won 3-1

These examples show how different tactics can win in women’s football. By learning from the pros, young players can understand the game better. They can also improve their skills.

The impact of these tactical masterclasses is huge. They don’t just decide the game’s outcome. They also inspire future players and coaches, shaping women’s football’s future.

How to Experiment with Tactics in Amateur Play

Tactical analysis is key to better game planning in amateur women’s sports. Teams can boost their field performance by using various tactics.

To try out new tactics, teams should first evaluate their current play. Reviewing past games helps coaches and players identify patterns, strengths, and weaknesses. Game footage is an invaluable tool for spotting areas that need improvement and for tracking progress over time.

Once a team understands its existing strategies, it can begin experimenting with new tactics. This might include adjusting formations, practicing innovative plays, or focusing on skills like passing, shooting, and positioning. Monitoring the results of these changes is crucial to determine which strategies are effective and which need refinement.

For teams aiming to reach higher levels of competition, exposure to global youth football academies can provide additional insight. These academies offer advanced training methods, tactical frameworks, and coaching philosophies from around the world, giving young players and teams a broader perspective on how to develop their game and implement successful strategies.

Adapting to the opponent’s strategy is a big part of tactical analysis. Teams should study their next opponents, looking at their tactics and planning how to counter them. This might mean changing the team’s formation or focusing on certain defensive or offensive plays.

  • Review game footage to identify areas for improvement.
  • Experiment with different formations and strategies.
  • Monitor the results of tactical changes.
  • Analyze opponents and plan counter-strategies.

By taking these steps and staying focused on game planning and tactical analysis, amateur women’s football teams can get better. They can achieve more success on the field.

Resources for Studying the Game

Improving your skills in women’s football means using many learning tools. To really get the game, you need to check out different resources. They help you understand player intelligence and strategies of top teams.

Reading books by coaches and players is a great way to learn. Books on tactics and player growth offer key insights. For example, books on successful teams can teach you how to boost your team’s game.

A dynamic scene capturing the essence of "player intelligence" in a women's sports context. In the foreground, a diverse group of women athletes in professional sports attire are gathered around a large digital screen displaying tactical game strategies. Their expressions are focused and engaged, embodying teamwork and strategic thinking. The middle ground features various game resources like playbooks, coaching tablets, and sports equipment, suggesting a rich learning environment. In the background, a bright, modern training facility is illuminated with soft, natural light from large windows, creating an inspiring atmosphere. The overall mood is one of collaboration and empowerment, highlighting the scientific approach to mastering game tactics. Aim for a slightly elevated angle to capture the depth of engagement while keeping the scene cohesive and vibrant.

Online courses are also a hit for learning football tactics. Courses by professional coaches cover a lot, from the basics to advanced strategies. They might even teach you learning from the pros, showing you how top players think and play.

Video analysis tools and sports analytics software are also great. They let you study game footage, track player movements, and see tactical decisions. Using these tools helps you grasp the game better and get smarter about tactics.

Joining online communities and forums for women’s football is also smart. These places let you talk tactics, share tips, and learn from others. It’s a chance to grow your knowledge and connect with fans and experts.

By using all these resources and keeping up with your learning, you’ll get better at understanding women’s football tactics. You’ll also be able to analyze and use effective strategies in your games.

Conclusion

The world of women’s football is more than just a game. It’s about the lasting impact players make off the field. Retired female footballers are changing lives in education, tech, politics, and advocacy.

Understanding tactical analysis is key to shaping future players and leaders. Stars like Alex Morgan, Megan Rapinoe, and Christen Press inspire many. Their achievements go beyond the game, showing the way for others.

Former players like Homare Sawa and Yuki Okamoto in Japan are making a big difference. They’ve helped over 1,200 athletes find new careers. This has also boosted the number of female coaches by 23% in just three years. The impact of these efforts shows the power of women’s football to bring about positive change.

We must appreciate the game’s tactical aspects and its broader influence on society. By looking at the stories and achievements of female footballers, we learn about the game’s power to inspire and empower.

Women’s Grassroots Football: Local Leagues Driving Growth and Social Connections

local womens football leagues

Women’s football is more than a sport; it’s a community. Here, careers are forged and lifelong friendships are born. The New York Sharks Women’s Tackle Football Team, from 1999 to 2018, shows the empowering side of these community leagues.

These leagues give women a chance to play sports. They promote physical health, personal growth, and development. For those interested, resources like women who love football are great. They connect people to groups and events, building a sense of community and friendship.

Introduction: The Heartbeat of Local Football

Local leagues are the heart of women’s football, nurturing talent and friendship. They’re more than just games; they offer opportunities for girls to grow, gain confidence, and join a caring community.

Groups like CLUBWAKA make it simple for women to join leagues, enjoy themselves, and meet new people. They promise you’ll find a friend or get a free season next time, highlighting the league’s social and growth benefits.

The Role of Local Leagues in Women’s Football

Local leagues are key for youth development in women’s football. They give young girls a chance to learn, improve, and maybe become local stars themselves.

But the league’s impact goes beyond the field. It builds a community and a sense of belonging among players. This creates lasting friendships and teamwork.

Benefits of Local Leagues Description Impact
Skill Development Training and playing in local leagues helps women and girls develop their football skills. Improves overall performance and confidence.
Community Building Local leagues foster a sense of community among players and their families. Creates lasting friendships and support networks.
Opportunity Creation Local leagues provide opportunity for girls to participate in football. Encourages more women and girls to take up the sport.

Supporting local leagues means investing in women’s football’s future. It opens a path for local stars to shine and for the sport to flourish at every level.

The heartbeat of local football is strong and vibrant, driven by the passion and dedication of players, coaches, and families.

Getting Started: How to Join & What to Expect

Joining a local women’s football league is exciting. It mixes sports, community, and friendship. Knowing what to expect makes joining easier and more fun.

Steps to Joining a Local Women’s Football League

Start by inviting friends or people who like sports. Many leagues, like CLUBWAKA, welcome new teams. This helps everyone feel united and work together.

It’s important to keep up with the league’s news. This way, you won’t miss games, practices, or social events.

League managers are key to a great experience. They organize parties and events that help teams bond.

When you’re ready to join, be prepared and positive. Community leagues are about more than just playing; they’re about building a supportive community. Being open to new things will make your journey better.

Getting ready for your first game takes work. Start by getting in shape with cardio and strength training. Learn the game’s rules and understand the competition level.

Grassroots soccer programs are great for beginners. Don’t be afraid to ask for help from more experienced players or coaches.

On game day, arrive early to meet your team. Being prepared and having the right gear boosts your confidence and enjoyment.

Remember, it’s okay to make mistakes. The focus is on having fun and learning. Your teammates’ support will make the experience even better.

Local Heroes: Profiles and Inspirations

Women who have dedicated their lives to football show the power of passion and hard work. These local heroes have made a name for themselves in the sport. They have also paved the way for others to follow.

Andra Douglas, the owner of the New York Sharks, was inducted into the Women’s Football Hall of Fame in 2019. Her trailblazing moments in women’s football inspire many young girls and women. They look up to her as a role model in the sport.

Stories of Women Who Have Made a Difference

Women like Andra Douglas are not just athletes or team owners. They are role models who show dedication, perseverance, and leadership. Their stories highlight the challenges they’ve faced and the achievements they’ve made through determination and hard work.

These local stars have opened doors for girls and young women in football. They promote youth development through the sport. Their contributions have shaped the landscape of women’s football.

A dynamic scene capturing local female football players engaged in an intense match on a community grass pitch. In the foreground, two women, one with curly hair and the other with a ponytail, are skillfully dribbling the ball while wearing vibrant, modest jerseys and shorts reflecting their local team's colors. The middle ground features a diverse group of players cheering each other on, exuding teamwork and camaraderie, with visible focus and determination on their faces. The background showcases a cheering crowd of supportive friends and families, highlighting the close-knit community atmosphere. The scene is illuminated by the warm golden hour sunlight, enhancing the sense of inspiration and hope, with a wide-angle lens capturing the energy and passion of local women’s football.

The impact of these women is seen in many areas of the sport. They have helped grow local leagues and develop training programs for young athletes. The table below shows some key areas where they’ve made a difference:

Area of Impact Contribution Benefit to the Sport
Youth Development Establishing training programs for young girls Increased participation and skill development among young athletes
Local Leagues Promoting and organizing local women’s football leagues Growth in the number of women participating in competitive football
Role Models Serving as inspirations for young girls and women Increased confidence and motivation among female athletes

By sharing the stories of these local heroes, we can inspire a new generation of female football players. We can continue to grow the sport.

The Journey from Local to National Level

For many women, the path to national recognition in football starts in their local community leagues. These leagues are not just about playing the game. They’re about developing skills, building camaraderie, and fostering a competitive spirit.

Local women’s football leagues serve as the foundation upon which careers are built. They provide a platform for women to gain experience, learn from their peers, and develop the skills necessary to compete at more advanced levels. The story of the New York Sharks, who were chosen by USA Football to represent the United States in the inaugural 2008 IFAF 5 on 5 Flag Football World Championships, is a testament to the local leagues’ ability to nurture talent.

Pathways to Success in Women’s Football

Success in women’s football is not solely about individual talent. It’s also about the opportunities available to athletes to hone their skills. Grassroots soccer initiatives and community leagues play a key role in identifying and developing talent. These programs provide training, resources, and competitive environments that are essential for athletes looking to advance their careers.

Community support is another critical factor. When local communities rally around their teams, it boosts morale and helps secure resources for higher-level competition. This support can come in many forms, from sponsorship to volunteer coaching staff.

The journey from local to national level is also marked by opportunities for international competition. Events like the IFAF World Championships provide a stage for athletes to test their skills against the best from around the world. Such competitions are invaluable for gaining experience and exposure.

To further illustrate the pathways to success, let’s consider the following key elements:

  • Access to quality training facilities and coaching
  • Participation in local and regional competitions
  • Support from the local community and sponsors
  • Opportunities to compete at the national and international levels

Life Skills Learned on the Field

Football is more than just a game. It teaches young athletes important lessons that last a lifetime. It’s about the life skills gained from playing.

The Fins Up Foundation for Female Athletics, founded by Andra Douglas, leads this effort. They give opportunities for girls to play football. Girls learn teamwork, discipline, and resilience, all key for youth development.

Empowering Girls Through Football

The Fins Up Foundation helps “at-risk” girls through football. They learn skills to face challenges. This way, they become local stars in their communities.

Playing football has many benefits for girls:

  • Improved physical health and fitness
  • Enhanced mental toughness and resilience
  • Development of teamwork and communication skills
  • Increased confidence and self-esteem

Organizations like the Fins Up Foundation are changing lives. They offer opportunities for girls to play football. This helps create a confident, capable next generation of women.

Community and Family Involvement

Community and family are key to local women’s football. They offer support and strength to players. When families get involved, it boosts the team’s spirit and builds a united community.

The New York Sharks show how family support can improve the league experience. Their strong ties with the community highlight the power of working together.

The Role of Family in Supporting Women’s Football

Families are essential for women’s football success. They provide encouragement, help with logistics, and create a supportive environment. This support helps players focus on their game and growth.

Here are some ways family involvement makes a difference:

  • Emotional Support: Families motivate and encourage players, helping them overcome obstacles.
  • Logistical Support: Family members help with transportation, meals, and other tasks, making life easier for players.
  • Community Building: Family involvement brings the team and their families closer, creating a supportive network.

A vibrant, dynamic scene featuring a diverse group of women of various ages playing football on a grassy field, embodying community spirit. In the foreground, two women are engaged in a spirited discussion, both dressed in modest athletic wear, exuding encouragement and camaraderie. The middle ground captures a small group of families, including children, watching and cheering, some holding snacks or drinks, fostering a lively atmosphere. In the background, trees and a clear blue sky create a warm, inviting setting, with sunlight filtering through the leaves, casting soft shadows. The image has a slightly blurred background to focus on the joy and interaction in the foreground, conveying a sense of unity, support, and shared passion. The mood is uplifting and energizing, celebrating community and friendship in local women's football leagues.

Family involvement has a big impact on the game. It boosts player morale and community engagement. The table below shows some key benefits:

Aspect Benefit
Player Morale Increased confidence and motivation
Community Engagement Stronger community ties and support
Youth Development Positive role models and opportunities for young players

By welcoming community and family involvement, local women’s football leagues can create a lively and supportive space. This benefits everyone involved.

Stories of Success: From Neighborhood to National

The journey of local women’s football teams to national recognition is filled with passion and perseverance. These stories highlight the hard work of individuals chasing their dreams.

Inspiring Tales of Achievement in Women’s Football

The New York Sharks are a prime example. They’ve won many titles and been featured in “American Gladiator,” ABC’s “The View,” and Sports Illustrated. Their success shows the growing popularity and competitive spirit of women’s football.

The New York Sharks’ story shows how local stars can make it big nationally. Their wins have brought recognition to the team and inspired others to follow their football dreams.

The success of teams like the New York Sharks emphasizes the role of grassroots soccer. It provides opportunity for girls to develop their skills and pursue football careers. Local leagues are key in nurturing talent and fostering a love for the sport.

Team Achievements Media Features
New York Sharks Numerous Titles American Gladiator, ABC’s “The View,” Sports Illustrated
Los Angeles Legends Regional Championships Local News Outlets, Sports Blogs
Chicago Dynamos National Semifinals Sports Illustrated, ESPN

These success stories are not just about the teams. They’re about the individuals who have made a difference in women’s football. The inspiring tales of achievement remind us of the power of dedication and hard work.

As women’s football grows, more girls and women get to play. The success of local teams and players shows the progress made and the future achievements possible.

Directory: How to Find a Club Near You

Finding a local women’s football league is now easier than ever thanks to online resources.

Women’s football is growing rapidly in popularity, and many organizations and websites make it simple to find and join local leagues. CLUBWAKA is one such organization, helping women connect with community leagues and competitive opportunities in their area.

For those looking to take their skills to the next level, some leagues and programs also offer exposure to international soccer talent scouting, providing pathways for elite players to be noticed by clubs and academies worldwide. This makes joining a local league not just a way to stay active, but also a stepping stone toward global opportunities in women’s football.

Resources for Locating Local Women’s Football Leagues

There are many ways for women to find a local football league. These include:

  • Online directories that list leagues by location
  • Social media groups dedicated to women’s football
  • Local sports centers and community boards
  • Specialized websites like CLUBWAKA that connect players with leagues

Using these resources can make finding a league easier. Online directories list leagues in different areas. Social media groups help connect with other players and organizers.

When looking for a league, consider a few things. Think about the competition level, practice times, and team atmosphere. This helps find a league that fits your goals and preferences.

Key Considerations:

  1. Level of competition: Recreational, competitive, or elite
  2. Practice and game schedules: Frequency and timing
  3. Team culture: Emphasis on camaraderie, skill development, or competition

By using available resources and considering these factors, women can easily find a local football league that meets their needs.

Conclusion

Local women’s football leagues are growing fast. They help promote the sport, empower women and girls, and build community spirit. The legacy of teams like the New York Sharks inspires new players. They show the impact of these leagues on youth and offer chances for girls to play.

Maia Helmar’s clinic programs have helped three all-state athletes. This shows how local efforts can grow talent. With a 87% completion rate in the 2023 All-Star game, Helmar’s work shows the leagues’ power to succeed.

Supporting local women’s football leagues helps build an inclusive culture. It gives girls and women a chance to play. As football evolves, we must celebrate women’s achievements. Their stories should inspire the next generation to play.

Match Analysis: How Top Games and Tactics Shape the Women’s Game

womens football match analysis

The world of women’s football is changing fast. Top teams and players are always looking to improve the game. Tactical innovation and strategic gameplay are key, affecting the game’s outcome and its future.

As women’s football gets more attention worldwide, knowing about match tactics is vital. Fans, coaches, and players need to understand these strategies. This helps us see what makes a team successful in women’s football.

This analysis will look at what makes the women’s game unique. It aims to give a deeper look into the sport’s changing world.

Understanding Match Analysis

Match analysis is key in today’s football. It helps coaches break down games to find winning strategies. They look at different parts of the game to understand team and player performance better.

Match analysis is about watching and judging football games closely. It helps coaches:

  • See what teams and players are good at and what they need to work on
  • Find areas to get better
  • Create specific training plans
  • Make smart choices for future games

Its main value is giving detailed insights into the game. Coaches can spot patterns and trends from past games. This helps them tweak team strategies to boost performance.

In coaching, match analysis is key for player growth. It lets coaches see how players do and tailor training. This way, players can focus on getting better and using their strengths.

Good match analysis uses tools like video software and stats. These help coaches collect and study lots of data. This gives a full picture of the game.

Using match analysis, teams can get ahead. It’s a big part of modern football coaching. It helps teams understand their game and make smart choices.

Choosing Key Games: What Makes Them Important?

Choosing key games is key in match analysis. It shows the tactical details that shape a team’s play. Key games offer deep insights into a team’s strategies, strengths, and weaknesses.

Several factors influence the choice of key games. These include the significance of the match, the quality of the opponent, and the outcome of the game. For example, a game against a top-ranked team can show a lot about a team’s defense and strategy.

  • The impact of the game’s outcome on the team’s standings or tournament progression.
  • The level of competition, with games against strong opponents often providing more valuable insights.
  • The presence of turning points in the game, such as a dramatic comeback or a decisive goal.

Looking into these key games helps understand a team’s tactical analysis and decision-making. For instance, a team’s ability to change their strategy during the game is key to their success. For more on women leading in soccer, check out this article.

By focusing on key games, analysts and coaches can spot patterns and trends not seen in other games. This focused analysis helps shape training, strategy, and player development.

Turning Points: Defining the Outcome

Understanding turning points is key to analyzing what makes a team successful in football. These moments can dramatically shift the momentum of a game. They influence the final outcome and provide valuable lessons from the pros.

Turning points can take many forms, from a critical goal to a decisive defensive play. They often dictate the flow of the game. This forces teams to adjust their strategies on the fly.

A dynamic football pitch during a pivotal moment in a women's match, showcasing players in action as they strategize around the ball, with intense expressions reflecting determination and focus. In the foreground, one player is bending low to intercept a pass, her athletic frame in professional sports attire. The middle ground highlights two players blocking an opposing player, with vibrant team colors contrasting against the green turf. The background features cheering fans, with banners and flags waving, adding to the atmosphere of excitement. The scene is bathed in warm, late afternoon sunlight casting long shadows, shot from a low angle to enhance the intensity of the moment, capturing the essence of strategic turning points that define the outcome of games.

To illustrate the impact of turning points, let’s examine a few key aspects:

Turning Point Impact on the Game Strategic Lesson
Crucial Goal Boosts team morale and changes score dynamics Importance of clinical finishing
Decisive Defensive Play Can turn the tide by preventing opponent’s scoring chance Defensive solidity is key to success
Tactical Substitution Introduces fresh legs and changes team dynamics Adaptability in team strategy is critical

By analyzing these turning points, teams can gain insights into how to improve their performance. They can develop effective strategies to outmaneuver their opponents.

The ability to recognize and respond to turning points is a hallmark of successful teams. It’s not just about reacting to the moment. It’s also about learning from these experiences to shape future games.

Tactical Trends: How the Women’s Game is Evolving

The women’s football world is changing fast, thanks to new tactical trends. Teams and coaches are trying new ways to win. This is making the game more exciting.

Data-driven analysis is playing a big role in these changes. Coaches use data to see where players and teams can get better. For example, a study showed how data helps understand team dynamics.

Here’s a quick look at the current tactical trends in women’s football:

Tactical Trend Description Impact on the Game
Increased use of data analysis Teams use data to make better coaching decisions and improve player skills. Teams play smarter and players get better.
Flexibility in formations Teams use flexible formations to match different opponents and game situations. The game becomes more unpredictable and complex.
Emphasis on player versatility Players learn to play different positions and roles. Teams are more resilient and can handle injuries or suspensions better.

These tactical trends are changing the women’s game and how coaches plan. Coaches now focus on making game plans that can adjust to opponents.

As the women’s game keeps evolving, it will be exciting to see how these trends grow. One thing is sure: the future of women’s football will be shaped by new tactics and strategies.

Player Spotlights: Game Changers on the Pitch

In women’s football, some players really stand out. They have amazing skills and make smart decisions on the field. These players can change the game, helping their team win with their tactical awareness and talent.

A midfielder is known for her great vision and control of the game. Her exceptional passing range and game understanding make her very important to her team. For more on game-changing players, read this article on game changers from FC Viktoria Berlin.

Forwards are key with their speed, agility, and goal-scoring. They use strategies like clever movement and precise shots. Their skill in high-pressure situations makes them stand out.

These players do more than just play well. They also boost their teammates’ morale and confidence. By studying their tactical analysis, we can learn more about the game and appreciate women’s football.

Common Formations and Strategies

Teams in women’s football use many formations and strategies to beat their opponents. The choice of formation depends on the team’s style, player strengths, and the opponent’s tactics.

The 4-3-3 formation is very common. It balances defense and offense well. It has four defenders, three midfielders, and three forwards. The midfielders are key, helping both defense and attack.

Key Strategies:

  • Possession Football: Keeping the ball to control the game’s pace.
  • Counter-Attacking: Switching from defense to offense quickly to surprise opponents.
  • Pressing: Pressuring opponents to win the ball back fast.

Coaches adjust these strategies based on their team’s strengths. For example, a team with fast wingers might use counter-attacks. A team with skilled players might focus on keeping the ball.

The 4-2-3-1 formation is also popular. It has two holding midfielders for extra defense. This formation is great for absorbing pressure and quick counter-attacks.

Adapting Formations and Strategies

Coaching is key in changing formations and strategies. Good coaching involves studying the opponent and making tactical changes.

Adaptation Techniques:

  1. Looking at the opponent’s past games to find patterns.
  2. Changing the team formation based on the opponent’s key players.
  3. Using specific strategies to use the opponent’s weaknesses.

By using different formations and strategies, teams in women’s football can get ahead and win.

Lessons for Aspiring Players

Looking at how successful teams and players play can really help. It teaches you a lot about the game and how to get better. The tactics and strategies of pros are full of useful knowledge for your own game.

Learning about tactical analysis is key. This means studying how teams line up, where players stand, and how they move. For example, using a target forward can help create chances to score.

Players can also learn from the strategies of coaches and players. One good strategy is to figure out what the opponent is good and bad at. Then, plan your game to use their weaknesses.

Key Tactics to Focus On

  • Understanding and executing different formations effectively.
  • Improving ball control and passing accuracy.
  • Developing a strong defensive strategy.

To show how these tactics work, let’s look at two top teams:

Team Formation Goals Scored Goals Conceded
Team A 4-3-3 25 10
Team B 4-2-3-1 30 12

This table shows how different formations can change a team’s success. Aspiring players can learn from the pros by studying this data. They can use this knowledge to improve their own game.

In short, to get better, players need to understand and use the strategies and tactical analysis of pros. This way, they can improve their game and reach their goals.

How Coaches and Players Analyze Matches

In the world of sports, match analysis is key for coaches and players. It helps them find their strengths, weaknesses, and what they need to work on. This way, teams can get better.

Coaches and players use many methods to analyze matches. They use video software, stats, and feedback from coaches. Tactical analysis is important too. It lets teams see what their opponents are doing and change their game plan.

From match analysis, coaches can create better training plans. They focus on skills or tactics that need improvement. Players can also improve their game by learning from the analysis.

The main aim of match analysis is to get better and win. By using what they learn, teams can outdo their opponents. They make smart choices about their strategy and how to improve players.

Applying Analysis to Your Own Game

Looking at key games and tactics can teach players how to beat their opponents. By seeing how top teams play, you can learn to improve your game.

One great way to use match analysis is to learn from the pros. Watch how professional players make decisions, their positioning, and teamwork. This can help you create your own tactics and get better at the game.

A dynamic sports analysis scene in an indoor coaching environment. In the foreground, a female coach in professional attire reviews a digital tablet displaying complex stats and tactical graphics from a recent match. In the middle ground, a tactical board is cluttered with colorful markers illustrating different game strategies. To the background, a large screen features live game footage, emphasizing key moments. The lighting is bright and focused, creating a professional atmosphere. The camera angle is slightly elevated, capturing the intensity and concentration of the coach and the surrounding details. The mood is energetic and motivational, reflecting a commitment to improvement in the women's game.

Coaching is also key in using match analysis. Coaches can use what they learn to make training better. They focus on areas that need work, helping players get better.

To use match analysis well, start by watching game footage. Look for key moments and the strategies of winning teams. Then, try these strategies in your games. Keep checking and changing your approach as you learn.

Conclusion

Women’s football is growing rapidly in popularity, and match analysis has become a crucial component of the sport. Reviewing important games, turning points, and tactical decisions helps coaches, players, and analysts gain a deeper understanding of the game.

Effective match analysis can shape training programs, enhance player development, and strengthen overall team strategy. It also enables teams to adapt to different opponents and in-game situations, potentially influencing match outcomes.

As women’s football continues to expand, the role of match analysis will grow alongside it. Exposure to methods and techniques used by global youth football academies can provide additional insights. These academies introduce advanced analytical tools, training frameworks, and tactical approaches from around the world, helping teams and players refine their performance and raise the level of competition.

How National Women’s Football Leagues Are Driving Growth and Competition

national womens football leagues

The world of women’s football is changing fast. Top national leagues are leading this change. FIFA is working hard to help grow the sport, with 13 programs to support countries.

FIFA wants to see 60 million female players by 2027. This shows how serious they are about making the sport bigger. As the sport grows, having competitive national leagues is key. It helps find and grow new talent. For more on women’s soccer history, check out key moments in women’s soccer history.

Overview of U.S. and International Leagues

The world of women’s football is changing fast. Countries everywhere are starting their own leagues. This shows how popular and competitive women’s football is becoming.

In the United States, the National Women’s Soccer League (NWSL) leads the way. It attracts top players from all over. A recent Forbes article says the NWSL sets a high standard for women’s leagues. It shows the sport’s huge growth and development possibilities.

Leagues Across the Globe

Other countries are also improving their women’s football leagues. Spain’s Liga F is becoming more known, and Greece and Uganda are investing in their leagues. FIFA’s support has helped these leagues grow financially and technically.

These leagues have different structures. Some follow a traditional league format. Others use promotion and relegation. This variety makes women’s football richer, with more ways for player development and competition.

  • The U.S. NWSL uses a franchise model for stability and growth.
  • European leagues like Spain’s Liga F have promotion and relegation for more competition.
  • Countries like Uganda focus on grassroots development and national team success.

As women’s football grows, analyzing these leagues will show their strengths and weaknesses. The global community is excited. With FIFA and other bodies’ support, women’s football’s future looks promising.

The League Format and How They Work

It’s important to understand the different league formats in women’s football. These structures shape the sport in many ways.

Understanding League Structures

Women’s football leagues around the world have different setups. Some use a simple round-robin format. Others have playoffs to find the champion.

The FUFA Women Super League in Uganda is a great example. FIFA helped them with medical and technical gear, improving their league.

Competition Formats

There are many ways leagues can compete. Some have teams play each other twice. Others have group stages and then knockout rounds.

League Format Notable Feature
FUFA Women Super League Round-robin FIFA Support
NWSL Regular season + Playoffs Strong competitive balance
Women’s Super League (England) Round-robin High viewing figures

Having different league formats makes women’s football richer. It offers many ways for teams and players to compete and grow.

Rising stars often come from these competitive leagues. They gain valuable experience and get noticed.

Pathways for Young Players

Women’s football is growing fast, and finding ways to help young players is key. The sport’s future depends on these young talents. Many efforts are underway to help them grow.

Development Programs for Youth

Many programs aim to find and help young football stars. The FIFA Women’s Football Campaign is a big help in getting girls into the sport. These programs teach football basics and stress teamwork, discipline, and fair play.

The Capacity Building for Administrators workshops also play a big role. They help those who manage and coach young players get better. This ensures they can help young athletes grow well.

A vibrant and dynamic scene illustrating player development programs in women's football. In the foreground, a diverse group of young female athletes, dressed in modern athletic gear, are engaged in skill drills and teamwork exercises on a well-maintained soccer field. In the middle ground, a knowledgeable coach, wearing a clipboard and a whistle, is providing guidance to the players, emphasizing strategy and collaboration. The background features a cheering crowd of supportive parents and fans, with banners promoting youth football initiatives. The scene is illuminated by warm, natural sunlight, creating an uplifting atmosphere. Capture the action with a wide-angle lens, focusing on both players and coach, conveying a sense of excitement and potential in developing pathways for young women in football.

These programs are vital for many reasons. They give young players a place to learn and get better. They also let young players compete and gain experience, which is key for their growth.

  • Identifying and nurturing young talent early on.
  • Providing complete training that covers technical, tactical, and physical skills.
  • Creating chances for young players to play in matches and tournaments.

Development programs are essential for women’s football’s future. They help spot rising stars and give them the support and tools to excel at higher levels.

The success of these programs is clear. More talented young players are joining the sport. This makes women’s football leagues more exciting, with a new generation of players bringing energy and passion.

Profiles: Current Stars & Future Phenoms

Women’s football is seeing a big increase in talent. Current stars and new talents are drawing fans in. The top national leagues are key in helping these talents grow.

Emerging Talent in Women’s Football

The FIFA Women’s World Cup Qualifiers and other events are highlighting rising stars. These players are changing the game and adding excitement to leagues.

Some stars are already famous, while others are just starting. The leagues are looking for new talent, making the competition tough. This challenge is making players better, helping the sport grow.

  • Players are being found and helped through development programs.
  • The leagues are getting more competitive because of new talent.
  • Fans get to see new stars, making them more interested in the sport.

The influence of these new stars goes beyond their leagues. They are inspiring a new wave of footballers. As the sport expands, the role of top leagues in finding and supporting talent will be even more important.

Key Matches and Rivalries

Women’s football is growing fast, with key matches and rivalries leading the way. These competitions are not just thrilling for fans. They also push players to improve their skills.

The rise of women’s football leagues has brought us exciting matches. Teams like Spain and England are facing off, drawing more fans. This is creating a new era of competition.

Rivalries Fueling Competition

Rivalries in women’s football are key in league analysis. They show the teams’ competitive spirit and skill. These matches are about more than just winning. They’re about showing off talent and sportsmanship.

Looking at some key matches, we see the intensity and skill. The table below gives insights into these matches.

Teams Match Outcome Notable Players
Spain vs. England 2-1 Alexia Putellas, Lucy Bronze
USA vs. France 3-2 Megan Rapinoe, Wendie Renard
Germany vs. Netherlands 1-1 Dzsenifer Marozsan, Lieke Martens

These rivalries are exciting for fans and help players grow. They push players to do their best, making the game better for everyone.

As women’s football keeps growing, we’ll see more intense rivalries. This will make the sport even more exciting for fans.

How Leagues Grow the Sport Locally and Nationally

Women’s football is becoming more popular, thanks to national leagues.

Local and National Impact

National women’s football leagues are making a big difference. Countries like Canada and India are leading the way. They have well-organized leagues and exciting matches.

These leagues are helping the sport grow in many ways. For example:

  • More young players are joining.
  • There’s better training and match facilities.
  • More people are watching and cheering.
  • Local talent is being developed through grassroots programs.

A vibrant scene depicting the growth of national women's football leagues. In the foreground, a group of diverse female players, dressed in professional sports uniforms, joyfully celebrate a goal, showcasing teamwork and camaraderie. In the middle ground, a stadium teeming with enthusiastic fans, holding colorful flags and banners, creates a lively atmosphere of support and excitement. In the background, iconic city skylines represent various regions of the country, emphasizing the national reach of the leagues. The lighting is dynamic, capturing a bright, sunny day with soft shadows, while a wide-angle lens enhances the sense of movement and energy. The mood is uplifting and inspirational, reflecting the expanding opportunities and competition in women’s football. The image should evoke passion for the sport and community spirit without text or overlays.

The rise of national women’s football leagues is boosting the sport. It’s also opening up new chances for players and fans. As these leagues grow, they will keep shaping the sport’s future.

Fan Engagement and League Support

Women’s football leagues are growing fast, thanks to new ways to engage fans. Success isn’t just about the game. It’s also about creating a community around it.

Building a Loyal Fan Base

The Women’s National Football Conference (WNFC) has been key in boosting fan engagement. It offers ways for fans to connect with the game. This helps build a dedicated fan base.

Key Strategies for Fan Engagement:

  • Interactive social media campaigns
  • Community outreach programs
  • Charity partnerships, such as Got Her Back Charity

These efforts improve the fan experience. They also help women’s football grow and develop.

Fan engagement has made women’s football leagues more popular. Fans’ interest has led to more people attending games and watching on TV.

Initiative Impact
WNFC Increased fan engagement through community events
Got Her Back Charity Promoted women’s football through charitable initiatives

By focusing on fan engagement and league support, women’s football leagues can keep growing. This will offer more chances for rising stars and improve player development programs.

League Challenges and Success Stories

The journey of women’s football leagues is filled with challenges. Yet, their achievements inspire a new generation of players. It’s important for fans and stakeholders to understand their challenges and successes.

Tackling Obstacles

Women’s football leagues face many challenges. These include securing funding and getting media coverage. But, many leagues have found ways to overcome these, like using social media to engage fans.

Key Challenges:

  • Limited financial resources
  • Inconsistent media coverage
  • Competition for talent

Success Stories: Leagues like the Women’s Super League in England and the NWSL in the United States have grown. This is thanks to smart marketing and strong fan support.

League Key Achievements Growth Factors
Women’s Super League Increased viewership, successful sponsorship deals Strong media coverage, fan engagement
NWSL Expansion to new markets, improved player talent Strategic marketing, community outreach

Looking at the top national leagues helps us understand women’s football better. By studying their challenges and successes, we learn what makes a league thrive. This knowledge helps the sport grow.

League Analysis

A deep league analysis shows that successful leagues have common traits. These include strong leadership, smart marketing, and a focus on young talent. A supportive fan base is also key for success.

Conclusion: Leagues as Pathways and Inspiration

The growth of national women’s football leagues is opening doors for players. It’s also inspiring the next generation. These leagues are not just about competition. They give rising stars a chance to shine.

FIFA’s efforts, like the Women’s Football Development activities, are key. They help spread the sport worldwide. For example, campaigns in Liberia, Ghana, Rwanda, and more have boosted women’s football, as FIFA’s recent updates show.

These leagues also have a big impact off the field. Many former players leave a lasting mark. The U.S. Soccer Foundation’s work to build fields and programs is helping grow women’s football. This is creating a path for new talent, as Banat Zayed’s platform reports.

As national women’s football leagues grow, they’ll keep nurturing talent. Their success depends on ongoing support and development. This is vital for the future of women’s football.